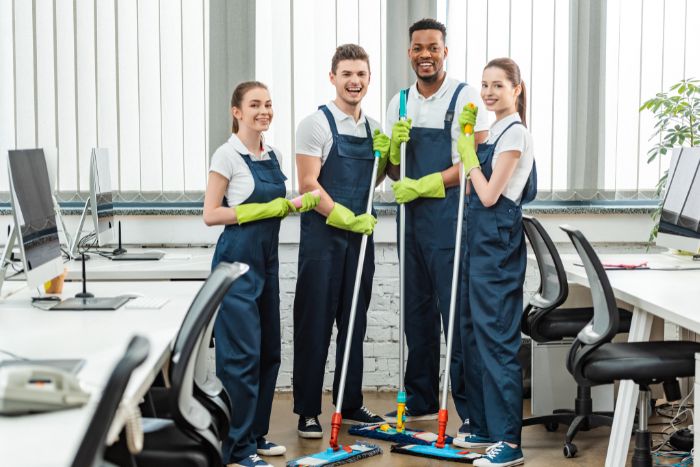
waldoksolutions

Maximize Your Square Footage: Clever Tips for Organizing Small Spaces

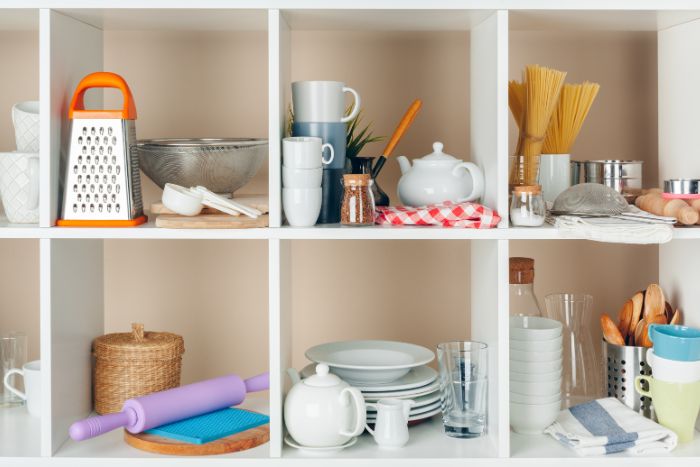
Organizing a small space often feels like solving a multifaceted puzzle, where every item demands its purpose and position. Yet, a few thoughtful strategies can turn cramped quarters into functional havens. Simple tweaks, such as repurposing everyday objects or reimagining unused spaces, can yield surprising gains in both utility and satisfaction. Small-space organization isn’t merely a matter of shoving things into hidden nooks; it’s about intentional design that prioritizes what you genuinely need. In the paragraphs that follow, we’ll distill proven methods, ruthless decluttering, vertical innovation, multi-functional furniture, and clever DIY hacks into actionable steps.

By balancing practical solutions with a dash of creativity, you’ll see how limited real estate can become a showcase of efficiency and style. Embrace the journey: each adjustment, no matter how small, adds up to a more manageable, more inspiring environment.

Why Small-Space Organization Matters

Living in a confined area doesn’t just cramp your physical presence; it can subtly undermine peace of mind. Clutter triggers stress, distracts your focus, and often leads to inefficient routines. Conversely, an organized small space acts like a visual exhale, allowing your mind to settle and your productivity to flourish. Thoughtfully arranging possessions ensures you spend less time rummaging and more time enjoying your surroundings. Additionally, when every square inch serves a purpose, your home feels larger and more inviting. This is crucial: perceived spaciousness often hinges on eliminating visual noise, creating clean sightlines, and maximizing natural light. Ultimately, small-space organization harmonizes form and function, supporting mental clarity and enhancing the quality of life, even when square footage is at a premium.

Tip

Description

Declutter Ruthlessly

Sort belongings into Keep, Donate/Sell, and Discard piles, applying a one-in, one-out rule. Conduct biannual seasonal sweeps to prevent accumulation.

Dual-Purpose Furniture

Choose pieces like ottomans with hidden storage, Murphy beds with built-in shelves, or lift-top coffee tables to maximize functionality and space.

Vertical Shelving

Install floating shelves, floor-to-ceiling units, or pegboards on walls to free up floor space and draw the eye upward.

Smart Closet Hacks

Double-hanging rods, use slim hangers, install shelf dividers, and employ door-mounted shoe organizers to utilize every inch of closet space.

Under-Bed Storage

Elevate the bed with risers or use flat rolling bins and vacuum-sealed bags beneath to hide seasonal clothing and bulky items.

Kitchen Overhauls

Mount magnetic knife strips, install pull-out cabinet drawers, and hang under-cabinet hooks to reclaim countertops and shelves.

Bathroom Vertical Solutions

Fit tension-pole shower caddies, corner shelves, and magnetic strips beneath sinks to organize toiletries and grooming tools without crowding counters.

DIY Repurposing

Transform items like wooden crates into wall shelves, ladder rungs into towel racks, and magazine holders into vertical dividers for baking sheets.

Entryway Efficiency

Use a slim console table with hooks overhead, add a shoe bench beneath, and hang a mirror to keep keys, mail, and footwear organized.

Digital Organization

Leverage apps (e.g., Sortly) to log item locations, use intelligent assistants for shopping lists, and set reminders for seasonal decluttering.

Color & Reflection

Paint walls and cabinets in light neutrals, use monochromatic schemes, and place mirrors to amplify natural light and create an airy feel.

Maintenance Routines

Implement daily five-minute tidies, weekly resets of high-traffic areas, and monthly audits of hidden storage to prevent clutter from rebounding.

Living Room Optimization

Mount the TV on the wall, use nesting tables or cube storage units (mixing open and closed), and select streamlined furniture silhouettes.

Bedroom Storage

Replace a dresser with a storage footlocker, build a headboard with recessed shelves, and use wall-mounted bedside lamps to save floor space.

Home Office Hacks

Install a fold-down floating desk, conceal cables in management boxes, and mount a vertical bulletin board to free up desktop real estate.

Psychological Triggers

Apply the “One-Minute Rule” for quick tasks, curb impulse buys by pausing before making a purchase, and use clear bins or baskets as visual cues to stay organized and tidy.


Declutter Ruthlessly

Before you introduce new systems, purge what no longer serves you. Hold each possession up and question its necessity: Do you use it often, or does it spark genuine joy? If not, consign it to the “Donate/Sell” or “Discard” pile. Employ the “Three-Pile Method”: Keep, Donate/Sell, Discard, to expedite decisions. After you’ve reduced your belongings to the necessities, follow the “One-In, One-Out” rule: you must bring one thing home for every item you take. To prevent backsliding, schedule biannual “Seasonal Sweeps.” As temperatures shift, reassess your wardrobe and décor; store off-season clothing in vacuum-sealed bags and rotate decorations accordingly. This cadence keeps belongings fresh and prevents accumulation. Remember: decluttering isn’t a single event; it’s an ongoing practice. By consistently confronting what you own, you avoid letting minor annoyances snowball into overwhelming messes. A lean collection cultivates breathing room and simplifies maintenance.

Embrace Multi-Functional Furniture

In tight quarters, furniture must justify its footprint. Seek pieces that serve dual (or triple) roles. For instance, choose an ottoman with hidden storage to stow blankets and extra pillows while simultaneously providing seating. A Murphy bed with integrated shelving transforms a bedroom into a daytime study or hobby nook. Look for coffee tables with lift-up tops that reveal concealed compartments, ideal for storing board games, remotes, or home office supplies. If you already own basic items, consider creative hacks: mount fold-down brackets beneath a wall-mounted shelf to fashion a temporary desk; attach caster wheels to a narrow bookcase so it doubles as a movable side table. The key is adaptability: when your furniture can shift to meet varied needs, sitting, sleeping, and working, it maximizes every inch of space. Even modest investments in convertible designs repay you through decluttered floors and streamlined aesthetics.

Vertical Storage, Going Up, Not Out

Horizontal real estate is precious, so look skyward. Walls and unused corners offer untapped storage potential. Install floating shelves above doorways to hold books or decorative items, creating a sense of airiness due to their lack of bulky brackets. Opt for floor-to-ceiling units that visually draw the eye upward, making ceilings appear higher while providing tiered storage. Pegboards are another vertical workhorse outfitted with hooks, baskets, and small shelves, which adapt over time to hold tools, kitchen utensils, or even craft supplies. In the kitchen, magnetic strips can suspend knives and spice jars, freeing up drawer and countertop space. Don’t ignore behind-the-door organizers, which tuck scarves, belts, or toiletries neatly out of sight. When you prioritize vertical solutions, you reclaim underutilized zones, reduce the clutter at eye level, and cultivate a more expansive, open feel, even in the coziest of rooms.

Smart Closet Solutions

Closets in compact homes often become black holes of forgotten items. Optimize every cubic inch by doubling hanging rods: position one rod higher for dresses or blouses, and a second lower rod for shirts or pants. Invest in slim, velvet hangers to save half an inch per garment, over dozens of items, which adds up. Use shelf dividers to keep piles of sweaters from toppling over. Overhead shelf bins store off-season clothing; vacuum-sealed bags further compress bulky items, such as winter coats. Under-shelf baskets clip onto existing boards, creating additional tiers for scarves, belts, or ties. For shoes, a door-mounted organizer holds multiple pairs vertically, freeing precious floor space. Finally, color-code and categorize clothing by type and hue. This system reduces decision fatigue in the morning and highlights unused gaps, signaling when it’s time to refresh your wardrobe. A streamlined closet is both functional and a joy to open.

Under-Bed and Hidden Storage

The space beneath your bed is an organizational treasure trove, with slide-in flat rolling drawers or plastic totes to store shoes, linens, or off-season items. Vacuum-sealed bags compress bulky blankets and sweaters into slim packets. If your bed frame sits low to the ground, elevate it with sturdy bed risers; this simple tweak can add several inches of storable height. For those seeking a more integrated approach, Ottoman beds lift from the center, unveiling a cavernous compartment beneath the mattress, ideal for larger belongings you access infrequently. If purchasing new furniture isn’t an option, repurpose adhesive under-bed wheels attached to wooden crates to craft budget-friendly rolling bins. Regardless of your method, this hidden zone can reduce reliance on crowded closets and dressers. By corralling items under the bed, you maintain order and reserve visible surfaces for daily essentials, creating a calmer, more inviting sanctuary.

Kitchen Hacks for Compact Cooking

Kitchens in small apartments often resemble obstacle courses during meal prep. Free up counter space by mounting magnetic strips on the wall for knives or metal spice jars, instantly clearing drawers. Under-cabinet hooks can suspend mugs or utensils, while a hanging pot rack overhead showcases cookware without occupying cabinet space. Invest in pull-out cabinet solutions, and sliding shelves ensure you can see and reach pots, pans, and pantry items without having to uproot everything. Tiered pull-out drawers in lower cabinets allow you to stack but still retrieve heavy cookware with a single pull. Consider roll-out trash and recycling bins tucked inside a cabinet door, maintaining a streamlined façade. In your pantry, store staples, such as rice, pasta, and grains, in clear, uniform containers, making it easy to recognize when supplies are running low. By reimagining storage from the ground up, you cultivate a cooking zone that’s efficient, visually tidy, and stress-free.

Bathroom Organization in Tight Quarters

Bathrooms, especially in older buildings, often waste vertical corners and wall space. Install corner shelves to hold toiletries, towels, and decorative accents, removing clutter from the sink. Above the toilet, a slim shelving unit capitalizes on dead airspace, providing tiers for extra toilet paper, cleansers, or candles. Use tension rods beneath the sink to hang spray bottles or baskets of sponges, maximizing a typically underutilized area. In the shower, opt for a tension-pole caddy running from floor to ceiling; it resists mold-prone adhesives and adapts easily to varying ceiling heights. Magnetic strips affixed inside a cabinet or on the wall corral metal grooming tools, such as tweezers, nail clippers, and bobby pins, keep them visible and sanitary. For small countertops, a Mason jar lid screwed beneath a shelf transforms the jar into a holder for cotton balls or Q-tips, keeping the counter clear and tidy. With these tweaks, a tiny bathroom can function like a well-manicured boutique.

Creative Storage Hacks and DIY Solutions

In small spaces, creativity is your greatest ally. Repurpose everyday items for unexpected storage: turn a wooden ladder on its side into a bookshelf or towel rack, and paint it a vibrant hue to double as décor. Convert magazine holders into vertical organizers for cutting boards or baking sheets, ensuring these items stand upright and remain easily accessible inside cabinets. Wooden crates, given a fresh coat of paint, become rustic wall-mounted shelves for displaying plants or books. Anchoring them at staggered heights creates visual appeal while maximizing vertical space. Use tension rods in closets or under sinks to suspend baskets for cleaning supplies or accessories. A floating nightstand, simply a robust shelf mounted next to the bed, fulfills bedside needs without crowding the floor. These DIY solutions often cost pennies yet deliver outsized impact, proving resourcefulness can rival expensive store-bought organizers when it comes to small-space brilliance.

Maximizing Entryways and Hallways

Entryways serve as the first impression, but quickly become clutter magnets. Opt for a slim console table, just wide enough to hold a tray for keys and mail. Above it, install a row of sturdy hooks for coats, tote bags, and scarves, keeping these items off the floor. Beneath the console, slide in a shoe bench with cubby compartments: you gain seating for shoe changes while stashing footwear neatly. If floor space is minimal, consider attaching a narrow wall-mounted shelf with a small lip, which serves as both a key holder and a mail sorter. Mirrors are transformative here: hanging a mirror opposite a window or near the hallway’s entrance multiplies light, making the corridor feel broader. A decorative wall-mounted letter rack or basket organizes incoming and outgoing mail, eliminating paper piles on surfaces. By layering vertical storage with reflective accents, even the narrowest entryways can feel spacious and functional.

Utilizing Technology and Apps

The organization extends beyond physical systems; the digital realm offers invaluable support. Apps like Sortly or Evernote let you log and categorize belongings, label items by their storage location (e.g., under-bed bin, closet shelf) and tag them with photos. Next time you search for holiday decorations or obscure documents, a quick in-app lookup points you directly to the correct container. Smart home devices also minimize bulky paraphernalia: install a compact smart thermostat that replaces an oversized radiator or use voice-controlled assistants to manage shopping lists, reducing scattered sticky notes around your kitchen. Automated lighting solutions allow you to adjust the ambiance without cluttering surfaces with multiple lamps. Even simple reminders, set on your phone, can prompt seasonal decluttering or rotating wardrobe items. By leveraging digital tools alongside physical strategies, you create a harmonious system that’s both adaptive and future-proof.

Strategic Use of Color, Light, and Mirrors

Colors and lighting have a profound influence on our perception of space. Light, neutral hues,soft whites, pale grays, and muted pastels reflect more light, causing walls to recede visually rather than advance. When painting shelving or cabinetry, choose a color that is half a shade lighter than the wall to create a seamless, expansive feel. Monochromatic schemes unify the room, allowing transitions from floor to ceiling to flow uninterrupted. Accent colors, deployed sparingly (such as a deep teal pillow or a chartreuse vase), draw the eye to focal points, diverting attention from cramped corners. Mirrors double the effect: place a mirror opposite a window to scatter daylight across the room, instantly brightening corners. A tall, slim mirror in a hallway widens the corridor’s perceived width. Even mirrored cabinet doors in a compact kitchen create the illusion of depth. Through deliberate color choices and reflective design tactics, a small interior can appear airy and inviting, even surpassing its actual square footage.

Maintaining Your Organized Oasis

Long-term success is mainly dependent on maintenance; implementing storage solutions is only half the fight. Develop a simple routine: each evening, spend five minutes returning items to their designated spots, mail in their organizer, keys on a hook, and dishes away. Weekly, perform a quick reset of high-traffic areas, such as the kitchen and entryway, by wiping down surfaces and realigning baskets. Monthly audits ensure hidden areas remain under control: open closet bins and under-sink drawers, then purge items you haven’t used recently. Embrace adaptability: if a particular system falters, perhaps a shelf becomes a dumping ground, tweak its function or location. Life evolves constantly: you might start working from home or welcome a pet into your family. When circumstances change, revisit your layout and make incremental adjustments to ensure it remains effective. By embedding these habits into your lifestyle, you prevent clutter from creeping back, ensuring that your small space remains an organized enclave rather than a ticking time bomb of chaos.

Room-by-Room Breakdown

Living Room: Choose sleek furniture, avoid chunky silhouettes. Use nesting tables that expand for guests and collapse afterward. Mount the TV on the wall, and install a floating media console beneath for electronics. Integrate cube storage units with a mix of open and closed sections to hide clutter while showcasing décor.

Bedroom: Replace a traditional dresser with a footlocker at the foot of the bed; it serves as both seating and storage. Build a headboard with recessed shelving, eliminating the need for nightstands. Replace table lamps with wall-mounted fixtures for bedside illumination without sacrificing surface space.

Home Office: Install a floating desk that folds up to resemble a cabinet when not in use. Use cable management boxes under the desk to conceal power strips. Mount a vertical bulletin board above your workspace to keep notes off the desktop.

Children’s Room: Implement a rotating toy system, store most toys in labeled bins under the bed, and display only a few at a time on shelves. Hang fabric pockets for stuffed animals on the wall, and assign hooks at child height for backpacks and jackets.

Budget-Friendly Tips

You don’t need a big budget to organize a small space effectively. Thrift stores and flea markets often yield gently used baskets, shelving units, and decorative crates at a fraction of retail prices. With a coat of paint, a dated piece can transform into a contemporary statement. Repurpose everyday household items: turn an old picture frame into a chalkboard memo board by applying chalkboard paint, offering a stylish alternative to store-bought organizers. Vintage suitcases stacked in a corner perform double duty as impromptu side tables and hidden storage for linens. Labels unify any system, invest in blank label stickers and print with a handheld label maker, or craft handwritten tags for a rustic flair. Labeling encourages all household members to return items to their rightful places. By leveraging secondhand finds and DIY ingenuity, you achieve a polished, cohesive look without overspending.

Common Mistakes to Avoid

Avoid overstuffing containers: when bins and baskets are crammed full, you lose visibility and access, forcing you to abandon the system. If an organizer overflows, it’s a clear sign to purge further rather than squeeze in more. Resist the temptation to shove everything into closets; hidden piles breed stress and clutter over time. Balance concealed storage with curated, visible displays, perhaps a set of decorative baskets or neatly arranged shelves featuring select items. Ignoring workflow is another pitfall. In functional areas like kitchens or home offices, store items where they are used: keep utensils near the stove and office supplies within arm’s reach of your desk. Thoughtless placement leads to constant shuffling and frustration. Lastly, neglecting regular maintenance transforms well-intentioned systems into abandoned backdrops. Consistency, however minimal, ensures that small habits prevent major messes.

Psychological Tricks to Reinforce Order

Leverage the “One-Minute Rule”: if a task takes under a minute, such as folding a throw pillow or hanging up a jacket, complete it immediately. These micro-actions prevent small messes from snowballing into chaos. To curb impulse buying, a notorious driver of clutter, take a moment before each purchase to ask: “Do I have space for this? Does it bring lasting value?” If hesitation ensues, walk away. Use visual anchors, such as open baskets or clear containers, so you can instantly see if items stray from their designated places; these cues trigger a mental nudge to restore order. Incorporate small rewards: after completing a five-minute tidy on Sunday evenings, treat yourself to a favorite podcast episode. By intertwining organizational tasks with instant gratification, you reinforce positive behavior. Remember, small psychological hacks often yield outsized benefits in preserving a serene, clutter-free environment.

FAQs

How can I make a small room appear larger?

Use light, neutral colors to open up walls; add a strategically placed mirror opposite a window to double the natural light. Keep furniture streamlined and clear visual clutter by using built-in or floating storage that draws the eye upward.

What’s the quickest way to cut down clutter?

Start with a three-pile sort: Keep, Donate/Sell, and Discard. Apply the one-in, one-out rule moving forward. If it hasn’t been used or loved in six months, chances are it doesn’t belong in your small space.

How do I choose multi-functional furniture without overspending?

Prioritize pieces that solve multiple problems, such as an ottoman with hidden storage or a drop-leaf table that becomes a desk. Scout thrift shops and repurpose creative hacks to avoid retail markups while still gaining versatility.

What’s the best way to organize a tiny closet?

Double your hanging rods: one high for longer items and one low for shorter clothes. Swap bulky hangers for slim, velvet-lined ones. Use vacuum-sealed bags for out-of-season items and door-mounted organizers to reclaim floor space.

How can I maximize under-bed storage without it feeling messy?

Elevate your bed on risers, then slide in flat rolling drawers or clear plastic totes. Label each container so you instantly know what’s where. Invest in an ottoman bed frame to conceal larger items completely.

Are DIY storage hacks worth the effort?

Absolutely. Repurposed items, such as wooden crates used as floating shelves or a ladder transformed into a bookshelf, can be both budget-friendly and visually cohesive. The extra creativity often yields more tailored solutions than those found in off-the-shelf organizers.

How do I maintain order in a small space over time?

Implement micro-routines: a daily five-minute tidy where you return items to their spots and a monthly audit to purge forgotten items. Couple these habits with visual cues, such as open baskets or clear bins, to prompt you to restore rather than relocate.

Conclusion

Living well in a small space demands creativity, discipline, and strategic thinking. You can increase your perceived square footage by utilizing vertical storage, investing in multipurpose furniture, and maintaining a clean and organized space. The thoughtful application of color, light, and reflections further enhances a sensation of openness. Simple hacks, such as DIY shelves, under-bed bins, and repurposed items, offer budget-friendly solutions, while digital tools enhance long-term maintenance. Maintaining these systems hinges on consistent micro-habits: a daily five-minute tidy, weekly resets, and monthly audits. When you balance practical routines with occasional audits, your small space becomes a sanctuary rather than a source of stress. Ultimately, clever organization isn’t about deprivation; it’s about valorizing what truly matters. By crafting an environment where every object has a purpose, and every corner serves a function, you transform limited square footage into a canvas for calm, productivity, and joy.

Cleaning Techniques to Reduce Allergy Triggers at Home

Allergies can make even the safest spaces feel like a battlefield. Sneezing fits, itchy eyes, coughing, and even asthma attacks often start right at home. Why? Because homes are filled with microscopic invaders, such as dust mites, pet dander, mold spores, and pollen, that trigger allergic reactions. Fortunately, your cleaning routine can become a powerful shield against these hidden enemies.

In this guide, we explore the most effective cleaning techniques to minimize allergy triggers in your home. Whether you’re an allergy sufferer yourself or want to create a healthier indoor environment, the strategies below are science-backed, practical, and easy to implement.

Why Cleaning Matters for Allergies

Let’s start with the basics: Why is cleaning so crucial in allergy prevention?

Allergens tend to accumulate in common household areas, bedding, carpets, upholstery, and air vents, to name just a few. Over time, these triggers can build up, leading to increased exposure and heightened symptoms. A regular and strategic cleaning schedule helps remove allergens before they can cause harm.

But here’s the catch: not all cleaning is created equal. Some methods may stir allergens into the air or even spread them around. That’s why targeted, allergy-friendly techniques are essential.

Table: Cleaning Techniques to Reduce Allergy Triggers at Home

Area of the Home

Common Allergy Trigger

Recommended Cleaning Technique

Frequency

Bedrooms

Dust mites, pet dander

Wash bedding in hot water (130°F+)

Use allergen-proof covers on mattresses and pillows

Weekly

Vacuum mattress with HEPA vacuum

Monthly

Living Room

Dust, pollen, and pet hair

Vacuum carpets & upholstery with a HEPA vacuum

2–3 times per week

Dust electronics, shelves, and décor with a microfiber cloth

Weekly

Bathrooms

Mold, mildew

Scrub tiles, grout, and shower walls with vinegar or peroxide

Weekly

Use exhaust fans and dehumidifiers.

After every use

Kitchen

Mold, food particles

Wipe counters with non-toxic cleaner

Daily

Clean under the sink & fridge seals

Monthly

Entryways

Pollen, outdoor debris

Remove your shoes at the door

Use bristle doormats

Daily

Mop or vacuum the entry floor

2–3 times per week

Windows & Blinds

Pollen, dust

Wipe spills with a damp cloth

Clean blinds with microfiber

Weekly

Air

Airborne allergens

Use HEPA air purifiers

Replace HVAC filters (MERV 11+)

Monthly or as needed

Pet Areas

Pet dander, fur

Bathe pets

Wash pet bedding

Vacuum pet zones

Weekly or more often

Floors

Dust, mites, pollen

Vacuum with HEPA filter

Damp mop hard floors

2–3 times per week

Curtains & Rugs

Dust mites, pet dander

Wash or vacuum curtains

Shampoo rugs or remove them

Monthly or seasonally


Start with a Cleaning Plan That Targets Allergy Zones

Before grabbing a mop or vacuum, you need a battle strategy. Think of your home as zones of allergy risk. High-risk areas include:

  • Bedrooms – where you spend 6–8 hours a night breathing in close contact with pillows, sheets, and mattresses.
  • Living rooms – loaded with upholstery, curtains, and carpets that trap dust and pet dander.
  • Bathrooms – a hotspot for mold growth.
  • Entryways – where pollen and outdoor irritants sneak inside.

Prioritize these zones with daily, weekly, and monthly tasks. Create a rotating schedule to prevent allergens from settling in.

Vacuuming Smart: Go HEPA or Go Home

Ordinary vacuums may do more harm than good by blowing allergens back into the air. To combat this, invest in a vacuum with a HEPA filter. High-Efficiency Particulate Air filters trap 99.97% of particles as small as 0.3 microns.

Pro Tips for Allergy-Safe Vacuuming:

  • Vacuum upholstered furniture, carpets, and rugs at least twice a week.
  • Slowly pass the vacuum over each section to ensure thorough suction.
  • Don’t forget less obvious places, such as baseboards, behind furniture, and under the bed.

Also, consider replacing wall-to-wall carpeting with hard surfaces if possible; hardwood, tile, or vinyl are easier to keep allergen-free.

Dusting Techniques That Don’t Stir Things Up

Dry dusting with feather dusters? Skip it. All it does is recirculate dust into the air, making things worse for allergy sufferers.

Use These Instead:

  • Microfiber cloths – These grab and lock in dust rather than push it around.
  • Electrostatic dusters – Great for electronics and delicate surfaces.
  • Damp cloths or wipes – Moisture prevents dust from becoming airborne.

Where to Dust:

  • Blinds and window sills
  • Ceiling fans
  • Light fixtures
  • Air vents
  • Electronics and cords
  • Picture frames and shelves

Dusting once a week is a solid baseline, but homes with high allergies may require more frequent care.

Air Purification: A Silent Game-Changer

Cleaning the air itself can drastically reduce allergy symptoms. While it’s not technically “cleaning” in the traditional sense, it’s an essential part of a complete allergy-reduction plan.

Air Quality Tips:

  • Use a HEPA air purifier in bedrooms and living rooms.
  • Change your HVAC filters every 60–90 days or monthly during periods of heavy allergy season.
  • Consider MERV 11–13 filters for HVAC systems for enhanced allergen trapping.
  • Keep windows closed on high-pollen days; check your local pollen index online.

Bonus: Some purifiers also include UV-C lights or ionizers to neutralize mold spores and bacteria.

Wash Bedding Weekly, And Don’t Forget the Pillows

Your bed might be the coziest spot in the house, but it’s also a magnet for allergies. Dust mites thrive in sheets, mattresses, and pillows, feeding on the skin cells and moisture present in these environments.

What to Do:

  • Wash blankets, pillowcases, and sheets once a week in hot water (130°F or higher).
  • Use dust-mite-proof covers on mattresses and pillows.
  • Replace pillows every 1–2 years.
  • Opt for synthetic-filled bedding rather than feather or down.

Pro tip: Don’t forget the curtains! Wash or vacuum them regularly, or replace them with washable roller shades.

Dehumidify Damp Areas to Prevent Mold

Mold thrives in damp, dark corners, especially in bathrooms, basements, and under sinks. Once spores take hold, they can spread rapidly and trigger severe allergic reactions.

Mold-Fighting Techniques:

  • Use a dehumidifier to maintain interior humidity levels between 30% and 50%.
  • Install ventilation fans in bathrooms and kitchens.
  • Clean shower tiles, grout, and bathroom surfaces with vinegar or hydrogen peroxide; both are effective alternatives to bleach for fighting mold.
  • Remove or replace any moldy carpets, drywall, or ceiling tiles.

Choose Allergy-Friendly Cleaning Products

Ironically, several cleaning solutions might worsen allergies due to the inclusion of harsh chemicals and artificial smells.

Look For:

  • Fragrance-free or hypoallergenic cleaning products
  • Green-certified brands (like Seventh Generation or ECOS)
  • DIY options like white vinegar, baking soda, and lemon juice

Avoid ammonia, bleach (except when necessary), and any product with “parfum” or “fragrance” listed as an ingredient; they often contain multiple undisclosed chemicals.

Remove Shoes at the Door

You’d be amazed at what hitchhikes a ride on your shoes: pollen, pesticides, mold, pet waste, and more. It’s one of the easiest changes to implement and one of the most effective.

  • Create a shoe-free zone near the entrance.
  • Use a doormat with a stiff bristle surface to catch particles.
  • Provide indoor slippers for comfort and cleanliness.

This simple technique drastically reduces the amount of outdoor allergens entering your home.

Pet Dander Management (Even If You Love Them)

If you’re an allergy sufferer with pets, cleaning is a constant chore, but one that pays off.

Steps to Reduce Pet Allergens:

  • Bathe pets regularly using a vet-approved hypoallergenic shampoo.
  • Keep pets out of the bedroom and off furniture if possible.
  • Every day, use a pet hair vacuum or lint roller.
  • Clean litter boxes, cages, or pet bedding frequently, ideally outdoors.
  • Consider air purifiers with carbon filters, which also neutralize pet odors.

Pro tip: Brushing pets outdoors helps keep fur and dander from becoming airborne in your home.

Professional Cleaning: When to Call in Reinforcements

Sometimes, deep cleaning is best left to the pros, especially in cases of long-neglected homes or persistent mold issues.

Consider Professional Help For:

  • Air duct cleaning – If you notice dust around vents or your symptoms worsen.
  • Carpet shampooing or steam cleaning
  • Upholstery Cleaning
  • Mold Remediation – Never Attempt DIY Toxic Mold Removal.

Ensure that any service you hire uses HEPA-certified equipment and avoids products containing chemicals.

How Often Should You Clean to Reduce Allergies?

Consistency is key. While deep cleaning may provide temporary relief occasionally, allergens regenerate quickly, especially in high-traffic areas. Here’s a practical cleaning frequency guide for allergy prevention:

Task

Recommended Frequency

Vacuuming with a HEPA filter

2–3 times a week

Dusting surfaces

Weekly

Washing bedding

Weekly in hot water

Cleaning curtains/shades

Monthly

Replacing HVAC filters

Every 60–90 days

Bathroom mold check

Weekly

Pet grooming

Weekly

Air purifier maintenance

Monthly (clean filters)

A regular schedule doesn’t just maintain cleanliness; it prevents the buildup of allergy triggers that lead to chronic symptoms.

The Role of Ventilation in Allergy Control

Although it’s easy to overlook ventilation, it’s essential for preventing allergies in your house. Poor ventilation means moisture lingers longer (think mold risk), and airborne particles accumulate more densely indoors.

Tips to Improve Ventilation:

  • Open windows only when pollen counts are low (typically after rainfall).
  • Utilize exhaust fans in the bathroom, laundry room, and kitchen.
  • Install trickle vents or slightly open windows for cross-ventilation.
  • Run your HVAC system’s fan on low to circulate and filter air consistently.
  • Consider energy recovery ventilators (ERVs) to bring in fresh air while maintaining a balanced humidity level.

Optimizing airflow helps disperse indoor allergens and maintain a healthy home environment.

Allergy-Safe Decluttering Strategies

Clutter isn’t just unsightly, it’s a magnet for allergens. The more objects on surfaces, the more places dust and dander can hide.

Quick Decluttering Wins:

  • Store books and knick-knacks in closed cabinets or glass-fronted shelves.
  • Use plastic storage bins instead of open baskets.
  • Donate or store away items you don’t use on a weekly basis.
  • Avoid heavy fabric décor, such as tapestries or layered drapes, and opt for a minimalist and washable approach.

Bonus: Decluttering also makes routine cleaning significantly faster and more effective.

Child & Baby-Safe Cleaning Tips for Allergy-Prone Homes

If you’re managing allergies in a home with infants or young kids, special care is required. Children often spend more time on the floor, where allergens tend to accumulate, and their immune systems are still developing.

Kid-Safe Allergy Cleaning Practices:

  • Use non-toxic, fragrance-free cleaners only.
  • Sanitize toys weekly, especially plush toys, which can harbor dust mites.
  • Wash crib sheets, blankets, and stroller liners frequently.
  • Use air purifiers in the nursery.
  • Vacuum play mats, area rugs, and soft flooring on a regular basis.

Parents often report fewer allergy-related sleep disturbances and respiratory issues once a kid-safe allergen routine is in place.

Natural DIY Cleaners That Fight Allergens

To reduce exposure to chemical irritants, opt for green cleaning products. Many DIY cleaners are just as effective for allergen control, and often safer for your family.

Top Natural Cleaner Recipes:

  • All-Purpose Surface Spray:
  • Combine ten drops of tea tree oil (a natural antifungal) with one cup of white vinegar and one cup of water. Use on counters, doorknobs, and high-touch areas.
  • Natural Mold Remover:
  • Combine 1 part hydrogen peroxide (3%) with 1 part water. Spray on bathroom tiles and allow to sit for 10 minutes before scrubbing.
  • Dust-Grabbing Wipes:
  • Microfiber cloths should be soaked in a solution of water and a few drops of lemon essential oil. Let dry and reuse to attract dust without dispersing particles into the air.

These DIY options help reduce allergens while avoiding harsh chemical residues.

Common Cleaning Mistakes That Worsen Allergies

Certain cleaning practices might have unforeseen consequences, even when done with the greatest of intentions. Awareness of these pitfalls can help you tweak your routine for better results.

What to Avoid:

  • Dry sweeping or feather dusting kicks allergens into the air.
  • Using scented air fresheners – they mask odors but irritate the lungs.
  • Neglecting your vacuum filter – a dirty HEPA filter becomes useless.
  • Skipping mattress and pillow cleaning – prime habitat for dust mites.
  • Allowing clutter to accumulate makes cleaning more difficult and traps allergens.

By avoiding these traps, you can protect your respiratory health and improve the air quality in every room.

Seasonal Allergy Cleaning Tips

Pollen, mold, and other seasonal allergens fluctuate with the changing seasons. That means your cleaning approach should shift accordingly.

Spring & Summer:

  • Clean window sills and screens to remove pollen that has become trapped.
  • Vacuum more frequently, as pollen can stick to clothes, shoes, and hair.
  • Bathe pets after outdoor exposure.
  • Wash outdoor furniture and clean porch and deck areas.

Fall:

  • Remove fallen leaves around doors and entryways (mold and pollen source).
  • Clean gutters to prevent mold buildup.
  • Dust off the heating vents before turning on the furnace.

Winter:

  • Use a humidifier to keep the air moist (but not above 50% humidity).
  • Clean behind radiators or baseboard heaters.
  • Wash winter bedding and curtains more frequently.

Adjusting your cleaning habits seasonally helps you stay ahead of allergens as they change throughout the year.

Quick Daily Habits That Keep Allergens Away

You don’t need hours every day to maintain a low-allergen home. These mini-daily rituals take minutes but yield huge results over time:

  • Make the bed and shake out the bedding (this keeps dust from settling).
  • Wipe down bathroom counters and shower walls post-use.
  • Run a HEPA vacuum or air purifier in high-traffic areas.
  • Take a quick “shoe sweep” to ensure no one is tracked in outdoor pollen or debris.
  • Do a quick pet brush or wipe down, especially after walks.

By implementing these minor routines, you create an environment that prevents allergies from flourishing.

FAQs

What is the best way to clean a home to reduce allergies?

Use HEPA-filter vacuums, wash bedding in hot water weekly, dust with microfiber cloths, and use fragrance-free cleaners.

How often should I vacuum to reduce allergens?

At least 2–3 times per week, especially in bedrooms and high-traffic areas.

Can air purifiers help with indoor allergies?

Yes, HEPA air purifiers effectively trap airborne allergens, including dust, pollen, and pet dander.

What are common allergy triggers in the home?

Dust mites, pet dander, mold spores, pollen, and indoor pollutants.

Are natural cleaners effective for allergies?

Yes, hydrogen peroxide, baking soda, and vinegar are effective alternatives for allergy-friendly substitutes.

Conclusion

Reducing allergy triggers at home isn’t about being a neat freak; it’s about creating a haven. You can make your house a place where allergies don’t dominate your life by using the right equipment and methods.

Remember: The key is consistency and a strategic approach. A one-time deep clean won’t suffice. However, a targeted, allergen-reducing routine, such as vacuuming with a HEPA filter, washing bedding weekly, managing humidity, and purifying the air, can make a significant difference.

Every allergen you eliminate brings you one step closer to relief, so roll up your sleeves, grab that microfiber cloth, and clean with purpose.

Cleaning Frequency Optimization: The Ultimate Guide to How Often You Should Clean

In an era when time seems perpetually scarce, cleaning can feel like an endless chore. Yet, do you need to scrub every surface daily? That’s where cleaning frequency optimization comes in: crafting a tailored plan that strikes a balance between cleanliness, health, and practicality. By considering variables such as household size, foot traffic, and environmental factors, you can avoid the extremes of over-cleaning, wasting precious free time, and under-cleaning, risking the spread of germs, allergens, and deterioration. A thoughtfully structured approach means you spend just enough time on each task to keep your home fresh without letting it dominate your schedule. Throughout this guide, you’ll discover concise, actionable advice on how often to tackle specific chores, room-by-room strategies, and tips for adjusting your routine when life throws curveballs. Optimizing your cleaning schedule not only preserves the longevity of furniture and appliances but also reduces stress, boosts mental clarity, and fosters a healthier living environment. With each section capped at around 150 words, you get focused insights without fluff.

Understanding Cleaning Frequency Optimization

Cleaning frequency optimization involves determining the exact frequency at which each chore should be performed based on actual household needs rather than rigid schedules. Instead of vacuuming every room every week without consideration, you assess factors such as surface type, usage level, and the occupants of the home. For example, a high-traffic hallway may require vacuuming twice a week, while a guest bedroom may only need attention once a month. This approach maximizes efficiency: chores get done when necessary, not due to arbitrary timelines. You avoid letting dust build up into a problem by cleaning just in time, yet you also save effort by not over-scrubbing pristine areas. The heart of optimization lies in evaluation, recognizing which tasks deliver the most significant impact and scheduling them accordingly. By observing your own home’s rhythms and adjusting as patterns shift (such as the arrival of a new pet or the development of allergies), you continually refine the plan. Ultimately, this method keeps your home healthier, your time freer, and your cleaning efforts more targeted.

Why Cleaning Frequency Matters

Maintaining an optimal cleaning cadence has a significant impact on health, efficiency, and cost. From a health perspective, germs and allergens accumulate on surfaces, exacerbating conditions such as asthma or allergies. In kitchens and bathrooms, bacteria can proliferate rapidly, meaning that weekly wipe-downs may not be sufficient if you cook daily or share the space with multiple people. Efficiency comes into play when dirt piles up: a lightly dusty bookshelf takes seconds to clean, but weeks of neglect transform it into a time-consuming chore. By adhering to the proper intervals, you save effort and keep tasks manageable. Cost and maintenance considerations also matter: overusing harsh chemicals on wood floors or granite surfaces can prematurely degrade finishes, necessitating repairs or replacements. A balanced schedule ensures surfaces are cleaned enough to extend their lifespan without wearing them down. In short, proper cleaning frequency safeguards your health, conserves time, and protects your belongings, rather than turning cleaning into an albatross around your neck.

Factors Influencing How Often You Should Clean

Several variables dictate ideal cleaning intervals. First, the type of space: kitchens and bathrooms naturally require more frequent attention than rarely used guest rooms. Second, foot traffic and usage levels: entryways and living rooms experience constant movement, requiring vacuuming or sweeping multiple times a week, whereas a home office may only need a weekly dusting. Third, occupant characteristics: allergy sufferers need more frequent dust removal and vacuuming with HEPA filters; families with pets often find daily vacuuming necessary to manage hair and dander. Homes with young children see more spills and messes, prompting near-daily tidying of play areas and mealtime zones. Fourth, climate and environment: humid regions encourage mold growth, so bathrooms require biweekly deep cleaning; arid, dusty regions demand frequent dusting, sometimes three or four times a week. Seasonal shifts also play a role; high pollen in spring or muddy boots during rainy seasons call for adjusted cleaning. By weighing these factors, you tailor a schedule that truly reflects your home’s unique demands.

General Guidelines for Different Cleaning Tasks

Finding the right cadence for cleaning tasks prevents both overkill and neglect. Daily tasks include washing dishes, wiping kitchen counters, and performing quick bathroom sink wipe-downs to prevent grime buildup. Clutter control, achieved by spending 5–10 minutes tidying each evening, prevents surfaces from piling up. Weekly tasks typically involve vacuuming carpets and rugs, sweeping and mopping floors, scrubbing toilets and showers, and dusting furniture and electronics. Change bed linens and wash towels weekly to reduce dust, mites, and odors. Biweekly tasks may include more thorough dusting (baseboards, blinds, window sills), disinfecting trash cans, and a thorough mopping of hard floors. Monthly tasks include window cleaning (interior), refrigerator deep cleaning (discarding expired items and wiping shelves), oven and stove deep scrubbing, and dishwasher maintenance, running vinegar cycles to clear buildup. Seasonal tasks, performed quarterly or biannually, include steam-cleaning carpets and upholstery, cleaning exterior windows, emptying and sanitizing gutters, rotating and vacuuming mattresses, and purging closets. Use these guidelines as a foundation, then adjust the frequency according to your home’s specific needs.

Room-by-Room Cleaning Frequency

Kitchen:

  • Daily: Wipe countertops, stovetops, and sinks; sweep visible crumbs; wash dishes.
  • Weekly: Mop floors; clean appliance exteriors; empty trash and disinfect bins; wipe cabinet doors.
  • Monthly: Empty and sanitize the refrigerator, deep clean the oven, run a dishwasher cleaning cycle, and descale the coffee maker (if needed).
  • Quarterly/Biannually: Vacuum refrigerator coils; move major appliances to clean underneath; organize pantry and wipe shelves.

Bathroom:

  • Daily: Wipe sinks and counters; squeegee shower walls to reduce mildew; hang fresh towels.
  • Weekly: Scrub toilets, showers, and tubs; clean mirrors; mop floors; restock toiletries.
  • Biweekly: Deep clean grout lines; wash shower curtains or liners; disinfect toothbrush holders and trash cans.
  • Monthly: Remove shower doors to scrub tracks; replace or clean exhaust fan filters; inspect caulking and recaulk if necessary.

Living Areas:

  • Daily: Tidy clutter; straighten cushions; spot-clean spills.
  • Weekly: Dust furniture and electronics; vacuum carpets, rugs, and upholstery; sweep or mop hard floors; wipe doors and light switches.
  • Biweekly: Polish wooden furniture; vacuum area rugs outdoors to remove embedded dirt; dust window treatments.
  • Monthly: Wash interior windows; dust ceiling fans and baseboards; clean beneath furniture.
  • Quarterly/Biannually: Steam-clean carpets and upholstery; rotate area rugs; clean or replace air purifier filters; remove cobwebs.

Bedrooms:

  • Daily: Make the bed, pick up clothes and personal items, and air out the space by opening windows.
  • Weekly: Change and wash bed linens and pillowcases; dust surfaces; vacuum floors and under-bed areas; wipe mirrors.
  • Monthly: Vacuum and rotate the mattress; dust or vacuum window treatments; organize closets and vacuum shelves and floors.
  • Seasonally, wash or professionally clean pillows and duvets, vacuum or wash mattress protectors, and deep clean carpets.

Home Office:

  • Daily: Clear desk clutter; wipe the desktop; lightly dust computer monitors, keyboards, and mice; empty small trash bins.
  • Weekly: Dust bookshelves and filing cabinets; vacuum or sweep the floor; sanitize high-touch items, such as doorknobs and phone handsets.
  • Monthly: Clean computer peripherals with isopropyl swabs; dust behind electronics to prevent overheating; wipe down chairs (upholstered, leather, or mesh).
  • Quarterly: Organize digital files and shred outdated paper; steam-clean carpets or rugs; check and replace air purifiers or HVAC filters.

Deep Cleaning vs. Regular Cleaning

Regular cleaning maintains a baseline: daily surface wipes, weekly vacuuming, and basic tidying keep your home looking presentable and well-maintained. Deep cleaning, by contrast, addresses hidden grime and stubborn buildup that accumulate over time. It involves moving furniture to vacuum or mop underneath, scrubbing grout lines, meticulously cleaning appliance interiors (such as refrigerators and ovens), treating mold in bathrooms, and steam cleaning carpets and upholstery. While regular chores focus on surface-level freshness, deep cleaning hits the “reset” button, restoring areas that regular methods can’t fully reach. It’s wise to deep-clean at least twice a year, often in spring and fall, to prepare for seasonal transitions and reduce allergen loads. Homes with pets, those that experience frequent cooking, or those with allergy sufferers may require quarterly deep cleans instead. By distinguishing between upkeep and overhaul, you can allocate resources effectively. Regular tasks keep living spaces manageable on a day-to-day basis, while periodic deep cleans ensure long-term hygiene and preserve the integrity of floors, fabrics, and fixtures.

Creating an Optimized Cleaning Schedule

  • Assess Your Needs: Walk through each room and note tasks, dusting window sills, vacuuming carpets, scrubbing grout. Identify high-traffic zones and problem areas (pet zones, allergy hotspots).
  • Prioritize and Categorize: Classify tasks into high priority (weekly or more frequent, e.g., bathrooms, kitchens), medium priority (monthly, e.g., refrigerator interiors, window cleaning), and low priority (quarterly, e.g., baseboards, behind appliances). High-priority tasks are scheduled first; lower-priority chores are accommodated when time allows.
  • Build a Flexible Calendar: Create a weekly template, Monday: vacuum all carpets; Tuesday: dust living areas; Wednesday: clean bathrooms; Thursday: mop floors and wipe kitchen surfaces; Friday: change bed linens; Saturday: tackle monthly appliance deep cleans; Sunday: rest or catch up. Use digital calendars or apps with reminders.
  • Use Tools and Checklists: Smartphone apps (Todoist, Tody) let you set recurring tasks, push notifications, and track progress. For a low-tech option, a laminated checklist on the refrigerator provides visual satisfaction when you check off chores. Leverage voice assistants to set voice reminders: “Hey, Google, remind me every Friday at 10 a.m. to clean the bathroom.” A flexible yet structured schedule ensures tasks don’t pile up and allows for adaptation to busy weeks or unexpected events.

Tips for Maintaining Consistency

Set Realistic Goals: Determine a timetable that you can adhere to. If you dislike ironing, consider planning to do it once a month rather than weekly. Prioritize tasks that match your energy and available time.

Break Tasks into Small Steps: Instead of “deep clean kitchen,” break it down into manageable steps, such as organizing the pantry, cleaning the fridge interior, scrubbing the stovetop, and wiping cabinet exteriors. Tackling one step per day reduces overwhelm and keeps the space manageable.

Involve Family Members: Assign age-appropriate chores; toddlers can help put toys away, while teens or roommates can rotate tasks such as vacuuming or bathroom cleaning. Shared responsibility lightens the load and builds accountability.

Reward Yourself: Treat yourself to your favorite meal, a movie night, or a soothing pastime after finishing your weekly responsibilities. Positive reinforcement turns chores into a gateway for enjoyable downtime.

Use Visual Reminders: Post a checklist on the fridge or set calendar alerts. Seeing tasks laid out makes it harder to ignore them, and checking off items provides a psychological boost.

Be Flexible: If you miss a day, don’t stress, adjust your schedule accordingly. Prioritize high-impact chores first, then slot smaller tasks when possible. Consistency matters more than perfection.

When to Outsource Cleaning

Sometimes, professional help is worth the investment. Time Constraints: If you work long hours or travel frequently, paying for a weekly or biweekly service frees up valuable free time. Specialized Deep Cleans: Tackling tough carpet stains, steam cleaning upholstery, or scrubbing grout can be laborious; trained technicians have the equipment and expertise to do it thoroughly. Pre- and Post-Event Needs: Hosting large gatherings, such as weddings, parties, or family reunions, requires a pre-event deep clean and a post-event restoration to handle the aftermath efficiently. Health Considerations: Expectant mothers, seniors, or individuals with mobility issues may find it safer and more comfortable to delegate tasks that involve heavy lifting, ladder work, or the use of toxic cleaners. Professional cleaners also use hospital-grade disinfectants if someone is recovering from illness. Outsourcing doesn’t replace regular upkeep; rather, it supplements your routine, ensuring that periodic deep tasks, such as steam-cleaning carpets or sanitizing HVAC systems, are handled expertly and safely.

Common Mistakes and How to Avoid Them

  • Over-cleaning vs. Under-cleaning: Over-cleaning, like mopping a low-traffic hallway daily, wastes time and energy. Under-cleaning, such as letting dust accumulate on ceiling fans, allows allergens and grime to build up. Find a balanced schedule that addresses actual dirt levels and usage patterns.
  • Ignoring Seasonal Adjustments: A rigid, year-round plan fails to account for changing needs. Spring brings pollen; fall brings leaves and mud. Increase dusting during pollen season and sweep entryways more often during rainy months to minimize tracked-in debris.
  • Inconsistent Scheduling: Skipping tasks until they pile up leads to marathon cleaning sessions that can be overwhelming. Maintain a calendar or task list with reminders to stay organized and on schedule. If life gets busy, shift tasks instead of abandoning them; tackling a missed chore the next day keeps the backlog manageable.
  • Using Inappropriate Cleaners: Applying a harsh oven cleaner to granite countertops can cause discoloration, and using bleach on unsealed wood can damage the finish. Always read labels and test products in an inconspicuous area. Use natural or DIY remedies like vinegar, baking soda, and lemon juice whenever possible.
  • Neglecting Hidden Areas: Corners, under furniture, and behind heavy appliances are spots that collect dust and buildup. Schedule periodic “hidden area” checks to move furniture and clean underneath, preventing allergens and pests from flourishing. A little attention goes a long way in maintaining a clean and tidy home.

Adapting Your Schedule for Special Circumstances

Illness or Allergies: When a household member is sick, increase the sanitation of high-touch surfaces, such as doorknobs, light switches, and remote controls, daily or multiple times a day to curb the spread of germs. Allergy sufferers may need to switch from monthly to biweekly dusting and run air purifiers continuously during high-pollen seasons.

New Pet Arrival: Puppies and kittens shed fur, track dirt, and occasionally have accidents. Expect to vacuum two to three times a week, wash pet bedding weekly, and wipe down furniture spots and floors daily. During shedding seasons, invest in a pet-specific vacuum attachment to handle embedded hair.

Renovations or Home Projects: Construction dust settles everywhere. After painting or installing new flooring, plan for at least two consecutive days of intensive cleaning: wipe down walls, dust baseboards, clean cabinets, and thoroughly clean floors to remove fine particles.

Seasonal Holidays and Gatherings: Hosting large gatherings, such as holiday dinners and birthdays, requires a thorough pre-event deep clean. This includes sanitizing guest bathrooms, polishing dining tables, and ensuring the kitchen is spotless. After the festivities, dedicate a catch-up day to tackle post-event mess: remove food debris from carpets, treat upholstery spills, and sanitize dishwashers and sinks.

Frequently Asked Questions

Can I clean less frequently if my home seems tidy?

Not entirely. Even tidy homes collect invisible dust, bacteria, and allergens. High-touch surfaces, such as countertops and light switches, require daily or weekly attention to prevent the buildup of microorganisms. A neat appearance doesn’t guarantee hygienic conditions. However, if an area genuinely shows minimal dirt, such as a guest room used only once a month, you can scale back to biweekly or monthly cleaning there.

Is it efficient to combine tasks (e.g., dusting before vacuuming)?

Yes, dusting first dislodges particles onto the floor, which vacuuming then captures. Combining complementary chores reduces redundancy. Just avoid overloading on any one day: spread tasks evenly, so you’re not exhausted by midweek.

How do I know when to deep-clean a mattress or upholstery?

Watch for odors, visible stains, or if it’s been more than six months since the last cleaning. Allergy sufferers or those who are heavy sleepers may require quarterly attention. Use a steam cleaner or professional service to remove embedded dust mites and allergens.

Are natural cleaners enough for every task?

Many everyday tasks, such as cleaning glass, countertops, and light dusting, can be done with vinegar, baking soda, or lemon juice. However, disinfecting after illness or sanitation in bathrooms may require EPA-approved disinfectants. Always check product labels to ensure proper germ-killing efficacy. Combine natural and commercial cleaners strategically.

What if I fall behind schedule?

Don’t panic, prioritize high-impact tasks first (such as bathroom sanitization and kitchen surfaces), then slot in medium- and low-priority chores when possible. Consider dedicating one day (e.g., Saturday morning) to catch up. Use family help or a small reward afterward to stay motivated and avoid a backlog.

Conclusion

Cleaning frequency optimization transforms home maintenance from a burdensome task into a streamlined, adaptive routine. By assessing factors such as room function, foot traffic, household characteristics, and climate, you tailor chore intervals to real-world needs, avoiding both wasted effort and health risks associated with neglect. Structured weekly, monthly, and seasonal schedules ensure high-priority zones stay pristine while lower-priority tasks fit comfortably into spare time. Use checklists, digital reminders, or voice assistants to maintain consistency, and involve household members to distribute the workload. Deep cleaning becomes a periodic reset, typically spring and fall for most, or quarterly if you have pets or allergies, while daily and weekly tasks keep your environment fresh on a day-to-day basis. If life gets hectic, shift chores rather than abandoning them, and consider outsourcing specialized or labor-intensive cleaning tasks when necessary. With a balanced, flexible plan, your home remains clean, your surfaces last longer, and you reclaim valuable hours for the people and activities you love.

Carpet Stain Removal 101: Essential Tricks & Techniques

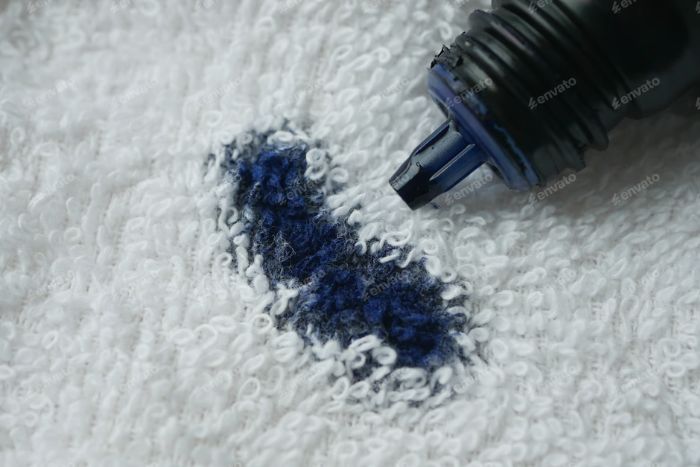
Carpet Stain Removal 101: Tricks and Techniques equips you with essential, time-tested methods to restore your carpets after inevitable spills. Whether you’ve accidentally spilled red wine at a dinner party, dripped coffee during a busy morning, or endured pet mishaps, acting swiftly and knowledgeably can save you both time and money. Start by understanding that fresh stains sit atop fibers; if you wait, pigments and residues can sink in and bond, making removal exponentially harder. This guide focuses on prompt, gentle blotting, region-specific cleaning solutions, and minimal-friction techniques. You’ll learn to identify stain types and choose between household cures (like vinegar, baking soda, or dish soap) and specialized products (enzyme-based cleaners, oxygen bleaches). Additionally, you’ll discover preventative tactics, shoe-free zones, area rugs, and stain-resistant coatings to reduce future accidents.

By blending these strategic approaches, even stubborn blemishes can vanish, leaving your living space crisp, fresh, and confident.

The Science of Stains

At its core, staining hinges on two key factors: the speed of intervention and the chemical nature of the spill. Fresh spills generally linger on the surface; over time, moisture wicks deeper, allowing pigments, oils, and proteins to become firmly embedded within the carpet fibers. Natural fibers, such as wool or cotton, absorb liquids more readily but also respond well to enzyme-based cleaners. In contrast, synthetic fibers such as nylon or polyester might initially repel water yet cling stubbornly to oily residues. When a stain is acidic (such as coffee or juice), an alkaline solution (like baking soda or mild ammonia) can neutralize it. Conversely, alkaline spills (like mud or pet accidents) often respond to gentle acids (such as vinegar). Temperature matters, too; protein stains (such as blood and dairy) coagulate when exposed to heat, so always start with cold water. Understanding this chemical interplay will guide appropriate solution choices, determining whether you need a simple dish-soap mixture, a vinegar-based blend, or a potent enzyme or oxygen bleach formulation to disrupt the molecular bonds of different stains.

Essential Tools and Materials

Before tackling any stain, assemble a concise toolkit to streamline the cleanup process. First, keep clean white microfiber cloths or paper towels on hand; colored fabrics can dye carpets, while the microfiber lifts particles without fraying fibers. A soft-bristle brush or old toothbrush helps gently agitate and dislodge embedded residues. Store a spray bottle labeled for different solutions (vinegar, soapy water, enzyme cleaner) to ensure correct application. Use a mild, clear dish soap for general-purpose cleaning and white vinegar for neutralizing acidic stains. Baking soda or cornstarch is indispensable for absorbing fresh grease or wine. Maintain at least a small bottle of 3% hydrogen peroxide for protein-based spills such as blood, and keep an enzyme-based cleaner for organic messes like pet urine. Protect your hands with nitrile gloves when using more potent agents, and have a vacuum on standby to lift powders or dry debris. Finally, using a fan or hair dryer on low heat expedites the drying process, preventing mold growth and ensuring the fibers return to their standard loft quickly.

General Pre-Treatment Steps

Every cleaning sequence begins with proper pre-treatment: first, blot, never rub, using a white microfiber cloth or paper towel to soak up excess liquid, starting at the stain’s edge and working inward to prevent spreading. Next, remove loose debris, crumbs, or solids by gently scooping with a spoon or spatula, then vacuum to extract finer particles. Any cleaning solution should always be tested on a discrete area to ensure colorfastness; do a spot check five to ten minutes after application. Maintain a gentle touch: vigorous scrubbing can cause permanent matting or fuzzing by distorting fibers. For powder-based absorbents (such as baking soda or cornstarch), sprinkle a generous layer onto fresh grease or wine spills, let it sit for 15–20 minutes, and then vacuum thoroughly. If the stain has already been set, avoid using excessive liquid that could sink deeper; instead, apply cleaning solutions sparingly via a spray bottle. By following these universal steps, blotting, testing, debris removal, and targeted absorbents, you’ll prepare the carpet for more specialized treatments without risking damage.

Stain Type

Pre-Treatment

Key Cleaning Agent

Technique Summary

Red Wine

Blot immediately (white cloth)

Table salt, white vinegar, and baking soda

Cover the fresh spill with salt to absorb the pigments, then vacuum it up. Mist with a 1:2 vinegar–water solution and blot until light. Apply a baking soda paste if needed; let it dry, then vacuum.

Coffee, Tea & Soda

Blot excess liquid (white cloth)

Dish soap, white vinegar

Mix 1 teaspoon of dish soap, 1 cup of water, and 1 teaspoon of vinegar. Lightly mist, let sit for 5–10 minutes, and blot until the stain lifts. Rinse with water and blot dry.

Pet Urine & organic stain

Blot fresh urine; rinse with cold water

Enzyme cleaner, baking soda

After a cold-water rinse, apply enzyme cleaner according to the instructions. Blot, then sprinkle baking soda overnight, vacuum to eliminate odors and residues.

Grease & Oil

Blot excess oil (white cloth)

Baking soda (or cornstarch), dish soap

Sprinkle powder to absorb oil and vacuum. Mix 1 teaspoon of dish soap, water, and a splash of vinegar. Dab, agitate gently, and blot. Rinse and dry thoroughly.

Ink & Dye

Blot fresh ink (white cloth)

Rubbing alcohol, mild dish soap

Dampen a cotton swab with alcohol, dab from the outside in, and blot up the dissolved ink. Follow with soapy water, dab to remove residue; blot dry.

Blood & Protein-Based

Rinse with cold water; blot (white cloth)

Hydrogen peroxide, enzyme cleaner

Test peroxide safely; pour 3% peroxide on the stain, let it bubble, and blot until no bubbles remain. For set-in stains, apply enzyme cleaner, let dwell, blot, and rinse.

Gum, Wax & Sticky stuffs

Freeze with ice pack; scrape (butter knife)

Ice (or iron + paper for wax), dish soap

Harden with ice, scrape off. For wax, place paper over the pot and iron on a low setting to transfer the wax onto the paper. Clean residual stickiness with soap solution; blot.


Red Wine and Other Coloring Agents

Red wine’s deep tannins and intense pigments can rapidly bind to carpet fibers, making prompt action essential. First, blot up as much liquid as possible with a white cloth, then press gently without spreading. Next, liberally cover the damp stain with table salt or kosher salt; the crystals absorb wine pigments. After 10–15 minutes, vacuum or brush away the pink-tinted salt. Combine one part white vinegar with two parts warm water in a spray bottle; avoid oversaturating the stained area. Blot again with a clean cloth, repeating spray-and-blot cycles until the color fades. For lingering discoloration, apply a paste of baking soda and water. Spread a thin layer, let it dry thoroughly (about 4–6 hours), then vacuum it up, finally, mist with plain water to remove cleaning residues and blot to dry. Optionally, use club soda instead of salt for a quick lift, though it’s less potent. Consistent, gentle blotting and absorbent powders prevent permanent staining.

Coffee, Tea, and Soda

Coffee, tea, and soda contain tannins or dyes that can leave a brownish or colored residue if untreated. Immediately blot excess liquid with a white cloth, pressing gently. In a spray bottle, combine one teaspoon of clear dish soap, 1 cup of warm water, and one teaspoon of white vinegar. To ensure there won’t be any discoloration, test this combination in a discreet location. Use a fresh microfiber cloth to mop up any dissolved residues after lightly misting the affected area and letting it sit for five to ten minutes without drying entirely. Repeat spraying and blotting until the stain noticeably lightens. Once the majority of the stain is removed, spritz plain water over the spot to rinse out any soap buildup, then blot dry completely. Using water alone risks a sticky soap film that attracts dirt; therefore, the addition of vinegar helps neutralize tannins. Prompt action and minimal saturation maintain fiber integrity, ensuring a clean result without over-wetting that could lead to mildew or backing damage.

Pet Urine and Organic Stains

Pet urine and other organic spills (milk, eggs) contain urea, uric acid, and bacteria that can crystallize, causing lingering odors even after visible cleanup. Begin by blotting fresh urine with paper towels or a white cloth, removing as much moisture as possible. Rinse the area with cold water to dilute any residual urine, then blot it thoroughly again. Apply an enzyme-based carpet cleaner specifically designed to break down uric crystals, follow the manufacturer’s directions for dwell time, usually 10–15 minutes, and blot to lift the enzyme solution and dissolved particles. To neutralize odors further, sprinkle a thick layer of baking soda on the spot once it is dry; let it sit overnight, and vacuum it up the next day. For old, set-in stains, pre-treat with equal parts white vinegar and water: mist, allow ten minutes for the solution to penetrate the uric crystals, then blot and follow with the enzyme cleaner. This two-step vinegar-enzyme approach is often necessary to eliminate deep-seated urine residues and odors, preventing repeat accidents.

Grease and Oil-Based Stains

Grease or oil, whether from cooking, cosmetics, or food, coats fibers with hydrophobic molecules that repel water-based cleaners. Start by blotting up any excess with a white cloth or paper towel; avoid smearing. Cover the remaining spot with baking soda or cornstarch, allowing the powder to sit for 15–20 minutes to draw out the oil. Vacuum up all powder thoroughly. Mix one teaspoon of degreasing dish soap with one cup of warm water and a splash of white vinegar. To be safe, test this solution at a concealed location. Lightly dampen the stain with the solution using a spray bottle or soft cloth, gently agitating it with a soft-bristled brush to break down the oil bonds. Blot with a fresh cloth until grease transfers onto it. Rinse with a little plain water, then blot again to eliminate any remaining soap residue. To finish drying, use a hair dryer or fan set to low heat. If residual oil remains, reapply the absorbent powder and repeat the degreasing step until the fibers are clean and non-greasy.

Ink and Dye Stains

Ink and dye penetrate carpet fibers very quickly, especially with permanent or ballpoint ink, necessitating cautious and targeted removal. Begin by blotting the fresh ink with a dry, white cloth and gently dabbing to absorb the surface ink without spreading it. Test the isopropyl rubbing alcohol on an inconspicuous corner, waiting several minutes to ensure there is no discoloration. Using rubbing alcohol to dampen a cotton swab, dab the discolored region from the outside inward. Blot with a fresh cloth as the ink disappears, and use new swabs as necessary. After removing the majority of the ink, combine one cup of warm water with one teaspoon of mild dish soap. Blot with a clean cloth until the soap is completely lifted. Finally, mist with plain water to remove any lingering cleaner, then blot dry. If alcohol is unsuitable due to carpet sensitivity, try a small amount of acetone on a cloth, test first, and follow the same blotting sequence.

Blood and Protein-Based Stains

Blood contains proteins that coagulate and bind to fibers when exposed to heat, so always use cold water. For a fresh spill, rinse the stained area with cold water, then use a white cloth to gently blot until the bulk of the blood is removed. Next, test 3% hydrogen peroxide on a hidden area. If safe, pour or spray a small amount of peroxide onto the stain; foaming indicates it’s breaking down blood proteins. Blot immediately with a clean cloth, repeating this process until the bubbling ceases. For stubborn or older stains, follow with an enzyme-based cleaner. Apply, let it dwell for 10–15 minutes, then blot. Rinse with cold water and blot until no residue remains. Avoid using hot water or steam until all proteins are removed, as heat can set stains permanently. Once clean, dry the area thoroughly using a fan or hair dryer on a low setting, ensuring no moisture remains to prevent mold or odor.

Gum, Wax, and Sticky Substances

Gum and wax can cement carpet fibers; shifting their physical state, either freezing or melting, facilitates removal. For chewing gum, place ice cubes in a sealed plastic bag over the affected area until the gum hardens (approximately 10–15 minutes). Gently scrape off hardened gum with a butter knife, taking care not to pull fibers. For wax (such as candle wax or crayons), freeze it using an ice bag until solid, then scrape it away as you would gum. Alternatively, place a brown paper bag or paper towel over the wax and run a low-heat iron over it, no steam, to melt the wax into the paper. Move the paper as wax transfers, repeating until the carpet is clean. After scraping or ironing, apply a small amount of dish soap solution (one teaspoon of dish soap in one cup of warm water) to any residual stickiness. Gently agitate with a soft brush, then blot dry. Finally, rinse with plain water and blot to remove any soapy residue.

Preventative Maintenance

Preventing stains is far simpler than trying to battle them afterward. First, establish a strict no-shoe policy to curb tracked-in dirt, oils, and microbes. Provide a shoe rack or cubby near entry points, and use slip-on indoor slippers if desired. Place washable rugs or runners in high-traffic areas, such as hallways, entryways, and play areas, and launder them regularly to keep them clean. Consider applying a professional stain-resistant coating (e.g., Scotchgard) every 12–18 months to repel spills and protect your flooring. Vacuum carpets at least twice a week, more frequently in pet-friendly homes, to remove loose soil before it compacts and abrades the fibers. Keep a compact “stain emergency kit” handy: a travel-size enzyme cleaner, a small bottle of clear dish soap, a spray bottle of vinegar solution, and a roll of white paper towels. Educate household members, especially kids, on promptly reporting spills and following established blotting procedures. Finally, schedule a professional deep cleaning (either steam or dry extraction) annually to remove embedded grime and refresh the carpet fibers, ensuring longevity and continued stain resistance.

Advanced Tricks and Pro Tips

When standard methods falter, these expert tactics can provide the upper hand. For deep-set protein or pet stains, apply an enzyme-rich cleaner generously and let it dwell overnight; enzymes break down organic matter into water-soluble compounds, ensuring complete removal. Oxygen bleaches (sodium percarbonate or sodium perborate) work exceptionally well on colorfast whites: dissolve one scoop per gallon of warm water, spray onto stains, let sit for 15–20 minutes, then blot and rinse. Use dry powder cleaners for quick refreshes, sprinkle, agitate gently, and vacuum without over-wetting. Invest in or rent a steam-cleaning machine for whole-room maintenance. Thoroughly vacuum the area first, then slowly run the steamer with an approved carpet shampoo to lift deep dirt. For dye transfer (e.g., from dark jeans), dab isopropyl alcohol on a white cloth to dissolve migrating pigments, then treat it as an ink stain. And if metal furniture legs cause rust spots, choose a gentle rust remover specifically indicated for carpeting. Test it in a hidden corner first to avoid fiber damage.

Common Mistakes to Avoid

Even well-meaning cleaning attempts can backfire. First, avoid over-saturating the carpet: too much liquid can push stains deeper, soak the backing pad, and promote mold growth. Always use a minimal solution, just enough to dampen fibers. Never apply hot water or high-heat steam to protein-based stains (such as blood or dairy), as heat causes proteins to coagulate and bond permanently. Stick to using cold or lukewarm water until these stains are entirely removed. Resist the urge to scrub aggressively: vigorous rubbing frays fibers, causing fuzzing and spreading the stain. Always blot gently, working from the stain’s perimeter inward. Remember to rinse thoroughly after using soap-based cleaners; leftover residue attracts dirt, leading to rapid re-soiling. Skipping a colorfastness test is another misstep; many DIY mixtures (vinegar, peroxide, or alcohol) can bleach or weaken fibers without warning. By sidestepping these pitfalls, over-wetting, heat misuse, excessive scrubbing, and skipping tests, you’ll preserve both the carpet’s integrity and aesthetic appeal.

Frequently Asked Questions

How quickly should I address a fresh spill?

Immediate action within minutes is crucial; pigments and oils begin bonding within 10–15 minutes, making removal notably harder later.

Can I use bleach on my carpet?

Avoid chlorine bleach; it often damages fibers and causes discoloration. Opt for oxygen-based bleaches (e.g., OxiClean) instead, testing on a hidden spot first.

Will vacuuming alone remove stains?

No. Vacuuming lifts dry debris but does nothing against liquid pigments or oils. However, regular vacuuming prevents dirt compaction, making future stain removal easier.

What if my stain won’t budge after multiple tries?

Consider professional carpet cleaning. Technicians use industrial-grade machines and specialized solvents that consumers typically don’t have access to.

How can I stop pets from re-soiling cleaned areas?

Train pets to use designated mats or outdoor spaces. Immediately clean any accidents using enzyme-based cleaners to eliminate lingering odors that attract repeat incidents.

Conclusion

Carpet Stain Removal 101: Tricks and Techniques empowers you to tackle virtually any household stain, red wine, coffee, pet accidents, grease, ink, blood, and gum through prompt action, correct solutions, and gentle blotting. By understanding why stains occur (fiber type, chemical composition, and timing) and assembling the essential tools (microfiber cloths, brushes, enzyme cleaners, vinegar, and baking soda), you can achieve faster and more effective results. Implementing simple preventive measures, such as no-shoe policies, area rugs, stain-resistant coatings, and regular vacuuming, significantly reduces the likelihood of future mishaps. When standard methods stall, turn to advanced tips: enzyme dwell times for organic stains, oxygen bleach for whites, dry powders for quick refreshes, and steam cleaning for deep extraction. Always avoid common missteps, such as over-saturating fibers, using heat on proteins, skipping test spots, or scrubbing aggressively. Whether you handle minor coffee drips or major pet mishaps, the combination of science-backed techniques and consistent maintenance will keep your carpets looking fresh and prolong their lifespan, breathing new life into every room.

Tile Grout: The Unsung Hero (and How Modern Magic is Saving Your Sanity & Your Wallet)

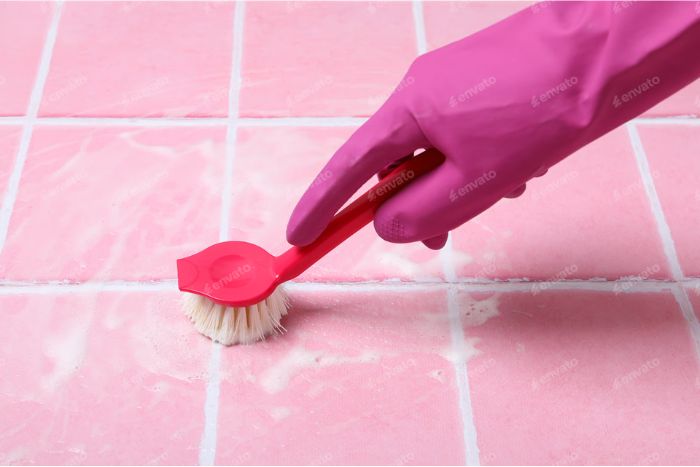
Tile grout. That thin line between beauty and the beast. It holds our tiles together, creates stunning patterns, and then… it turns grey, collects grime, harbors mold, and becomes the bane of every homeowner and facility manager’s existence. Scrubbing on hands and knees with a toothbrush? Paying a fortune for professional deep cleans every few months? It felt like an inevitable, expensive chore. But hold onto your scrub brushes, the world of grout care is undergoing a quiet revolution, saving time, money, and countless sore backs.

Why Grout Innovation Deserves a Standing Ovation

Let’s be real, tile isn’t going anywhere. From sleek bathroom sanctuaries to bustling commercial kitchens, it’s durable, stylish, and practical. But it’s Achilles’ heel? That porous grout traps dirt, grease, and moisture like a sponge. Traditional methods, harsh chemical soaks, brutal scrubbing, or expensive steam cleaning often felt like a losing battle. They were labor-intensive, potentially damaging to grout and tile, involved lengthy drying times, and offered only temporary relief before the grime crept back. Worse, aggressive scrubbing could actually erode the grout, leading to costly repairs.

Modern innovations are tackling these headaches head-on. Think more innovative tools, gentler yet more powerful chemistry, and techniques that deliver lasting results without the elbow grease or the hefty price tag. Keeping grout pristine is finally becoming manageable.

Grout Cleaning & Care Innovations: Your New Best Friends

Here’s a look at the game-changers transforming the way we tackle grout:

Innovation

Key Benefits

Ideal For

Saves Time/Cost By…

Color-Safe Oxygen Boosters Powerful stain lifting, no bleach damage, eco-friendly Homes (bathrooms/kitchens), restaurants, pools Eliminates re-grouting, safe for all grout colors, fast action
Smart Oscillating Scrubbers Targeted vibration, ergonomic, adjustable pressure DIYers, aging users, and detailed areas Reduces physical strain, faster cleaning, and precise control
Nano-Sealing Technologies Invisible barrier, repels stains & moisture New installations, post-clean protection Dramatically reduces cleaning frequency, protects grout integrity
Electrolyzed Water Systems Chemical-free deep clean, converts tap water Healthcare, schools, and eco-conscious homes Zero chemical costs, safe for kids/pets, no residues
Ultrasonic Grout Wands Sound waves loosen grime, minimal scrubbing needed Delicate tiles, historic restorations Prevents grout damage, deep cleans without abrasion
Steam + Vacuum Combos Simultaneous injection/extraction, rapid drying Commercial kitchens, high-traffic lobbies One-pass cleaning, minimal downtime, deep sanitization
Grout “Pens” & Renewal Kits Instant color refresh, easy application Quick touch-ups, rentals, and resale prep Avoids full regrouting cost, DIY simplicity
Subscription Grout Care Delivered maintenance kits, expert advice Busy homeowners, consistent upkeep Prevents major issues, spreads the cost, and provides convenience
AI-Assisted Inspection Apps Identifies problem areas, tracks maintenance history Facility managers, large properties Targeted cleaning optimizes schedules, prevents neglect
Professional-Grade DIY Machines Affordable rentals/leases, commercial power Large projects, cost-conscious users Avoids pro service fees, tackles big jobs effectively

Diving Deeper: The Tech Behind the Sparkle

  1. Color-Safe Oxygen Boosters: Say Goodbye to Bleach Stains! Forget harsh chlorine bleach that weakens grout and yellows colors. Modern oxygen-based cleaners activate upon contact with water, releasing tiny bubbles that burrow into grout pores, lifting stains (even red wine or coffee!) through oxidation. They’re eco-friendly, safe for colored and natural stone grout, and often work in minutes with minimal scrubbing. The result? Bright grout without the damage or toxic fumes. Time and Money Win: No more ruined grout requiring replacement; an effective DIY solution cuts professional costs.
  2. Smart Oscillating Scrubbers: Your Knees Will Thank You. These aren’t your grandpa’s scrub brushes. Ergonomic handheld tools with rapidly oscillating heads (thousands of vibrations per minute) do the hard work for you. Paired with specialized grout brush attachments, they agitate cleaning solutions deep into the line with minimal pressure required. Adjustable speeds, handle light maintenance or tough, set-in stains. Time/Money Win: Cuts scrubbing time drastically, reduces physical strain (saving on potential physio bills!), and makes regular upkeep feasible.
  3. Nano-Sealing Technologies: The Invisible ShieldThis. This is prevention at its finest. Applied after a deep clean, advanced nano-sealers penetrate the grout surface, creating an invisible, molecular barrier. This hydrophobic layer repels water, oils, and dirt, preventing them from soaking in and staining. Modern sealers last years, not months, and are far more effective than old-school versions. It drastically reduces the frequency of deep cleaning needed, protects grout from deterioration, and significantly extends its lifespan.
  4. Electrolyzed Water Systems: Turning Tap Water into a Superhero. Imagine cleaning grout with just water. These innovative systems (available as portable units or built into some steam cleaners) use electrolysis to convert tap water and salt into a powerful yet entirely chemical-free cleaning solution (hypochlorous acid). It’s incredibly effective at killing mold, mildew, and bacteria, while also lifting dirt without leaving any toxic residues. Safe for food prep areas, kids, and pets. And eliminates the ongoing cost of cleaning chemicals, incredibly secure, no rinsing needed.
  5. Ultrasonic Grout Cleaning Wands: Gentle Power Using high-frequency sound waves, these wands create millions of microscopic bubbles in the cleaning solution that implode upon contact with the grout surface. This gentle cavitation action literally shakes dirt and contaminants loose from deep within the pores without the abrasive scrubbing that can wear down grout. Ideal for delicate or historic tilework. Preserves grout integrity (saves on repairs) and is effective for deep cleaning with less effort.
  6. Professional-Grade Steam + Vacuum Combos (DIY Access): The power pros use is now accessible. Compact machines combine high-temperature steam injection to dissolve grime and kill microbes with immediate, powerful vacuum extraction. This removes both dissolved dirt and most of the moisture in one pass, resulting in dramatically faster drying times compared to traditional steam cleaning alone. Achieves professional-level cleaning without pro prices; rapid drying minimizes disruption (crucial for businesses).
  7. Grout Renewal Pens & Kits: Instant Facelift. For grout that’s clean but discolored or slightly damaged, full replacement isn’t always necessary. Easy-to-use pens, paints, or epoxy-based renewal kits allow you to apply a fresh, durable color coat directly over existing grout lines. It’s waterproof, stain-resistant, and instantly revives the look of tired tile. Time/Money Win: A fraction of the cost and time of full regrouting, perfect for quick refreshes or when selling a home.
  8. Subscription-Based Grout Care: Maintenance Made SimpleBusy life? Subscription services deliver curated kits of premium, color-safe cleaners, sealants, and the right tools (such as oscillating brush heads) directly to your door on a schedule. Often includes access to online tutorials or expert advice. Takes the guesswork out of maintenance. Time/Money Win: Prevents neglect leading to significant issues; convenient, cost-effective way to maintain pristine grout year-round.

FAQs: Grout Care, Demystified

Q: How often should I reseal my grout?

A: With modern nano-sealers, every 2-3 years is typical for most areas. High-traffic or wet areas (showers, kitchens) might need it yearly. Check the specific product.

Q: Are oxygen cleaners safe for all tiles?

A: Generally yes, but always test in an inconspicuous area first, especially on natural stone (like marble or travertine). When in doubt, consult the tile manufacturer.

Q: Can I use a steam cleaner on all grout?

A: High heat and moisture can potentially damage some types of grout (like very old or already crumbling mortar) or certain tiles. Check compatibility. Vacuum extraction is key to minimizing moisture.

Q: Is electrolyzed water as effective as bleach?

A: For disinfecting and removing organic stains/mildew, yes, often more effectively and without the damaging side effects or fumes. It may take slightly longer to remove heavy inorganic stains.

Q: Do grout color pens last?

A: Quality epoxy-based pens and kits can last several years with proper cleaning and care. Avoid harsh abrasives on the renewed surface.

Conclusion: Grout Care, Evolved.

Gone are the days of grout cleaning being a dreaded, expensive, and futile chore. The innovations hitting the market, from powerful yet gentle chemistry and ergonomic tools to high-tech sealing and convenient maintenance models, are genuinely transformative. They put effective cleaning and long-term protection within reach, saving you significant time, money, and physical effort. Whether you’re battling bathroom mildew, kitchen grease, or maintaining the sparkle of a commercial space, embracing these modern solutions means reclaiming your weekends, your budget, and the beautiful, clean lines your tile deserves. The future of grout care isn’t just cleaner; it’s more innovative, easier, and finally sustainable.

Carpet Protection Services: Are They Worth It?

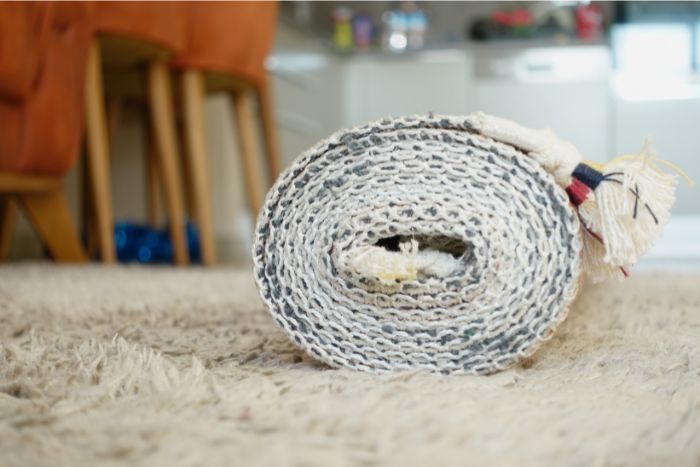
Picture this: you’ve just invested in a plush, high-quality carpet that elevates your home’s aesthetic, softens footsteps, and reduces noise. It looks immaculate, until a red wine spill, muddy shoes, or pet accident threatens to mar its pristine surface. At that moment, you might wonder: Are carpet protection services worth it? You’re not alone. In an era where homeowners juggle time, budget, and the desire to maintain a flawless interior, this question surfaces frequently. Let’s dive deep into what carpet protection services entail, weigh their advantages and drawbacks, and help you decide if they justify the investment.

What Are Carpet Protection Services?

Carpet protection services are professional treatments applied to new or existing carpets to guard against stains, soiling, and wear. Typically, this involves the application of chemical solutions, most often Fluorochemical-Based Protectors, that coat individual carpet fibers. The protective layer repels liquids and prevents dirt from becoming embedded in the pile, making routine cleaning more straightforward and effective.

Professional Applications vs. DIY Solutions

  • Professional: Technicians use specialized equipment (usually a high-pressure sprayer) to ensure even, deep penetration of the protective solution.
  • DIY Kits: These can be found at home improvement stores and frequently use pump-up sprayers or aerosol spray bottles. However, DIY solutions may not achieve the same level of fiber saturation, leading to uneven performance.

While a DIY fraught with convenience and lower upfront costs can be tempting, it does not match the thoroughness or the warranty backing of a professional treatment.

As was stated above, when done correctly, carpet protection creates an invisible barrier that protects the carpet from damage. These can be found at home improvement stores and are frequently used with pump-up sprayers or aerosol spray bottles. For households with children or pets, or those with environments prone to spills and accidents, this barrier can be a game-changer. Yet, this convenience carries a cost: one that varies widely based on factors such as carpet type, your region, and service provider reputation. Before delving into pricing, let’s explore the tangible benefits.

Benefits of Carpet Protection

Enhanced Stain Resistance

  • Rapid Beading and Repelling of Liquids: When a spill occurs, liquids remain on the surface rather than soaking into the fibers.
  • Easier Cleanup: Quick blotting prevents permanent staining. Even dark or colorful liquids (think red wine or coffee) become less likely to leave a lasting mark.

Prolonged Carpet Life

  • Reduced Wear and Tear: The protective layer helps fibers resist abrasion from foot traffic and vacuuming.
  • Delay in Fiber Matting: By shielding fibers from dirt and grit, the carpet maintains its loft and appearance for a longer period.

Cost Savings Over Time

  • Lower Cleaning Frequency: Since carpets resist soiling, you may need professional deep cleaning less often, saving money in the long run.
  • Minimized Replacement Costs: A well-maintained carpet can last a decade or more; otherwise, heavy staining and wear might force premature replacement.

Peace of Mind

  • Warranty Extensions: Many carpet manufacturers void warranties if carpets aren’t protected or maintained according to guidelines. Utilizing professional carpet protection services can help ensure your warranty remains valid.
  • Boosted Home Value: A spotless, well-protected carpet suggests attentive upkeep, which is favorable if you plan to sell or rent your home.

Drawbacks and Considerations

Upfront Costs

  • Variable Pricing: Depending on square footage, carpet type (e.g., wool, nylon, polyester), and local labor rates, protection costs can range from $0.20 to $0.60 per square foot.*
  • Installation Bundles: Often, carpet protection is offered as an add-on when purchasing new carpeting. While bundled pricing might seem attractive, it can inflate the overall cost.

*Note: Prices vary by region and service provider.

Chemical Exposure

  • Potential for Odors: Some protection solutions emit a mild chemical odor for 24–48 hours after application. Well-ventilated spaces mitigate this, but odor-sensitive individuals should be aware.
  • Health Considerations: Modern carpet protectors are generally low-VOC, but if you or your family members have respiratory issues, consult with the provider about eco-friendly or “green” alternatives.

Uneven Application Risks

  • DIY Kits: When homeowners apply protection unevenly, certain areas may remain vulnerable to stains.
  • Professional Inconsistencies: Even reputable providers can occasionally miss spots, especially in tight corners or under furniture, though this is rare when technicians follow industry best practices.

Not Bulletproof

  • Limited Lifespan: Most protective treatments last 12–18 months, especially in high-traffic zones. Reapplication is necessary to maintain efficacy.
  • Substance Limitations: Oil-based stains (e.g., butter, cooking oils) may still permeate the fibers if left unchecked. Prompt cleanup remains crucial.

Types of Carpet Protection Solutions

Topical Fluorochemical Protectors

  • Description: The most common category, these coatings encapsulate each fiber with fluorochemicals that repel water and oil-based substances.
  • Longevity: Typically 12–18 months per application.
  • Pros: Reliable, widely offered, and often backed by warranty endorsements.
  • Cons: Some fluorochemicals have come under scrutiny for environmental impact, though newer formulas aim for reduced toxicity.

Nanotechnology-Based Protectors

  • Description: These use microscopic particles to create a hydrophobic, breathable barrier.
  • Longevity: Claims suggest up to 24 months, but real-world results vary.
  • Pros: Often marketed as eco-friendly; fewer harsh chemicals.
  • Cons: Surfactants and binders may leave a residue, slightly altering the feel of the carpet.

Silicone-Based Protectors

  • Description: Silicone particles bond with fibers, creating a hydrophobic surface.
  • Longevity: Around 9–12 months.
  • Pros: Affordable, quick-drying.
  • Cons: Less effective against oil-based stains; may cause slight discoloration on certain types of carpet.

Hybrid Formulations

  • Description: Combinations of fluorochemicals and silicone or nanotech agents.
  • Longevity: 12–24 months, depending on traffic and cleaning frequency.
  • Pros: Balanced performance; some claim to offer the best of both worlds in protection.
  • Cons: Price points can be higher; there are fewer independent studies on real-world efficacy.

When exploring carpet protection services, ask vendors which specific solution they use. If environmental impact matters to you, dig into VOC content and biodegradability. Next, what is the total cost of all this?

Cost Breakdown: How Much Should You Expect to Pay?

Factors Influencing Price

Square Footage

Naturally, larger areas cost more. Service providers often offer tiered pricing:

  • 0–500 sq ft: $100–$300
  • 500–1,000 sq ft: $200–$500
  • 1,000+ sq ft: Custom quotes

Carpet Material and Pile Height

  • High-End Wool or Silk: Often commands a premium price, requiring gentle solutions and slower application, which increases labor time.
  • Synthetic Fibers (Nylon, Polyester, Olefin): More straightforward; typically on the lower end of price ranges.

Accessibility and Room Layout

Tight hallways, stairs, and furniture-dense areas might increase labor costs by up to 15–20%. Technicians need to maneuver carefully to ensure even coverage.

Brand Reputation and Guarantees

Well-known franchises or specialized eco-friendly providers charge more, offset by strong warranties (e.g., “If a stain becomes permanent, we’ll replace the carpet”).

Bundling with Carpet Purchase

Many flooring retailers offer carpet protection as a bundle with new carpet installation at a discounted rate. While the per-square-foot cost may seem lower, it’s embedded in the overall carpet purchase, so evaluate the actual incremental expense.

Estimated Price Examples

Scenario

Approximate Cost

300 sq ft living room (nylon carpet, professional)

$120–$180

800 sq ft home office (polyester carpet, pro)

$240–$400

1,200 sq ft entire apartment (mixed carpets, DIY)

$240–$600 (DIY: $0.20–$0.50/sq ft)

350 sq ft hallway + stairs (wool carpet, professional)

$200–$300

Note: DIY kits typically retail for $30–$60 per gallon, which is enough to cover approximately 500 sq ft. However, the labor is on you, and effectiveness can be hit-or-miss if the application isn’t uniform.

DIY vs. Professional: Which Is Better?

DIY Kit Advantages

Lower Initial Investment

  • A one-time purchase of a spray kit might cost $40–$80.
  • Reapplication at home (every 12 months) costs roughly the same, excluding your time.

Immediate Accessibility

  • There is no need to schedule appointments or wait for technicians.
  • Perfect for quick touch-ups after a minor spill.

Control Over Product Choice

  • You can choose green or non-toxic brands.
  • Shop based on personal preferences (scent-free, hypoallergenic).

DIY Kit Disadvantages

  • Uneven Coverage: Without professional equipment (e.g., a low-pressure sprayer), achieving full saturation on high-pile carpets is challenging.
  • Shorter Lifespan: Many DIY solutions last only 6–12 months, rather than the advertised 12–18 months.
  • Skill Required: Improper application can lead to visible “wet spots,” leading to matting or even discoloration.

Professional Service Advantages

Expertise and Equipment

  • Technicians are trained to identify various carpet types and select the appropriate protectors.
  • High-pressure, industrial-grade sprayers ensure deep, even penetration.

Warranty and Guarantee

  • Many providers offer warranty-backed services: if a spill becomes a permanent stain, they’ll replace or re-treat portions of the carpet.
  • Peace of mind: if anything goes awry, they’ll make it right.

Time Savings

  • The average professional treatment takes 30–45 minutes per room.
  • You skip the trial-and-error of DIY efforts; there is no need to wrestle with sprayers, ladders, or heavy furniture.

Advanced Solutions

  • Access to cutting-edge nanotechnology or hybrid formulations not available in retail.
  • Technicians can tailor treatment to high-traffic zones for maximum efficacy.

Professional Service Disadvantages

  • Higher Cost: Often 2–3 times more expensive per square foot than DIY kits.
  • Scheduling Constraints: You may need to wait days or weeks for an opening in the provider’s calendar.
  • Potential Upselling: Some companies bundle services you may not need (e.g., deep cleaning before protection), thereby inflating costs.

A balance: If you frequently host, have active children, or own pets, professional services often pay for themselves by preventing costly carpet replacements and repeated professional cleanings. For low-traffic areas or infrequently used spaces, a DIY approach may suffice.

Factors to Consider Before Investing

Household Activity Level

  • High Activity: Families with kids, pets, or frequent guests benefit most.
  • Low Activity: Spare bedrooms or seldom-used home offices may not justify the expense.

Carpet Quality and Warranty Requirements

  • High-End Carpets: Often require annual protection to maintain manufacturer warranties.
  • Budget Carpets: It might be cheaper to replace rather than protect.

Long-Term Plans

  • Home Ownership Duration: If you plan to sell within 1–2 years, maintaining immaculate carpets can significantly boost your home’s resale value.
  • Renting or Short-Term Stay: Landlords or property managers frequently require professional protection before move-in, check your lease.

Budget Constraints

  • Factor carpet protection into the overall flooring budget.
  • If cost is tight, prioritize high-traffic areas (such as the living room and hallway) over guest bedrooms.

Environmental and Health Concerns

  • Seek eco-friendly, low-VOC protectors if you or your family have sensitivities.
  • Ask providers for Safety Data Sheets (SDS) to verify chemical composition.

Frequency of Professional Cleaning

  • If you have already scheduled bi-annual deep cleaning, a protective layer can enhance cleaning efficacy and extend the intervals between deep cleans.
  • Conversely, if you rarely get professional cleanings, undetected soil can reside below the protective layer, leading to fiber abrasion over time.

Real-World Scenarios: When Protection Makes Sense

Families with Young Children

  • Spilled juice, ice cream drips, and crayon marks are practically inevitable.
  • Carpet protection allows rapid cleanup before dyes and sticky residues are set.

Pet Owners

  • Accidents (urine, vomit) and muddy paw prints are common headaches.
  • A protective layer can keep odors at bay and prevent discoloration from stains.

Entertainers

  • Hosting dinner parties means serving red wine, oily foods, and dealing with cutlery mishaps.
  • Protecting carpets reduces the risk of embarrassment; no one wants an expensive ruin on their floor.

High-End Rentals or Short-Term Vacation Homes

  • Turnover between guests can be hectic; instant protection minimizes damage caused by guests.
  • Reports of impeccable floors justify higher nightly rates and better reviews.

Commercial Spaces with Carpeted Areas

  • Offices, hotel rooms, or salons: consistent foot traffic, potential coffee spills, and grooming products.
  • Carpet protection services can reduce maintenance costs over months and uphold a professional appearance.

Conversely, if your home is carpeted only in low-traffic zones, such as a seldom-used reading room, prioritizing protection may not be necessary. Be aware that even light use can lead to soil buildup over time; a surprise spill can still be problematic.

Pros and Cons: A Quick Reference

Pros

Cons

Excellent stain resistance and extended carpet life

The upfront costs can be substantial

Reduced cleaning frequency and overall maintenance costs

Must reapply every 12–18 months (or sooner in high-traffic)

Maintains warranty and can boost home resale value

Potential chemical odors; low-VOC options may cost more

Peace of mind for families, pet owners, and entertainers

DIY applications are less practical than professional methods

Access to specialized, high-end formulations

Not foolproof, prompt cleanup is still required


Making the Decision: Are They Worth It?

In short, it depends. Carpet protection services offer undeniable benefits, such as stain resistance, extended lifespan, and warranty preservation, but they also carry costs and require maintenance. Let’s break down the decision-making process into actionable steps:

Evaluate Your Household Needs

  • High-traffic, high-risk for spills? Favor professional protection.
  • Seldom-used, low-risk area? Skip or use a DIY kit sparingly.

Calculate the True Cost

  • Compare local professional rates (get three quotes).
  • Factor in the cost of deeper, more frequent cleanings versus the cost of protection.
  • For valuable carpets (e.g., wool, Oriental rugs), even if the initial protection costs $0.50 per square foot, preventing a $1,500 replacement might justify it.

Check Warranty Requirements

  • If your carpet’s manufacturer specifies protective treatments as a warranty condition, it’s not optional. Skipping it could void portions of your warranty, leaving you responsible for future damage.

Weigh Environmental and Health Preferences

  • If odor, VOCs, or chemical residues concern you, consider seeking out eco-friendly protectors, although they may come at a premium.

Review Provider Credentials

  • In search of certification from the Institute of Inspection, Cleaning and Restoration Certification (IICRC).
  • Read online reviews. Confirm the company’s stain-repair guarantee: “If we can’t remove a fresh stain, we’ll remediate or cover the replacement.”

Plan for Reapplication

  • Schedule annual or biannual protection as part of your home maintenance calendar.
  • Set reminders, whether on your phone or calendar, so you don’t let the protective layer lapse.

Consider Alternative Solutions

  • For homeowners on a tight budget, consider area rugs in high-risk zones. These rugs can be replaced or cleaned more affordably than wall-to-wall carpeting.
  • Use entryway mats and enforce a “no shoes” policy indoors to minimize soil.
  • Invest in stain-resistant carpet (e.g., treated fibers) at the outset. While pricier, built-in resistance can complement or reduce the need for aftermarket protection.

Frequently Asked Questions

How long does carpet protection last?

Most professional treatments are advertised to have a lifespan of 12–18 months, depending on foot traffic and the frequency of cleaning. High-traffic zones (entryways, living rooms) may require touch-ups after 9–12 months, while bedrooms could stretch to 18–24 months.

Can I protect an already stained carpet?

Yes, but it’s advisable to remove existing stains first. Applying protection over stains may seal them in, making future removal nearly impossible. Most providers require a pre-treatment cleaning (steam cleaning or hot water extraction) before applying protective solutions.

Will carpet protection alter the appearance or texture of my carpet?

When applied correctly, professional solutions are virtually invisible. However, you may notice a slight change in “hand feel”, the fibers might feel marginally stiffer until the solution fully cures (usually within 24–48 hours). High-quality protectors aim to maintain the original texture and color.

Is it safe for pets and children?

Modern protectors are formulated to be low-VOC and non-toxic once dried. During application, keep pets and children away for at least 2–4 hours (air out the room). Always ask providers for Safety Data Sheets to ensure the chemicals meet your family’s safety standards.

Can I apply a carpet protector after a DIY shampoo?

Yes, but ensure the carpet is thoroughly rinsed and completely dry before applying any protector. Residual shampoo can interfere with the protector’s bonding, reducing its effectiveness.

Are there eco-friendly carpet protection options?

Absolutely. Seek out green-certified or cradle-to-cradle carpet protectors that use biodegradable, plant-based agents rather than traditional fluorochemicals. These may cost 10–20% more but reduce environmental impact and chemical exposure.

Conclusion

Carpet protection services can be a sound investment, especially if you own high-quality carpeting, have an active household, or need to preserve warranty coverage. By creating a defensive barrier against stains, spills, and soil, these services delay wear, reduce cleaning frequency, and potentially save hundreds or even thousands of dollars in replacement costs. Yet this peace of mind comes at a price: a non-negligible upfront investment, periodic reapplications, and potential exposure to chemicals (albeit low-VOC options exist).

If you’re on the fence, start by obtaining multiple quotes, scrutinizing provider credentials, and assessing your household’s unique risk factors. For moderate use or tight budgets, a carefully applied DIY protector combined with vigilant cleaning habits might suffice. Conversely, beyond the practical calculus of dollars and cents lies an emotional dimension often overlooked: the confidence that comes from knowing your home is ready to weather life’s little mishaps. A protective barrier underfoot is more than a chemical coating; it’s a silent guardian that empowers you to live boldly, invite friends over without fretting, let your children play freely, and welcome pets without hesitation. In essence, carpet protection services give you the freedom to focus on living rather than worrying about every potential spill.

Of course, nothing, no matter how advanced, can substitute for vigilance. Promptly blot spills. Vacuum regularly. Rotate furniture to prevent uneven wear. Think of protection as one pillar of a multifaceted maintenance strategy: pairing professional treatments with conscientious daily habits prolongs carpet life exponentially more than either approach alone. In rooms where frenzied activity reigns, combine protection with durable area rugs or removable runners. In quieter zones, periodic cleanings and strategic spot treatments may suffice. The ideal scenario combines prevention with protection, offering a balanced approach that reflects your household’s unique rhythm.

Finally, trust your instincts. If you value a flawless and inviting environment and can comfortably absorb the cost, professional carpet protection is a savvy investment, particularly in high-traffic or high-stakes areas. If frugality reigns supreme, targeted DIY applications, strategic furnishings, and disciplined cleaning may achieve acceptable results. Whatever path you choose, remember that carpets are more than upholstery: they’re canvases for daily life, absorbing memories and mishaps alike. Treat them with thoughtfulness today, and they’ll reward you with years of resilient beauty tomorrow.

Carpet Cleaning Innovations That Save Time and Money

Carpet cleaning. For many, it’s the necessary evil of home and commercial maintenance, tedious, time-consuming, and often expensive. Yet, in recent years, the game has undergone significant changes. Thanks to powerful innovations in technology, chemistry, and technique, what once required hours of scrubbing and hundreds of dollars in equipment can now be handled swiftly, efficiently, and without incurring significant costs.

Whether you’re a homeowner tired of weekend deep cleanings or a facility manager seeking to reduce costs and improve cleaning standards, this guide explores the latest carpet cleaning innovations that are revolutionizing the industry, saving both time and money in the process.

Why Innovation in Carpet Cleaning Matters

Let’s face it: carpets aren’t going away. From plush home rugs to high-traffic office floors, carpets add comfort, insulation, and style. But they also trap dirt, allergens, and bacteria. Traditional carpet cleaning methods, such as shampooing, steam cleaning, or dry powders, aren’t only labor-intensive but also ineffective. They often require long drying times, use excessive water, lead to re-soiling due to chemical residues, and demand costly machinery or repeated professional services.

Modern innovations aim to solve these problems. With more intelligent machines, eco-friendly solutions, and data-driven techniques, today’s carpet cleaning tools are faster, safer, and more cost-effective than ever.

Carpet Cleaning Innovations

Here’s a comprehensive table of carpet cleaning innovations, summarizing each method along with its core benefits, ideal use cases, and potential cost/time savings:

Innovation

Key Benefits

Ideal For

Saves Time/Cost By

Low-Moisture Cleaning Systems

Fast drying, minimal water usage, no mold risk

Offices, homes, and hotels

Shorter drying times, reduced water bills, and less downtime

Robotic Carpet Cleaners

Automated, AI-driven cleaning, data tracking

Extensive facilities, 24/7 buildings

Cuts labor costs, runs during off-hours

Green Cleaning Solutions

Eco-friendly, safe for pets/kids, reduces residue buildup

Homes, schools, and healthcare facilities

Prevents carpet damage, lowers chemical use, and improves air quality

Dual-Action Extractors

Simultaneous spray and suction, deep clean

Commercial buildings, rental services

Fewer passes needed, less water and detergent used

Intelligent Scheduling & Maintenance Apps

Automates cleaning plans, tracks performance

Property managers, large teams

Reduces admin time, optimizes scheduling

Dry Ice Carpet Cleaning

No moisture, chemical-free, deep clean

Industrial sites, data centers

No drying time, reusable instantly

Foam Cleaning Systems

Gentle on fibers, quick-drying, suitable for high-pile carpets

Residential, hospitality

Reduces mold risk, fast turnover of rooms

DIY Cleaning Subscriptions

Home delivery of kits, flexible scheduling

Households, pet owners

Avoids rental/professional fees, cleans on demand

UV-C Sanitizing Attachments

It kills germs & allergens, and is non-toxic

Healthcare, homes with children

Cuts chemical usage, improves hygiene

AI Spot Detection & Treatment

Real-time stain targeting, learning algorithms

High-traffic businesses, cleaning services

Maximizes efficiency, minimizes cleaning agent waste

Carpet Cleaning Drones

Aerial cleaning for large areas, low-contact

Warehouses, arenas, and exhibitions

Speeds up coverage and reduces physical labor

Subscription-Based Equipment Leasing

Access to premium gear without ownership

Cleaning services, hotels

Eliminates purchase costs, includes upgrades/maintenance

Anti-Re-Soiling Treatments

Repels dirt and prolongs a clean look

Lobbies, high-traffic areas

Reduces cleaning frequency, protects carpet fibers

Fiber-Specific Technologies

Custom settings per carpet type preserve the material

Luxury spaces, historic buildings

Prevents damage, extends carpet lifespan

Voice-Controlled Systems

Hands-free, integrates with intelligent assistants

Smart homes, elderly users

Low-Moisture Cleaning Systems:

Cleaning with High Speed and Low Moisture

Due to its significantly lower water usage and effective results, the low-moisture carpet cleaning method has obtained popularity in both residential and commercial spaces. This method uses considerably less water than typical steam cleaning and often employs innovative polymers and encapsulating agents that adhere to dirt and debris. Once the cleaning solution is applied, it dries quickly, forming crystals around soil particles that are easily vacuumed away. This technique reduces the risk of mold or mildew formation and minimizes the chance of over-wetting, which can damage carpet fibers. Businesses love it because it allows for almost immediate reuse of the space, and homeowners appreciate that furniture doesn’t have to be displaced for long periods. Low-moisture systems and also use less water and energy, which lowers utility costs and lessens environmental impact. These systems not only preserve the integrity of your carpet but also extend its lifespan, making them a wise investment for those who clean frequently.

Robotic Carpet Cleaners: Automation at Its Finest

The rise of robotic carpet cleaners represents a significant shift in the carpet cleaning industry, particularly in the commercial space. These autonomous machines, equipped with AI-powered navigation systems and sensors, can map out a space and clean it systematically with minimal human intervention. Even during non-operational hours, tasks that previously needed hours of manual labor can now be scheduled to run automatically. Facilities such as airports, malls, and large office buildings are adopting robotic vacuums and extractors to maintain a consistent level of cleanliness without dedicating staff to the task on a full-time basis.

Over time, the labor cost savings can be substantial. Robotic cleaners are also precise, their sensors help detect heavily soiled areas that require extra attention. Many models now come with cloud-connected dashboards, offering reports on cleaning times, coverage areas, and machine health. This data enables businesses to make informed maintenance decisions, ultimately enhancing operational efficiency and extending the lifespan of their carpeting.

Green Cleaning Solutions: Eco-Friendly Meets Economical

As sustainability becomes an increasingly important priority, green cleaning solutions have gained widespread popularity. Plant-based or biodegradable substances that are effective at removing stains yet gentle on carpets and the environment are used to create these environmentally friendly treatments. Unlike traditional chemical cleaners, green solutions do not leave behind harmful residues that attract more dirt or pose health risks to occupants. This makes them especially appealing in homes with children or pets, as well as in healthcare and educational settings. Green cleaning products often utilize enzymes that break down organic waste at the molecular level, allowing them to remove stains such as pet urine, food spills, and human fluids without the need for vigorous scrubbing. While the initial cost might be slightly higher, the long-term benefits are substantial, reduced wear on carpet fibers, improved indoor air quality, and fewer instances of allergic reactions. Additionally, many green products require less rinsing, resulting in faster cleaning times and lower overall water usage.

Dual-Action Extractors: One Pass, Total Clean

Dual-action extractors have redefined carpet cleaning efficiency by combining spray and suction capabilities into a single motion. This technology eliminates the need for multiple passes over the same area, significantly reducing labor and cleaning time. These extractors are especially useful in commercial environments where time is money and every minute spent cleaning is a minute taken from productivity. With powerful jets that inject cleaning solution deep into carpet fibers and immediate vacuum suction that removes the solution along with embedded dirt, these machines deliver a deep, thorough clean in a fraction of the time. Some high-end models even offer adjustable pressure settings and heat application, enhancing their effectiveness on stubborn stains or high-traffic areas. While they may come with a higher upfront cost, their time-saving benefits and superior performance make them a worthwhile investment. They also use less water and detergent per session, contributing to lower operating costs over time.

Intelligent Scheduling and Maintenance Apps

Technology isn’t just transforming machines, it’s changing how we manage cleaning itself. Intelligent scheduling and maintenance apps have revolutionized carpet care by automating the planning, monitoring, and execution of cleaning routines. These digital platforms enable users to create customized cleaning schedules tailored to their usage patterns, room size, and type of carpet. Some apps can even integrate with robotic cleaners or innovative building systems to initiate cleaning tasks automatically. This means fewer missed cleanings, less human error, and a consistently cleaner environment.

For commercial businesses, these tools offer detailed analytics and reports, enabling managers to track cleaning frequency, product usage, and labor efficiency. This level of insight not only helps reduce waste and costs but also ensures accountability among cleaning staff.

Homeowners benefit, too, by receiving reminders and tips for maintaining their carpets year-round. Ultimately, smart apps streamline the entire cleaning process, ensuring carpets stay cleaner longer without requiring excessive time or financial investment.

Dry Ice Carpet Cleaning: The Cold Frontier

Dry ice carpet cleaning is one of the most cutting-edge methods available, leveraging the unique properties of frozen carbon dioxide to deliver an exceptionally deep and dry clean. The process involves blasting small dry ice pellets onto the carpet surface, which instantly freezes grime and contaminants. As the pellets sublimate or transition directly from solid to gas, they lift dirt from the fibers without leaving any moisture behind. This method is not only fast and effective but also completely chemical-free, making it ideal for sensitive environments like hospitals or data centers. There is no drying time required, which drastically reduces cleaning disruption.

Although typically used in industrial settings due to specialized equipment, dry ice cleaning is gaining traction in residential and commercial carpet care as more compact and affordable machines enter the market. Its unparalleled efficiency and cleanliness make it a powerful option for those seeking the ultimate deep clean.

Foam Cleaning Systems

Foam cleaning systems offer an alternative to traditional wet methods by using a high-density foam that encapsulates dirt and debris for easy removal. These systems typically use rotary brushes to agitate the foam into the carpet fibers, allowing the solution to cling to the soil and lift it away from the carpet fibers. After a short dwell time, the foam and embedded dirt are vacuumed up, leaving a fresh and nearly dry surface behind. This technique works particularly well on delicate or high-pile carpets that could be damaged by vigorous cleaning or excessive water. Foam cleaning is particularly valued for its quick drying time, which is often less than an hour. This makes it ideal for places like workplaces, hotels, and schools that require immediate use. Additionally, the lower moisture levels reduce the risk of mold and mildew, contributing to better indoor air quality and healthier living environments. It’s an efficient, gentle, and cost-effective cleaning method.

DIY Carpet Cleaning Subscriptions

The rise of subscription-based carpet cleaning services is reshaping the DIY market by making professional-level results more accessible than ever. These services deliver cleaning kits to your door on a monthly or quarterly basis, complete with eco-friendly solutions, compact cleaning tools, and easy-to-follow instructions. For homeowners, this eliminates the hassle of renting bulky machines or scheduling costly appointments. Instead, you get a convenient, cost-effective alternative that allows you to clean-o-demand. Many services also offer strain-specific treatments and access to support resources, such as video tutorials or live chat with experts. This personalized approach enables users to tackle tough stains confidently and maintain their carpets’ fresh appearance throughout the year.

Ultimately, opting for a subscription service can be more economical than paying for one-off rentals or hiring professionals, especially in homes with kids or pets that need frequent cleanings. Plus, consistent maintenance helps preserve carpet life, further extending the value of your investment.

UV-C Sanitizing Attachments

UV-C sanitizing attachments bring a scientific edge to carpet cleaning by incorporating ultraviolet light to kill germs, bacteria, and viruses on contact. These devices often connect to existing vacuums or extractors, enhancing their cleaning power with the germicidal properties of UV-C radiation. Especially useful in settings where hygiene is paramount, such as hospitals, eldercare facilities, and daycare centers. These attachments offer an added layer of protection without the use of harsh chemicals. They are highly effective at reducing allergens, mold spores, and pathogens, which contributes to better indoor air quality and overall health. In homes, UV-C attachments are particularly beneficial for allergy sufferers or families with young children. While the technology may carry a higher initial cost, it reduces the need for multiple chemical treatments and deep-cleaning sessions, saving both time and money over the long term. It’s a low-effort way to ensure a deeper, more sanitary clean with every pass of the vacuum.

AI-Powered Spot Detection and Treatment

Artificial intelligence is pushing the boundaries of carpet cleaning with AI-powered spot detection and treatment systems. These advanced technologies utilize machine learning and image recognition to identify areas of high soiling, staining, or wear in real time. Once detected, the system automatically adjusts its cleaning intensity, solution concentration, or brush pressure to effectively treat those spots. This targeted approach prevents the overuse of cleaning agents and reduces water consumption, making the process both environmentally friendly and cost-effective.

Some high-end commercial systems can even learn from past cleaning sessions, becoming more accurate and efficient over time. The integration of AI also improves user experience, minimizing the need for guesswork or manual adjustments. For facility managers and cleaning professionals, this translates to increased productivity, improved results, and reduced operational costs. AI-powered solutions are anticipated to become a commonplace part of contemporary carpet care as the technology gets more accessible and user-friendly, completely changing the way we approach cleaning on all fronts.

Carpet Cleaning Drones: The Future of Large-Area Maintenance

Carpet-cleaning drones are in their early stages but show immense potential for maintaining expansive carpeted spaces in warehouses, arenas, or convention centers. Equipped with soft-brush attachments and directional airflow systems, these drones hover just above the carpet, using downward pressure to dislodge dirt while integrated vacuums or misters treat specific areas. Because they operate from above, there’s no risk of carpet compression or fiber damage. While commercial availability is limited, prototypes in Asia and Europe have already demonstrated time savings of up to 40% for large-scale applications. Additionally, drones reduce the need for heavy-duty equipment and large cleaning crews, significantly cutting operational costs. As battery life, AI navigation, and load capacity improve, carpet-cleaning drones could become a game-changer in facility maintenance, offering a no-contact, energy-efficient cleaning method tailored for hard-to-reach or crowded areas where traditional machines fall short.

Subscription-Based Equipment Leasing for Professionals

For cleaning businesses or property managers seeking access to the latest equipment without capital investment, subscription-based equipment leasing has emerged as a flexible and economical solution. Companies like Tennant, Kärcher, and Rug Doctor now offer monthly leasing plans that include regular upgrades, maintenance, and replacement options. This eliminates the hefty upfront costs and depreciation that typically come with owning commercial-grade machines. Users can select from a catalog of extractors, vacuums, steamers, and robotic systems, tailoring the equipment mix to meet seasonal or site-specific demands. It also ensures continuous access to cutting-edge innovations, such as low-moisture systems or AI-integrated models, without worrying about obsolescence. For small cleaning businesses, this model improves cash flow and lowers the barrier to entry. For extensive facilities, it means access to best-in-class technology with zero downtime due to breakdowns, as most leasing plans include emergency service and on-site support.

Anti-Re-Soiling Treatments: Longer Lasting Results

One of the biggest challenges in carpet care isn’t the initial cleaning, it’s maintaining the carpet’s cleanliness afterward. This is where anti-re-soiling treatments shine. These post-cleaning sprays or conditioners form a microscopic barrier over carpet fibers, repelling dust, dirt, and liquids for weeks or even months. The latest innovations include fluoropolymer-based solutions and nanotech coatings that resist foot-traffic grime, pet hair, and even oil-based spills. These treatments can be applied manually or integrated into professional extraction systems for seamless application. By preventing rapid re-soiling, users extend the intervals between major cleans, which dramatically saves time and money in the long run. They’re particularly effective in high-traffic zones like lobbies, hallways, and retail spaces. As a bonus, they also help maintain the visual appeal of the carpet, reducing color fading and fiber wear. Some eco-conscious variants even come with USDA BioPreferred certification, adding a sustainable twist to superior carpet protection.

Carpet Fiber-Specific Cleaning Technologies

Not all carpets are created equal, wool, nylon, polyester, and olefin fibers each have unique characteristics. Innovations now include fiber-specific cleaning technologies that automatically adjust cleaning parameters (brush stiffness, water pressure, chemical mix) based on carpet composition. Some systems utilize RFID tags or smartphone-scannable QR codes embedded in carpet tiles to identify the fiber type instantly. Others incorporate spectroscopy sensors that analyze material composition in real time. These systems optimize cleaning efficacy while reducing the risk of damage, especially on delicate or premium fibers, such as silk blends or natural wool. This technology is particularly beneficial in luxury hotels, heritage sites, and designer homes, where aesthetics and preservation are of the utmost importance. From a cost-saving perspective, fiber-specific cleaning prevents unnecessary wear and tear, thereby extending the carpet’s lifespan and reducing the frequency of replacement. It also minimizes operator error, making it a favorite among cleaning pros aiming to deliver high-quality results with minimal training.

Voice-Controlled Cleaning Systems

As smart home ecosystems evolve, voice-controlled carpet cleaning devices have emerged, offering hands-free convenience that seamlessly integrates into daily routines. Devices like the iRobot Roomba j7+ and Roborock S8 Pro Ultra now work with Amazon Alexa, Google Assistant, or Apple Siri to start, stop, or schedule cleanings. Some systems even allow for room-specific commands, such as “clean the living room only” or “focus on the hallway.” The integration of voice tech makes carpet maintenance less of a chore and more of a background task, especially useful for people with mobility challenges, busy families, or tech-forward households. Users can also receive voice alerts about maintenance needs, filter replacements, or battery status, adding another layer of efficiency. While the cost of these intelligent systems may seem high initially, their automation and ease of use reduce the need for frequent deep cleans, resulting in both time and money savings over the months of consistent upkeep.

FAQs

Are robotic carpet cleaners worth the investment?

Yes. While the upfront cost may be higher, they significantly reduce labor costs and keep carpets consistently clean with minimal oversight.

How long does low-moisture carpet cleaning take to dry?

Typically under 2 hours, making it ideal for spaces that require quick use.

Can eco-friendly solutions clean as effectively as chemicals?

Absolutely. Many green products use enzymes that break down stains without leaving harmful residues.

Is dry ice carpet cleaning safe for homes?

Yes, though it’s currently more common in industrial use. As compact systems become available, it’s expected to enter residential markets.

How often should carpets be treated with UV-C attachments?

It depends on usage, but monthly treatment is effective in reducing allergen and bacterial buildup.

Conclusion

From advanced robotics and AI to enzyme-based cleaners and app-controlled schedules, carpet cleaning has undergone a dramatic transformation. These innovations don’t just offer convenience; they save hours of labor and reduce operational costs while delivering a cleaner, healthier environment. Whether you’re managing a facility or maintaining a home, incorporating these cutting-edge methods means smarter cleaning, faster turnaround, and long-term savings. The future of carpet care is not just clean, it’s intelligent, efficient, and sustainable.

Freshness Guaranteed: Top Odor-Neutralizing Methods for Every Room

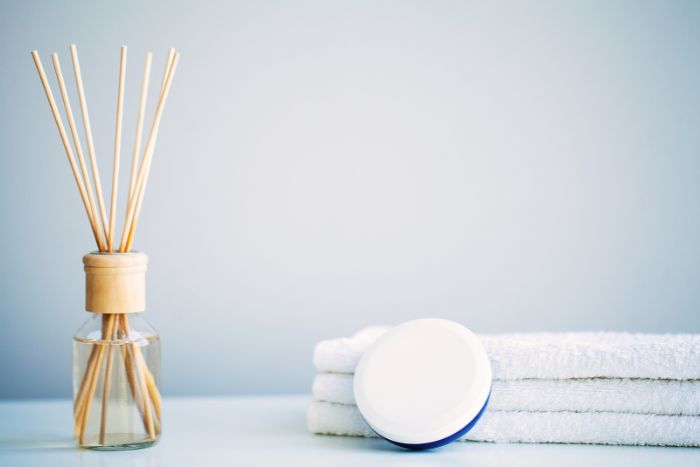
Lingering odors can transform a welcoming home into an unpleasant environment. Whether it’s the smell of last night’s dinner, a musty guest room, or pet accidents, unwanted scents can invade every corner. Thankfully, you don’t need harsh chemicals to maintain freshness. By identifying odor sources, improving airflow, and using simple neutralizers, many of which you likely have on hand. You can keep each room smelling clean and inviting. Below is a concise guide to the best odor-neutralizing methods for every space in your home.

Why Neutralizing Odors Matters

Health and Well-being

Lingering odors aren’t just unpleasant; they can signal the presence of bacteria, mold, or poor air circulation. Over time, poor indoor air quality can exacerbate allergies, induce headaches, and even contribute to respiratory problems. Neutralizing smells at the source enhances both physical health and mental comfort.

Home Value and Aesthetics

An odor-free home not only feels cleaner but also gives a positive impression to guests or potential buyers. Even subtle scents, like stale cigarette smoke or pet dander, can linger and detract from your home’s perceived value. Consistent odor control preserves a bright, welcoming atmosphere.

Long-Term Savings

Some odor-causing issues, like mold growth under flooring or persistent pet stains, can become expensive problems if left unchecked. Consistent, proactive odor neutralization helps you catch these issues early, saving money on deep-cleaning services or repairs down the road.

Key Principles of Odor Control

Source Elimination

Identify and remove the root cause, spoiled food in the fridge, damp towels, or hidden trash. Masking odors only provides temporary relief; addressing the origin ensures lasting freshness.

Airflow Enhancement

Stale air collects scents. Open windows, run fans or use Exhaust Vents to disperse odor molecules. Even a cracked window or a ceiling fan on low can make a notable difference.

Absorption and Neutralization

Substances like baking soda and activated charcoal trap odor-causing particles. Enzymatic cleaners break down organic residues, while white vinegar chemically neutralizes many smells. Choose the right agent based on what’s causing the odor.

Routine Maintenance

Weekly cleaning, scrubbing surfaces, laundering linens, and emptying trash bins, prevent odors from accumulating. Consistency is the secret to a perpetually fresh home.

Room-Specific Strategies

Kitchen

Trash and Recycling

  • Empty bins daily. Line with a thin layer of baking soda, or use odor-absorbing liners.
  • Weekly: Use a solution of equal parts white vinegar and warm water to scrub the bins, then allow them to air dry.

Refrigerator and Pantry

  • Clear expired items biweekly. Wipe shelves with a baking soda-water solution (1 tbsp per quart).
  • Store an open box of baking soda on a shelf and swap it out every three months. Activated charcoal sachets also excel in low-humidity spaces.

Cooking Surfaces and Drains

  • After cooking, simmer water with lemon slices or cinnamon sticks for 10–15 minutes, grease loosens, fresh scent emerges.
  • Microwave: For three to five minutes, heat a bowl of water with a quarter cup of vinegar; then wipe it down.
  • Garbage Disposal: Run cold water and grind ice cubes with salt to dislodge debris.
  • First, crush the citrus rinds. Then, stream one cup of vinegar and half a cup of baking soda below the drain. Let it sit for a few minutes, then rinse with hot water.

Bathroom

Toilet and Sink

  • Weekly: Add a half-cup of baking soda to the bowl, then a cup of vinegar; let fizz for 10–15 minutes before scrubbing.
  • Install an enzymatic toilet freshener tablet in the tank and replace it monthly.
  • Pour baking soda and kosher salt (in equal parts) down the sink drain monthly; follow with hot water. For stubborn odors, add a cup of vinegar, let it fizz, then flush with boiling water.

Shower, Tub, and Grout

  • Post-shower: Use a squeegee to remove excess moisture from walls and glass.
  • Weekly: Spray tiles and grout with a mixture of one part white vinegar and five parts water. Let it sit for 10 minutes, then rinse.
  • Spread a mixture of hydrogen peroxide and baking soda to the grout, leave it for 15 to 20 minutes, and then scrape to remove the black mold patches.

Linens and Ventilation

  • Launder towels and bath mats twice a week in hot water, adding a half-cup of vinegar to strip away residues.
  • Run the exhaust fan during and after showers for 15–20 minutes. If no fan exists, a small portable dehumidifier helps keep humidity below 50%.

Living Room

Upholstery and Carpets

  • Sprinkle baking soda over sofas, chairs, and carpets; let sit for at least 30 minutes (overnight if possible), then vacuum.
  • Every six months, steam-clean carpets and upholstery to remove embedded dirt and bacteria.
  • In the event of a pet mishap, break down the urine proteins with an enzymatic cleanser and then absorb any remaining stench with baking soda.

Soft Furnishings

  • Machine-washable throws and curtains: Launder monthly in hot water with a half-cup of vinegar.
  • Non-washable fabrics: Shake outside and lightly steam with a handheld steamer, or hang outdoors on a breezy day to air out.

Air Purifiers and Plants

  • Run a HEPA-plus-carbon air purifier on “auto” mode to filter particulates and neutralize VOCs.
  • Add Spider Plants, Peace Lilies, or Boston Ferns for natural air filtering, ensure they don’t develop mold in their soil.

Bedroom

Bedding and Mattresses

  • To remove bacteria and soften the fabric, wash linens and pillowcases once a week in hot water, adding a half-cup of vinegar during the rinse cycle.
  • For mattresses: Sprinkle baking soda, let it sit for several hours (sunlight is ideal), then vacuum. Steam-clean semi-annually, moving slowly to avoid over-wetting.
  • Protective mattresses and pillow covers block sweat and fluids; they’re easier to wash than the mattress itself.

Closets and Drawers

  • Place cedar blocks or lavender sachets among garments.
  • Use airtight plastic bins for off-season clothes; cardboard traps moisture and odors.
  • Keep closets aerated by occasionally leaving doors ajar and using moisture-absorbing packets.

Floors and Carpets

  • Area rugs: Shake outdoors every other week; deep clean with baking soda and vacuum.
  • Hardwood/laminate: Sweep daily; mop quarterly with a vinegar-water solution (¼ cup vinegar per gallon of water).

Pets

  • If pets share the bedroom, wash their beds weekly or vacuum thoroughly.
  • Run a small HEPA purifier on low during sleep to reduce dander and mild pet odors.
  • Consider training pets to stay off the bed or out of the room altogether.

Home Office / Study

Electronics and Work Surfaces

  • Dust keyboards and vents weekly with compressed air to prevent warm, stale odors.
  • Wipe desks and shelves with a microfiber cloth dampened in mild soap; follow up with diluted vinegar for wood surfaces.

Carpets and Upholstery

  • Sprinkle baking soda on rugs and fabric chairs before leaving the room; vacuum the next morning.
  • Steam-clean or use a fabric refresher spray monthly to remove dust and eliminate lingering odors.

Air Quality Aids

  • Use an ultrasonic diffuser with a few drops of lemon or eucalyptus oil for a light, refreshing aroma, avoid overpowering concentrations.
  • Place a small activated charcoal pouch on a shelf or in a desk drawer to discreetly trap odors.

Basement, Attic, and Storage

Moisture Control

  • Check the humidity with a hygrometer, aim for a reading below 60%, ideally under 50%.
  • Fix leaks promptly (pipes, foundation cracks, roof). If needed, install a sump pump or reroute drainage.
  • Wearing gloves and a mask, scrub minor mold patches with a bleach-water solution (1 cup bleach to 1 gallon water).

Odor Absorbers

  • Place moisture absorbers (DampRid packets or silica gel sachets) on shelves and in corners.
  • Run a dehumidifier in damp basements and empty it on a weekly basis. In attics, ensure the vents are clear to allow for adequate airflow.
  • Spread activated charcoal in open bins throughout to trap musty smells, replace every 3–6 months.

Storage Practices

  • I prefer airtight plastic containers over cardboard for textiles, books, and linens.
  • Inspect stored items seasonally for pests or mold.
  • Air out long-stored belongings outdoors for a few hours before reintroducing them to living spaces.

Universal Odor-Neutralizing Tools

Baking Soda

Cheap and versatile, sprinkle on textiles, place open boxes in fridges and closets, and add to laundry as a booster.

Activated Charcoal

Porous structure traps VOCs. Use small pouches in cabinets, basements, cars, and closets; replace them periodically.

White Vinegar

Acetic acid neutralizes alkaline odors and bacteria. Employ as a multi-surface cleaner, laundry additive, or steam treatment in microwaves.

Enzymatic Cleaners

Contain bacteria or enzymes that digest organic residues, ideal for pet stains, bathroom mildew, and kitchen grease. Follow product instructions carefully.

Essential Oils

Certain oils (lavender, tea tree, lemon) offer mild antimicrobial effects and pleasant scents. Use sparingly in diffusers, room sprays, or added to cleaning solutions.

Portable Air Purifiers

Models with HEPA and activated carbon filters effectively remove particulates and absorb odors, making them ideal for bedrooms, living rooms, and offices.

Quick Maintenance Checklist

Weekly Tasks

  • Kitchen: Empty the trash, wipe down the counters, check the fridge for spoiled items, and sprinkle baking soda in the sink.
  • Bathroom: Scrub the toilet and sink, launder towels, wipe down tiles, and clean drains with a mixture of baking soda and vinegar.
  • Living Areas: Vacuum carpets and upholstery, dust surfaces, and launder throws.
  • Bedroom: Change bed linens, vacuum the floors, air out the mattress, and declutter.
  • Home Office: Dust electronics, wipe desk, vacuum or sweep.
  • Basement/Attic: Inspect for leaks, run a dehumidifier, and replace charcoal sachets.

Monthly Tasks

  • Deep-clean appliances (oven, microwave, dishwasher) with vinegar and baking soda.
  • Replace HVAC and purifier filters.
  • Clean under and behind large furniture.

Seasonal Tasks

  • Inspect gutters, fix roof leaks, and clear attic vents.
  • Check for hidden water intrusion in basements and crawl spaces.
  • Service HVAC system for optimal airflow and filtration.

Eco-Friendly Odor Solutions

For those seeking greener alternatives, eco-friendly methods can be just as potent. Instead of relying on synthetic chemicals, consider harnessing nature’s arsenal of botanicals, natural acids, and biodegradable materials.

Citrus Peels and Herb Sachets

  • Why It Works: Citrus peels contain natural oils that emit a bright, clean scent. Herbs such as lavender, rosemary, and mint possess antimicrobial properties.
  • How to Use: Peels from oranges, lemons, or grapefruits can be dried in a low-temperature oven until they are crisp. Combine them with sprigs of dried lavender or rosemary, and place the mixture in small muslin bags. Tuck these sachets into drawers, closets, or shoes. Replace every 4–6 weeks or when the aroma fades.

Bamboo Charcoal Bags

  • Why It Works: Bamboo charcoal is a renewable resource. Its highly porous structure captures moisture and odor molecules without releasing any chemicals.
  • How to Use: Purchase small bamboo charcoal bags (often found in eco-friendly home stores). Place one in a refrigerator, another in a bathroom cabinet, and a few in living areas prone to dampness. Every 2–3 months, hang the bags outside in direct sunlight for a few hours to rejuvenate their adsorption capacity.

DIY Vinegar Spritzers

  • Why It Works: Vinegar’s acidity cancels out alkaline odors, and because it’s a natural acid, it leaves no harmful residue once it dries.
  • How to Use: In a spray bottle, combine one part of white vinegar with four parts of distilled water. Put on 5 to 7 drops of your favorite essential oil for a subtle scent. Lightly mist carpets, curtains, or upholstery, never soak. Allow items to air-dry and enjoy a scent-free, clean surface.

Houseplants as Natural Filters

  • Why It Works: Certain plants remove VOCs (Volatile Organic Compounds) from indoor air, converting them into harmless byproducts.
  • Top Picks: Snake plants, pothos, and spider plants need little care and do well in low light.
  • How to Use: Group several potted plants on stands or shelves, ensuring good airflow around the leaves to prevent disease. Every month, wipe leaves with a damp cloth to remove dust and optimize their filtering ability.

Natural Baking Soda Blends

  • Why It Works: Baking soda remains one of the most versatile, non-toxic odor absorbers. Airing it with fragrant herbs or citrus zest enhances its appeal.
  • DIY Deodorizing Jar
  • Start by adding 1 cup of baking soda in a shallow glass or plastic container, one tablespoon of finely shredded, dried citrus peel, and one teaspoon of dried lavender petals or mint. Secure the lid, after poking several small holes into it, and set the jar wherever odors tend to linger: kitchen counters, closets, or near the litter box are all good spots. To keep it fresh and compelling, swap out the mixture for a new batch once a month.

Cross-Ventilation Tips

  • Why It Works: Bringing in outdoor air helps to dilute and carry away trapped odors. y continually replacing stagnant indoor air, odor-bearing molecules are dispersed more quickly.
  • How to Use: On days when the weather is mild, open windows on opposite sides of a room to create a gentle breeze through the space. If you live in an apartment without windows to open, position a small exhaust fan near the front of your unit. The fan will push indoor air outside and draw in cleaner air from under doors or through vents.

FAQs

How often should I replace baking soda or charcoal absorbers?

Swap baking soda every 3–4 months and replace charcoal pouches every 3–6 months, depending on humidity and odor levels.

Can I use vinegar on all surfaces?

Most countertops, tiles, and glass can be cleaned with vinegar, but porous stone (like marble or granite) should not be exposed to it because it can etch it.

Are enzymatic cleaners safe for children and pets?

Most are non-toxic once dry but always follow label instructions. Ensure children and pets remain clear of the area while it’s being applied and as it dries.

Will essential oil diffusers remove odors?

They mask scents rather than neutralize them. Combine diffusers with absorbers (baking soda, charcoal) for best results.

How can I prevent mold odors in basements and attics?

Keep humidity below 50% using a dehumidifier or moisture absorbers.

What’s the quickest way to freshen a musty carpet?

After adding baking soda and letting it set for at least half an hour (or overnight if feasible), vacuum it thoroughly.

Conclusion

Maintaining an odor free home doesn’t require elaborate techniques, just consistent habits, simple materials, and an eye for problematic areas. From kitchens to bedrooms, each room presents its unique set of challenges. However, by removing odor sources, improving ventilation, and utilizing absorptive agents like baking soda or activated charcoal, you can create a consistently clean environment. Incorporate these methods into your routines, and soon, every corner of your home will stay inviting and brilliantly fresh.

Bathroom Mold Prevention Tips You Should Know

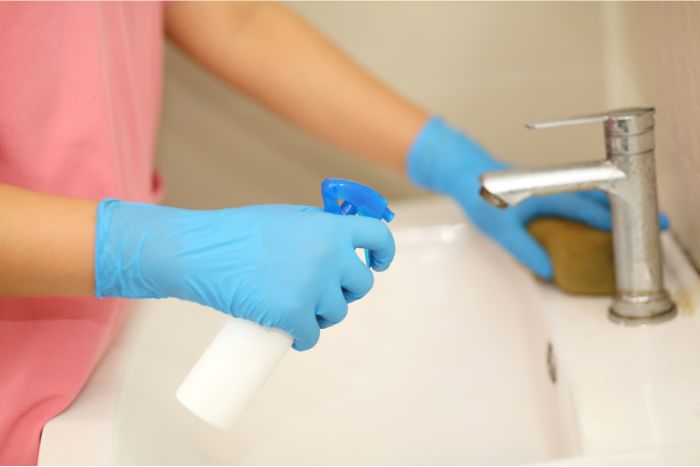
Bathroom mold can be a persistent problem, turning a once-fresh, clean space into a musty, unhealthy environment. It often begins as small black or green specks along grout lines, corners, and behind fixtures. If left unaddressed, it can rapidly spread, leading to health risks, foul odors, and damage to the structure. This comprehensive guide will delve into Bathroom Mold Prevention Tips You Should Know, helping you keep your bathroom mold-free year-round.

Why Bathroom Mold Grows

Bathrooms naturally trap moisture from showers and baths; steam condenses on tiles, grout, and ceilings. When humidity remains above 60% for extended periods, mold spores, ever-present in the air, land on damp surfaces and begin colonizing. Porous materials like untreated grout, caulk, and drywall absorb moisture, creating microscopic pockets where mold thrives. Even small drips from leaky faucets or shower-heads feed these colonies. Inadequate ventilation, such as relying solely on a windowless design or using an undersized exhaust fan, prevents humid air from escaping. Without consistent airflow, moisture lingers, allowing spores to multiply and spread.

Additionally, cooler night time temperatures can cause condensation on walls, further feeding mold growth. Over time, this cycle results in visible black, green, or brown spots along grout lines and corners. Addressing moisture sources, improving air circulation and fixing leaks, is the foundational step to stop mold before it takes hold.

Health Hazards of Bathroom Mold

Mold exposure in bathrooms can trigger a range of health issues, particularly for sensitive individuals. When inhaled, mold spores irritate nasal passages, leading to sneezing, runny nose, and itchy, watery eyes and these symptoms are often mistaken for seasonal allergies. People living with Asthma may experience more frequent attacks or increased wheezing and shortness of breath, as mold can inflame the airways and reduce lung function. Prolonged exposure to species like Stachybotrys chartarum (black mold) can produce mycotoxins; though rare at home, these toxins contribute to chronic headaches, fatigue, and even cognitive difficulties. Skin contact with moldy surfaces can sometimes lead to rashes, redness, or exacerbation of eczema. Beyond personal health, mold weakens structural materials, causing grout to become brittle, drywall to warp, and wooden studs to rot, compromising bathroom integrity. Additionally, persistent mildew odors create an unpleasant atmosphere, discouraging regular cleaning and exacerbating mold growth. Recognizing these hazards underscores the importance of prevention and early intervention.

Identifying Early Signs of Mold

Detecting mold early prevents larger infestations. One of the first warning signs is a persistent, musty, or earthy odor, even when no visible mold is present. Check grout lines between tiles: look for tiny dark flecks or fuzzy patches, especially in corners, along shower edges, and around the toilet base. Walls may exhibit discoloration, yellowish or brownish stains behind fixtures, indicating moisture intrusion. Inspect caulk seals for peeling or cracking since gaps allow water to seep into hidden cavities. If paint bubbles or wallpaper peels on bathroom walls or ceilings, moisture accumulates behind the surface, signaling potential mold growth. Another clue: excessive condensation on mirrors, windows, or pipes that doesn’t dissipate quickly. Finally, if occupants develop unexplained allergy symptoms, frequent sniffles, scratchy throat, or skin irritation, after using the bathroom, suspect mold. A flashlight and mirror can help inspect recesses behind shelves or pedestals. Early detection enables prompt cleaning and repairs, preventing more extensive remediation later.

Essential Prevention Tips

Improve Ventilation: The Single Most Important Step

  • Use an Exhaust Fan: Always run your bathroom’s exhaust fan during showers and baths, and leave it on for at least 20–30 minutes afterward. This helps expel warm, moist air.
  • Open Windows: When weather permits, crack a window to create cross-ventilation. Fresh air reduces humidity levels quickly.
  • Install a Timer Switch: If your fan lacks an automatic shut-off feature, add a timer to ensure it continues running after the shower, drawing out all moisture.
  • Ceiling Fans (if feasible): In larger bathrooms, a small ceiling fan can keep air moving, preventing pockets of stagnant humidity.

Short sentence. Removing excess moisture is non-negotiable. Without adequate ventilation, even the cleanest bathroom will become a prime spot for mold growth.

Control Humidity Levels

  • Use a Dehumidifier: If your bathroom remains damp despite the use of fans, a compact, portable dehumidifier can lower the humidity level below the critical 60% mark.
  • Monitor Humidity: Invest in a hygrometer (available for under $15) to track relative humidity. Ideally, keep levels between 30% and 50%.
  • Fix Leaks Promptly: Dripping faucets, loose showerheads, or leaking pipes contribute to continual moisture. Address plumbing issues immediately to prevent micro-environments where mold can thrive.
  • Heat Towel Racks: Heated towel racks not only warm towels but also help evaporate residual moisture on the walls and floors.

Maintaining humidity levels helps prevent mold from forming. Simple. Effective. Vital.

Opt for Mold-Resistant Materials

  • Mold-Resistant Drywall (Green Board): When renovating, choose moisture-resistant drywall for shower surrounds and walls. It contains additives that slow mold growth.
  • Anti-Mildew Paint: High-quality bathroom paints often contain mildewcides. Paint your walls and ceilings with these specialized formulas to create a barrier.
  • Waterproof Grout & Caulk: Standard grout can be porous; switch to epoxy grout or penetrate-sealant-coated grout to minimize water infiltration. Use silicone-based, mildew-resistant caulk around tubs and sinks to prevent mildew growth.
  • Plastic Shower Curtains: Use a washable, synthetic liner instead of cloth curtains, which can absorb moisture and promote mildew growth. Replace plastic liners every three to six months, or wash the cloth liners frequently.

Renovating with mold-resistant materials pays off in the long term. Although initial costs may be higher, your bathroom will remain cleaner and healthier.

Establish a Consistent Cleaning Routine

  • Weekly Deep Clean: Scrub tiles, grout, and corners with a bathroom cleaner formulated to remove mold and mildew. Pay attention to corners, behind toilets, and inside shower niches.
  • Squeegee After Showers: Keep a squeegee in the shower. Remove water from glass doors, tile walls, and the floor immediately after each use to prevent pooling.
  • Use Vinegar Sprays: Undiluted white vinegar is acidic enough to kill 82% of mold species. Cascade the mixture into a spray bottle and lightly spray the affected areas once a week. Then, wipe them dry.
  • Re-Caulk Annually: Even the best caulk degrades over time. Inspect all joints annually; reapply silicone caulk as needed to seal gaps and cracks.
  • Wash Reusable Items: Rinse and wash loofahs, washcloths, and bath mats on a weekly basis. These harbor moisture and can develop mold quickly.

Consistency matters. A quick 10-minute wipe-down can save hours of remediation later.

DIY Mold Cleaning Solutions

  • Vinegar & Baking Soda: Spray undiluted white vinegar on grout lines and corners, allowing it to sit for 30 minutes. Scrub with a brush, then rinse. Apply a baking soda paste to stubborn spots and scrub again, rinsing thoroughly. The acidity kills most spores, while baking soda neutralizes odors and lifts residue.
  • Hydrogen Peroxide: Mix one part 3% hydrogen peroxide with two parts water in a spray container. Apply to moldy tile or grout, let it bubble for 10–15 minutes, then scrub and rinse. This method is effective on non-porous surfaces without bleaching colored grout.
  • Bleach Mixture: Dilute one cup of bleach in one gallon of water. Wearing gloves, apply to white grout or porcelain surfaces and let it sit for 10 minutes before scrubbing. Rinse completely. Bleach eliminates mold quickly but can discolor colored surfaces and irritate skin,use sparingly.
  • Tea Tree Oil: Top up a spray bottle with one cup water and one teaspoon tea tree oil, then shake to combine. Mist affected areas and let it sit for several hours or overnight. Wipe away mold and rinse. Tea tree oil is a natural antifungal, leaving behind a fresh scent without harsh chemicals.

Professional Tactics & Advanced Measures

  • Whole-House Ventilation Systems: Install a Heat Recovery Ventilator (HRV) or Energy Recovery Ventilator (ERV) to exchange moist indoor air with drier outside air, balancing humidity throughout the home. Ideal for climates with high humidity, these systems significantly lessen bathroom moisture.
  • Mold-Resistant Construction: During renovations, use Type X moisture-resistant drywall or cement boards in shower areas. Pair with fiberglass insulation behind walls to prevent moisture absorption. Use waterproofing membranes under tile to redirect water to drains.
  • Professional Inspection & Remediation: If mold covers over 10 square feet, recurs despite DIY efforts, or if occupants experience severe symptoms, call certified mold remediation specialists. They’ll test spore counts, locate hidden leaks, contain the area, and apply antimicrobial treatments. Post-remediation testing ensures spores are reduced to safe levels.
  • Encapsulation Products: Use EPA-registered antimicrobial sealants or encapsulants on affected drywall or wood framing. These products create a barrier that resists moisture absorption and inhibits the regrowth of spores.

Budget-Friendly Mold Prevention Solutions

You don’t need to splurge to keep mold at bay. First, swap expensive cleaners for white vinegar, undiluted, it kills up to 82% of mold species. Purchase an inexpensive spray bottle and refill as needed; a single gallon of vinegar can last months. Baking soda, another cost-effective option, works wonders: sprinkle it on damp tiles, scrub, and then rinse to remove residue and odors. For ventilation, if you lack a powerful exhaust fan, prop a small, portable fan near the bathroom door to push moist air out. Install inexpensive stick-on moisture absorbers, such as silica gel packets or charcoal sachets, under sinks or inside cabinets; replace them every two months. Reuse old towels as rags for wiping down surfaces instead of buying specialty microfiber cloths. Finally, inspect used “free” or thrift-store shower curtains: wash them, then hang them to dry; they can be just as effective as new liners when cleaned regularly. Simple swaps and repurposed items keep costs low while thwarting mold growth.

Mold Prevention for Small or Windowless Bathrooms

Tiny bathrooms lacking windows face unique challenges, moisture has nowhere to escape, so every droplet counts. If a built-in exhaust fan is absent or underpowered, consider installing a composite vent with a booster switch, which amplifies airflow only when needed. Position a dehumidifier on a counter or ledge; models under $50 can lower humidity to safe levels. After showering, prop the door open for at least ten minutes to allow damp air to diffuse into adjacent rooms. Keep a microfiber towel inside the shower, wipe down walls and floors immediately upon exiting to capture water before it clings to grout. Replace bulky bath mats with ultra-thin, quick-dry PVC mats that resist pooling. Hang towels on hooks outside the bathroom to dry instead of over rods inside; this prevents stagnant air from accumulating. Finally, paint walls and ceilings with a mold-resistant primer, these inexpensive coatings create a barrier, preventing spores from embedding in porous surfaces. In compact spaces, strategic airflow and swift moisture removal are critical.

Safe Practices Around Children and Pets

When preventing and cleaning mold, prioritizing safety around children and pets is essential. First, choose non-toxic, fragrance-free cleaners: undiluted white vinegar and baking soda provide effective mold control without harsh chemicals. If you opt for commercial products, read the labels, and never mix bleach with ammonia or other cleaners, as the resulting fumes can endanger children and pets. Always store cleaning supplies on high shelves or locked cabinets. When scrubbing moldy grout or tiles, wear gloves and, if possible, a simple dust mask to avoid inhaling spores. Keep children and pets out of the bathroom until the surfaces are dehydrated. After cleaning, ventilate thoroughly by opening doors and running fans to clear any residual odors. Consider placing barrier gates to prevent toddlers or curious cats from entering wet areas. For long-term prevention, choose mold-resistant paints and caulks labeled as low-VOC; these reduce off-gassing and lower the risk of respiratory irritation. Prioritize non-toxic solutions and controlled drying periods to safeguard health.

Bathroom Mold Prevention Tips

Tip

Description

Improve Ventilation

Run an exhaust fan during and 20 minutes after each shower; crack a window if possible. This pushes humid air out, preventing moisture from lingering on walls and surfaces.

Control Humidity

Keep indoor humidity between 30–50% using a hygrometer and, if needed, a small dehumidifier. Fix drips promptly, any continuous leak feeds mold.

Use Mold-Resistant Materials

Install green board (moisture-resistant drywall) or cement backer board in wet zones. Opt for epoxy grout and silicone-based, mildew-resistant caulk around tubs and sinks.

Squeegee After Shower

Swipe water off tiles and glass doors immediately to stop pooling. Even a quick pass with a squeegee removes most of the surface moisture.

Regular Cleaning

Wipe down walls, grout lines, and corners weekly with undiluted white vinegar or a commercial mold cleaner. Less than 10 minutes keeps spores from multiplying.

Inspect and Repair Leaks

Check faucets, shower-heads, and under-sink pipes on a monthly basis. A tiny drip, left unchecked, becomes a hidden mold hotspot behind walls or under flooring.

Replace or Wash Soft Items

Launder bath mats and washcloths weekly, and replace shower curtains or liners every 3 to 6 months. Damp fabrics harbor spores and accelerate the growth of mildew.

Seal Grout and Caulk Annually

Even high-quality grout deteriorates over time. Reapply sealant annually to maintain a watertight barrier and prevent moisture from seeping into porous surfaces.

Use Mold-Inhibiting Paint

Coat walls and ceilings with an anti-mildew paint or primer. These contain mildewcides that inhibit spore growth on painted surfaces.

Monitor Hidden Corners & Vents

Shine a flashlight into cabinet corners and ceiling vents to spot early discoloration. Catching tiny black or green specks before they spread makes cleanup easy.


FAQs

Can I use bleach on colored grout?

Bleach kills mold fast but often fades colored grout. Instead, use hydrogen peroxide or undiluted white vinegar on tinted grout to avoid discoloration.

How often should I re-caulk the shower?

Inspect caulking every 12–18 months. If you see cracks, peeling, or mold beneath the surface, remove old caulk immediately and apply fresh, mildew-resistant silicone.

Is a small fan enough for ventilation?

A portable fan helps, but it isn’t ideal in the long term. For best results, run an appropriately sized exhaust fan during and for 20 minutes after showers; only then will most steam exit the room.

Will vinegar alone remove stubborn mold?

Vinegar kills about 82% of household molds. For persistent patches, follow with a baking soda scrub, its mild abrasiveness lifts the remaining spores without harsh chemicals.

How do I know if mold is hidden?

Musty odors and condensation on walls or ceilings often signal unseen growth. If allergy symptoms arise after using the bathroom, inspect behind fixtures or inside cabinets for damp spots.

When should I call a professional?

If mold covers over 10 square feet, recurs despite DIY cleaning, or family members suffer severe reactions, bring in certified remediators. They’ll test, contain, and treat hidden infestations.

Conclusion

Preventing bathroom mold requires consistent vigilance, encompassing proper ventilation and humidity control, as well as the selection of mold-resistant materials. Simple daily habits, such as squeegeeing tiles, wiping down surfaces, and hanging towels to dry outside the bathroom, remove hidden moisture before it can foster spores. Weekly cleaning using vinegar or hydrogen peroxide solutions ensures early-stage mold is eradicated swiftly. During renovations, invest in epoxy grout, silicone caulk, and cement backer boards to fortify your bathroom against dampness. If mold reappears repeatedly, trace the root cause: hidden leaks, insufficient airflow, or poor insulation. For severe infestations, engage professionals to inspect, remediate, and encapsulate affected areas. Remember: mold prevention is an ongoing process, not a one-time fix. By combining innovative design, targeted cleaning, and prompt repairs, you’ll maintain a fresh, healthy bathroom,free from mold’s unsightly stains, odors, and health risks. Stay proactive; your efforts today save hours of remediation tomorrow.

Cleaning Gadgets vs. Traditional Tools: Which Is Truly More Cost-Efficient?

In a world brimming with innovative cleaning solutions, the question arises: Are cleaning gadgets more cost-efficient than traditional tools? At face value, a robotic vacuum or steam mop commands a heftier price tag compared to a humble broom or mop. Yet cost efficiency transcends mere sticker shock. It encompasses the purchase price, routine expenses such as electricity and replacement parts, longevity, and, even more intangibly, the value of saved time. While some households treasure the convenience of automated gadgets, others prioritize minimal ongoing costs. By dissecting each component, from upfront investment to hidden maintenance fees, this exploration illuminates whether investing in modern devices truly outweighs the reliability and simplicity of classic cleaning implements. Ultimately, personal circumstances, such as household size, cleaning frequency, and lifestyle, shape which path leads to genuine savings and satisfaction.

Defining Cost Efficiency

Cost efficiency measures how effectively you convert money spent into cleaning output, balancing expenses against performance and time saved. It encompasses:

  • Upfront Costs: The initial purchase price of either gadgets (robot vacuums, steam mops) or traditional tools (brooms, mops, brushes).
  • Operating Expenses: Energy consumption, electricity or batteries, plus consumables such as replacement filters, pads, or cleaning solutions.
  • Maintenance and Repairs: The frequency and cost of servicing gadgets versus replacing worn-out manual tools.
  • Durability: The lifespan of each device or tool before it requires a complete replacement.
  • Time Savings: Labor is valuable. Faster, automated cleaning translates into either leisure or productive time.
  • Hidden Costs: Disposal fees, environmental impact, and unexpected breakdowns.

By evaluating these factors, we can determine if an advanced gadget offers a better return on investment compared to using a broom, mop, and scrub brush.

Upfront Costs

When it comes to initial outlay, traditional tools typically prevail in terms of affordability. A quality broom costs $10–$30, a mop with a bucket $15–$40, and basic scrubbing brushes or cloths $5–$15. Altogether, a comprehensive manual toolkit might total $50–$100. In contrast, cleaning gadgets demand a heftier price. A reliable robotic vacuum costs between $150 and $800; a mid-range steam mop between $40 and $200; and a cordless electric scrubber between $20 and $100. Even a basic stick vacuum can range from $50 to $400. Therefore, equipping a home with multiple gadgets can escalate costs to $300–$1,000. While high-end gadgets can replace several manual tools, eliminating the need for separate brooms, dustpans, and carpet sweepers, the sticker shock remains. On sheer purchase price, traditional implements are undeniably more cost-effective; yet, the calculus shifts when factoring in long-term savings, time efficiency, and maintenance considerations.

Operating Costs

Once the initial purchase is behind you, cleaning gadgets introduce ongoing expenses that differ markedly from traditional tools.

Electricity and Batteries:

  • A robotic vacuum uses roughly 30–60 watts, totaling 18–36 kWh annually if run daily,$2–$4 per year at $0.12/kWh.
  • A steam mop’s 1200–1500 watts element, used for one hour weekly, consumes 62–78 kWh yearly, approximately $7–$9.
  • Small electric scrubbers draw about 10–20 W; monthly use amounts to under 2 kWh per year (less than $0.30).

Water and Cleaning Solutions:

  • Traditional mopping might use 4–6 gallons weekly, $2–$6 annually ,plus $5–$10 for cleaning fluid.
  • Steam mops typically need 0.5–1 L per session (52–104 L annually), costing $2–$4 if distilled water is required.

Consumables:

  • Robotic vacuum filters at $10–$20 every few months: $40–$80 per year. Brushes or rollers at $15–$30 every 2 years: $30–$60.
  • Steam mop pads: $10–$20 twice yearly ($20–$40 annually).
  • Electric scrubber pad replacements: $10 per year.
  • In contrast, traditional tools require minimal utilities: nearly zero electricity, modest water usage, and inexpensive replacement mop heads or rags (ranging from $10 to $30 per year). Thus, operating a suite of gadgets typically costs more in consumables and energy, while manual tools remain budget-friendly, albeit less time-efficient.

Durability and Lifespan

Durability significantly influences long-term cost efficiency. Traditional tools tend to be rugged and straightforward:

  • Brooms and Dustpans: Often last 2–5 years; frayed bristles can be trimmed or the head replaced at a low cost.
  • Mop Handles and Buckets: Typically endure 5+ years if properly cared for; mop heads or cloth replacements ($5–$15 every few months) sustain performance without discarding the handle.

In contrast, cleaning gadgets have more complex architectures with varying lifespans:

  • Robotic Vacuums: Base units can last 5–7 years. However, batteries often degrade by year 3 and cost $30–$60 to replace. Motors, sensors, and electrical/electronics can falter, prompting repairs of $50–$100 or full replacement.
  • Steam mops typically last 3–5 years. Mineral buildup can clog heating elements; repairs can approach $50–$100. Using distilled water mitigates damage but incurs additional costs.
  • Electric Scrubbers: With fewer parts, they last around 3–6 years. Motor failures can be expensive to repair, sometimes half the cost of a new device, encouraging the purchase of a new device over repair.

While gadgets offer automation and convenience, their electronic components introduce more failure points. The simplicity of traditional tools often translates to greater longevity and lower replacement costs, thereby bolstering cost efficiency for those prioritizing durability.

Time Savings and Labor Value

Time is a valuable asset, sometimes worth far more than the cost of cleaning gadgets. Consider two scenarios:

Traditional Cleaning:

A 2,000 sq ft home might take 2–3 hours to sweep and mop manually. Bathrooms require an additional 1–2 hours of weekly maintenance in addition to dusting. Over the course of a year, 150–200 hours could be spent cleaning. If you value your time at $15/hour, that’s $2,250–$3,000 in opportunity cost, time that might otherwise be spent working, caring for family, or relaxing.

With Gadgets:

  • A robotic vacuum can run unattended for 2–3 hours daily, covering hard floors and low-pile carpets. This automation eliminates manual sweeping, saving potentially 2–3 hours per week (104–156 hours annually).
  • A steam mop can sanitize floors in 20–30 minutes weekly, compared to 45–60 minutes with a traditional mop.
  • Electric scrubbers reduce bathroom deep cleaning from 45 minutes to 15–20 minutes.

For someone valuing each hour at $15, saving 100 hours annually equates to $1,500 per year. Suppose a set of gadgets costs $500 and incurs $200 yearly operating expenses. In that case, the net “earnings” in time savings can quickly surpass the costs, making gadgets a wise investment for busy households or professionals who monetize their time. Conversely, if cleaning is a leisure activity or if you have ample free time, traditional tools may yield greater cost efficiency despite the extra hours spent.

Hidden Costs

Beyond visible expenses, hidden costs can undermine perceived savings.

Repairs and Downtime:

  • Manual Tools: A broken broom handle or worn mop head is swiftly replaced for under $10 with minimal downtime.
  • Gadgets: If a robotic vacuum wheel jams or a steam mop element clogs, professional repairs can run $50–$100. During service, you may need backup tools, temporarily doubling expenses.

Disposal and E-Waste:

  • Traditional Tools: Often recyclable, metal handles, wooden parts, nylon bristles. Disposal costs are negligible.
  • Gadgets: Electronic components and batteries require remarkable recycling. If not properly recycled, devices contribute to e-waste. Some municipalities levy fees for disposing of electronics or batteries, adding to overall costs and inconvenience.

Environmental Impact:

  • Water and Chemicals: Traditional mopping often uses more water and chemical cleaners. Despite the low cost, this increases water bills and raises concerns about chemical runoff, potentially attracting higher utility bills in drought-prone regions.
  • Electricity Footprint: Gadgets draw power. In areas where electricity is heavily dependent on coal or expensive, running multiple devices can significantly increase utility bills and carbon taxes.

Regulatory Fees and Incentives:

Some regions incentivize recycling or penalize the disposal of electronic waste. If a gadget’s battery needs to be disposed of, fees may apply. Conversely, eco-friendly steam cleaners might qualify for rebates or tax credits.

Accounting for these concealed charges, such as repair fees, disposal costs, and environmental levies, provides a more accurate picture of genuine cost efficiency.

Case Studies

Household A: The Busy Family

  • Profile: Four members in a 2,000 sq ft home. Both parents work full-time.
  • Traditional Tools: Weekly manual cleaning: 3 hours sweeping/mopping, 1 hour bathroom scrubbing, 30 minutes patio sweeping, totaling; 200 hours annually. At $15/hour, with a $3,000 opportunity cost, plus $70 for water and cleaning supplies and $50 for replacement tools.
  • Gadgets: Robotic vacuum ($400), steam mop ($100), electric scrubber ($50), leaf blower ($80) = $630. Annual energy and consumables $122. Manual time: 50 hours/year (steam + scrubber), equating to $750.
  • Comparison: Year one: $630 + $122 + $750 = $1,502 vs. $3,120 (traditional), $1,618 saved. Subsequent years: $872 vs. $3,050,savings of $2,178 annually.

Household B: The Retiree

  • Profile: Single occupant in 700 sq ft apartment, minimal time constraints.
  • Traditional Tools: Weekly cleaning: 1 hour sweeping/mopping, 30 minutes bathroom, 100 hours/year. If time isn’t monetized, the annual cost is $15 (for water and cleaner) + $30 (for tool replacements) = $45.
  • Gadgets: Stick vacuum ($100), electric scrubber ($50) = $150. Annual energy and consumables $47.
  • Comparison: First year: $197 vs. $45,gadgets cost $152 more. Subsequent years: $47 vs. $45,gadgets are nearly equal to traditional. For someone with free time, traditional tools remain more cost-efficient.

These scenarios demonstrate that time value and household needs significantly influence whether gadgets outperform manual methods in terms of cost efficiency.

Factors Influencing Cost Efficiency

Several variables determine if a cleaning gadget trumps traditional tools:

Home Size and Layout:

Large, multi-room spaces or mixed flooring benefit more from automated vacuums and steam cleaners. Small apartments may not justify the expense.

Cleaning Frequency:

High-traffic homes or homes with pets require more frequent cleaning. Gadgets offer consistency and reduce manual labor. Conversely, sporadic cleaning favors the use of manual tools.

Labor Value:

If cleaning time could be monetized (e.g., extra work hours), gadgets that save hours deliver tangible financial returns. If you view cleaning as a leisure activity, the time saved has little monetary value.

Durability Expectations:

Households expecting gadgets to last a decade may be disappointed, as many devices require replacement of parts within 2 to 5 years. Traditional tools, if properly maintained, often outlast electronics at a minimal cost.

Access to Repairs and Services:

Urban dwellers often have easy access to service centers, which reduces repair downtime and expenses. In remote areas, shipping electronics for repair can be cost-prohibitive.

Health and Environmental Preferences:

Allergy sufferers or eco-conscious users might favor steam mops for chemical-free cleaning and reduced allergens. If local recycling programs for electronics are robust, the costs of disposing of gadgets diminish.

By assessing these factors, household characteristics, time valuation, maintenance logistics, and environmental priorities, individuals can gauge which cleaning approach delivers actual cost efficiency tailored to their circumstances.

Environmental Considerations

Beyond personal budget, cleaning choices carry ecological implications that influence long-term value.

Water Consumption:

  • Traditional Mopping: Can consume 4–6 gallons per session. If cleaned twice weekly, that’s 400–600 gallons annually, potentially costing $4–$12, depending on local rates. Excessive water use strains resources, especially in drought-prone regions.
  • Steam Mops: Typically use 0.5–1 L per session,52–104 L yearly, negligible water cost. Because steam sanitizes surfaces without the use of chemical detergents, runoff is minimal.

Energy Footprint:

  • Electricity-Reliant Gadgets: Robotic vacuums and steam mops require consistent power. In regions where electricity is coal-generated or expensive (e.g., $0.20/kWh), annual gadget-related energy could cost $20–$30,plus a larger carbon footprint. Conversely, homes powered by solar or renewables minimize both costs and emissions.
  • Manual Tools: Rely on low-tech water heating, often via gas stoves or kettles. While less efficient, their overall energy draw is modest.

Waste Generation:

  • Traditional Cleaning: Sponges, cloths, or paper towels produce organic or recyclable waste, which can be composted or recycled.
  • Gadgets: Electronic waste from broken units, batteries, and non-recyclable filters contributes to landfills. Though some regions offer e-waste recycling, fees or logistical hurdles may impede proper disposal.

Regulatory Incentives and Penalties:

Some municipalities offer rebates for purchasing energy-efficient appliances or steam cleaners. Others impose fees on electronic disposal. In places with strong green initiatives, eco-friendly gadgets may prove more cost-effective over time.

Considering environmental factors, such as water scarcity, energy sourcing, waste disposal, and local regulations, paints a fuller picture of cost efficiency that extends beyond household budget to ecological stewardship.

Choosing the Right Cleaning Strategy

Determining whether cleaning gadgets or traditional tools deliver better value hinges on aligning choices with personal circumstances. Here’s a guide:

Evaluate Cleaning Needs and Frequency:

If you tackle 2,000 sq ft weekly with mixed flooring and pets, gadgets like robot vacuums and steam mops offer unmatched consistency. For a 600 sq ft studio, a mop and broom likely suffice.

Quantify Your Time Value:

Multiply hours spent cleaning manually per month by your personal hourly “rate” (either wage or perceived value). Compare that figure to annual gadget costs (amortized purchase plus operating expenses). If gadget expenses are lower, automation becomes more cost-effective.

Assess Durability and Maintenance Access:

Research warranties and local service options. A gadget with a two-year warranty and nearby repair centers limits unexpected costs. If you live in rural area with no access to repair services, manual tools are the way to go.

Consider Hybrid Approaches:

A robot vacuum for daily tasks, combined with occasional manual mopping, strikes a balance: moderate upfront gadget cost with a traditional mop for deep cleaning. Alternatively, invest in a quality stick vacuum alongside a reliable mop for partial automation.

Monitor Deals and Seasonal Discounts:

Purchase during Black Friday, Prime Day, or local sales to significantly reduce gadget costs. A mid-tier robotic vacuum flash sale can transform ROI within months.

Factor in Environmental and Health Objectives:

Allergy sufferers may prioritize steam cleaning to eliminate allergens. Households in drought regions may adopt steam mops to slash water usage. If local e-waste recycling is convenient or subsidized, disposing of gadgets becomes less daunting.

Frequently Asked Questions

Do cleaning gadgets always end up costing more over time?

Not in every situation. Gadgets can be more expensive upfront and incur higher consumable and energy costs. However, if they save significant cleaning time, especially for large homes or multi-level spaces, they often offset those expenses via labor value.

How can I gauge if a robotic vacuum is worth it when I own a stick vacuum?

Consider how often you clean and how busy your schedule is. A robot running daily can prevent buildup and reduce the need for manual vacuuming to once a week. If the value of saved time (e.g., working an extra hour) exceeds the robot’s annual costs ($200–$300), it becomes a wise investment.

What maintenance costs should I anticipate for gadgets?

Expect to replace robot vacuum filters every 2–3 months ($10–$20), roller brushes every 6–12 months ($15–$30), steam mop pads twice a year ($10–$20), and possibly batteries every 2–3 years ($30–$60). Factor these into your annual budget.

Are steam mops truly eco-friendly?

Steam mops use significantly less water (a 90% reduction compared to manual mopping) and disinfect without the need for chemical detergents. If charged with renewable electricity, their carbon footprint shrinks further, making them a greener option, especially where water scarcity is a concern.

How do I dispose of electronic cleaning gadgets responsibly?

Check local e-waste recycling programs. Many municipalities offer free drop-off events or subsidized pickup for small appliances and batteries. Proper recycling often eliminates disposal fees and mitigates environmental harm.

Can I mix traditional and gadget-based cleaning to save money?

Absolutely. Hybrid strategies, using a robot vacuum for daily floors while retaining a manual mop for occasional deep cleaning, balance convenience and cost. This approach lowers upfront gadget costs and extends their lifespan by reducing overuse.

Conclusion

In the perennial debate, Are cleaning gadgets more cost-efficient than traditional tools?, the definitive answer is: It depends. For large households where time is scarce, gadgets can deliver significant labor savings that overshadow higher purchase and operating costs. Conversely, smaller dwellings or those who relish hands-on chores will find traditional tools more economically sensible: low upfront expenses, minimal consumables, and durable longevity. Environmental factors also influence the decision: steam mops reduce water usage and chemical consumption, while gadgets generate e-waste and require electricity. Ultimately, aligning cleaning strategies with personal priorities, whether that’s maximizing productivity, minimizing expenses, or reducing ecological footprint, ensures that you choose the approach that truly offers cost efficiency tailored to your lifestyle.