waldoksolutions

1 2 3 6

Steam Cleaning vs Dry Cleaning: Which Method Is Best for Your Home?

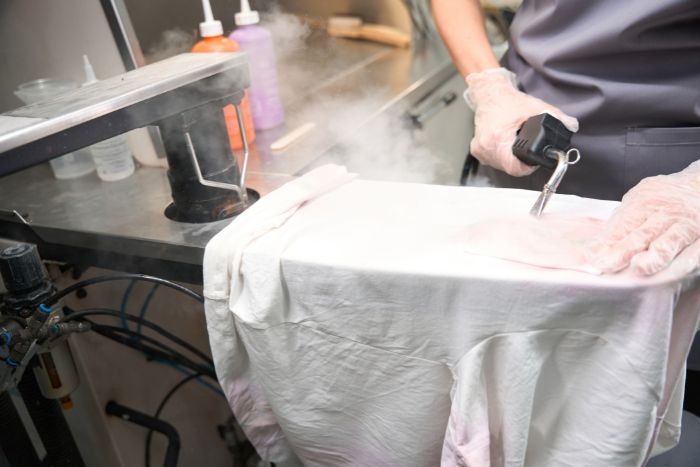
Deciding between steam cleaning and dry cleaning often hinges on understanding the core principles and practical outcomes of both methods. Steam cleaning harnesses high-temperature water vapor to dissolve dirt, bacteria, and allergens, offering a chemical-free sanitization solution for floors, upholstery, and appliances. Dry Cleaning, in contrast, relies on specialized solvents, such as perchloroethylene or eco-friendly silicone-based alternatives, to target oil-based stains without introducing moisture.

Each approach delivers distinct benefits: steam cleaning excels at killing germs and removing embedded grime, while dry Cleaning preserves delicate fabrics and furniture that might shrink or warp under heat and water. By comparing their effectiveness on various surfaces, evaluating health and environmental impacts, and weighing cost considerations, homeowners can make informed choices.

In this concise guide, we’ll explore essential aspects of steam cleaning and dry Cleaning, clarifying which method is best suited for specific tasks and materials, so you can maintain a pristine home with confidence and efficiency.

What Is Steam Cleaning?

Steam cleaning utilizes superheated water vapor, typically between 200°F and 300°F, to penetrate and remove dirt, grime, bacteria, and allergens from surfaces without the use of harsh chemicals. A steam cleaner heats water until it vaporizes under pressure, then delivers the steam through a nozzle or brush attachment. As the steam meets a floor, carpet, or appliance surface, it breaks down residues, which can be wiped or vacuumed away.

Typical applications include tiled floors and grout lines (where steam kills mold and mildew), sealed hardwood (when used cautiously to avoid warping), carpets and upholstery (deeply extracting allergens and stains), and kitchen appliances (cutting through grease without corrosive degreasers).

Key benefits include high-level sanitization, eliminating up to 99.9% of bacteria and dust mites, a chemical-free operation ideal for allergy sufferers, and versatility across various household tasks. Potential drawbacks include higher equipment costs (ranging from $100 for handheld units to over $ 500 for commercial-grade machines), a learning curve to prevent surface damage, and occasionally extended drying times for porous materials.

What Is Dry Cleaning?

Dry Cleaning, on the other hand, uses non-water-based solvents to dissolve oils, greases, and specific proteins that water-based methods struggle to remove. In professional settings, garments or household textiles are placed into a sealed drum filled with solvent, often perchloroethylene (perc), hydrocarbon fluids, or greener silicone-based compounds. Agitation allows the solvent to penetrate the fibers and dissolve stains; a spin cycle then extracts the excess liquid, followed by a low-heat tumble to evaporate the residual solvent. Beyond clothing, dry cleaning techniques also extend to area rugs and delicate upholstery, especially leather or suede pieces that can shrink or stain when exposed to water. Dry carpet cleaning systems employ a dry compound or bonnet method: a granular or foam cleaning agent mixed with minimal solvent is agitated into fibers and vacuumed up, offering rapid turnaround in commercial settings. Benefits include superior performance on oil-based stains, minimal moisture (preserving delicate fabrics), and faster drying times.

Drawbacks encompass chemical exposure risks (perc is hazardous without proper ventilation), environmental concerns over solvent disposal, and generally higher costs per use compared to DIY steam cleaning.

Surface-by-Surface Comparison

When evaluating steam cleaning vs dry Cleaning, material-specific considerations dictate the optimal approach:

Hard Flooring: Steam cleaning outperforms dry methods on tile, grout, sealed hardwood, and laminate, its high heat dissolves grime and sanitizes. Dry Cleaning for hard floors is limited to dry dusting or specialty stone solvent treatments, rarely matching the deep-cleaning power of steam.

Carpets & Rugs: Steam (hot water extraction) offers deep penetration, removing allergens and stains, but may require 6–12 hours to dry. Dry carpet cleaning (dry compounds or bonnet methods) provides immediate walk-on readiness but extracts fewer allergens.

Upholstery & Fabrics: Steam lifts odors and kills dust mites on stain-resistant sofas. However, for silk, velvet, or leather, dry-cleaning solvents preserve texture and color without moisture damage.

Kitchen Surfaces: Steam excels at sanitizing countertops, ovens, and sinks. Dry-clean solvents can effectively remove grease from range hoods, but they also risk leaving chemical residue on food-contact areas. In most residential scenarios, steam cleaning delivers broader sanitization and eco-friendly benefits; dry Cleaning remains indispensable for water-sensitive or delicate fabrics.

Health and Safety Considerations

Assessing steam cleaning vs dry Cleaning requires weighing chemical exposure, allergen removal, and indoor air quality.

Chemical Exposure: Steam cleaning relies solely on hot water, eliminating the risks of inhaling or contacting harsh chemicals. Users must handle steam carefully to avoid burns. Dry Cleaning historically used perchloroethylene (perc), linked to respiratory irritation and potential carcinogenic effects. Although many cleaners now adopt silicone-based or liquid CO₂ solvents, even these produce low-level VOCs requiring good ventilation.

Allergen Removal: Steam’s high heat effectively kills dust mites, mold spores, and bacteria, reducing common allergens. Dry cleaning solvents typically lack bactericidal properties, rendering them less effective for microbial control.

Mold & Mildew: Steam eradicates surface mold in grout and tiles; however, residual moisture can foster regrowth unless surfaces are promptly dried. Dry Cleaning introduces no humidity, preventing the growth of new mold, but cannot remove existing colonies on porous materials.

Indoor Air Quality: Steam cleaning produces no VOC emissions, preserving healthy air. Dry cleaning solvents, even “green” alternatives, can emit trace VOCs that linger in poorly ventilated spaces.

Cost Considerations

Budget often dictates whether homeowners invest in steam cleaning equipment or rely on dry cleaning services.

Initial Investment: Consumer-grade steam cleaners range from $100 to $300; professional units can exceed $500. In-home dry-cleaning kits cost $10–$25 per kit (for multiple garments) but offer inconsistent results and a limited scope.

Professional Services: Steam carpet cleaning services charge $0.20–$0.40 per square foot (e.g., $60–$120 for a 300 sq. ft. living room). Dry carpet cleaning typically runs $0.18–$0.30 per square foot but lacks deep sanitization. Dry Cleaning for garments costs $3–$7 per shirt or $10–$20 per suit; draperies and large rugs can exceed $30–$100 per piece.

Maintenance Costs: Steam cleaners require periodic descaling ($10–$20) and replacement microfiber pads ($5–$15 each). Dry cleaning kits need replenishment peruse, while professional services rack up recurring fees,$15–$40 monthly for multiple garments.

Long-Term Value: Over five to ten years, a steam cleaner pays dividends through repeated chemical-free Cleaning. Ongoing dry cleaning expenses often exceed the amortization of steam equipment for whole-home maintenance.

Environmental Impact

Choosing between steam cleaning and dry Cleaning has distinct ecological consequences.

Water Usage: Steam cleaning is surprisingly water-efficient, consuming only 0.2–0.3 gallons per hour, far less than traditional mopping or pressure washing. Dry Cleaning generates virtually no wastewater but involves solvent disposal, requiring specialized treatment to prevent soil and groundwater contamination.

Chemical Footprint: Steam cleaning utilizes only water (or an optional eco-friendly detergent), resulting in negligible chemical waste and zero VOC emissions. Traditional dry Cleaning uses perchloroethylene (classified as a hazardous air pollutant by the EPA), which poses significant risks to soil, air, and water. Green alternatives, such as silicone-based or liquid CO₂,have lower toxicity but still require energy-intensive manufacturing and careful disposal.

Energy Consumption: A steam cleaner draws 1200–2000 watts briefly to heat water, whereas commercial dry cleaning machines (especially older perc units) can consume over 5,000 watts continuously for heating and ventilation.

Carbon Footprint: When powered by renewable electricity, steam cleaning has a minimal carbon impact. Dry Cleaning’s solvent production, facility operations, and hazardous waste transport collectively increase its carbon footprint despite improvements to greener processes. In eco-conscious households, steam cleaning emerges as the more sustainable option.

Maintenance, Longevity, and Frequency

Proper upkeep is crucial when choosing steam cleaning vs dry Cleaning. Steam Cleaning Maintenance:

  • Descaling: Hard-water areas require descaling every 20–30 hours of use; simple white vinegar flushes ($10–$20) prevent mineral buildup in heating coils.
  • Filter Changes: Some units feature water filters to remove impurities, replace or clean them every 3–6 months.
  • Accessory Care: Microfiber pads lose efficacy after dozens of cycles; budget $5–$15 per replacement pad.

Recommended Frequency:

  • Hard Floors & Tiles: Monthly or bi-monthly deep steam, with weekly light mopping.
  • Carpets & Upholstery: Quarterly or bi-annual hot water extraction in high-traffic areas; spot steam for spills.
  • Kitchen Appliances: Monthly steam sanitation, as grease accumulates.

Dry Cleaning Maintenance (Professional Focus):

  • Solvent Recycling: Modern machines recycle up to 95% of solvent, but require routine checks for leaks and filter integrity.
  • Ventilation Servicing: Air scrubbers and filters need periodic inspection to ensure VOC capture.

Recommended Frequency:

  • Garments & Delicates: Every 6–8 weeks for regularly worn suits or dresses.
  • Rugs & Upholstery: Annual or semi-annual professional Cleaning to remove oils and soils.

Steam equipment can last 5–10 years with proper care, providing cost-effective home maintenance. Dry cleaning, on the other hand, relies on continuous professional service schedules.

Performance on Common Home Challenges

Understanding how steam cleaning and dry cleaning tackle everyday issues, such as pet accidents, set-in stains, and mold, reveals the strengths of each method. Pet Stains & Odors:

  • Steam Cleaning: High heat and water extraction, combined with enzyme pre-sprays, neutralizes urine bacteria and odors. However, if moisture isn’t fully extracted, mold or mildew can develop.
  • Dry Cleaning: Solvents dissolve oil-based residues while odor-neutralizing additives mask lingering odors. Yet, solvents alone often fail to penetrate deeply into protein-based stains, requiring enzyme-based follow-up.

Tough, Set-In Stains (Wine, Coffee, Grease):

  • Steam Cleaning: When paired with pre-treatment (stain removers), steam lifts many stains from carpets and grout. However, However, applying heat to untreated protein-based stains can cause them to set.
  • Dry Cleaning: Solvent-based stain removers excel at dissolving grease and cooking oils on upholstery or carpets. They often require multiple passes and may not handle sugar-based spills without specialized formulas.

Mold & Mildew:

  • Steam Cleaning: High-temperature vapor kills surface mold on grout, caulk, and fabric, ideal for bathrooms and damp areas. Users must dry surfaces immediately to prevent regrowth.
  • Dry Cleaning: Solvent-based mold treatments can degrade existing mold but rarely remove deep mycelial structures, often requiring mechanical scrubbing that reintroduces moisture.

For many residential challenges, especially allergens and germs, steam cleaning provides superior sanitization. Dry cleaning excels at removing oil-based stains and handling delicate fabrics that cannot tolerate moisture or heat.

How to Choose: Key Decision Factors

Selecting between steam cleaning and dry cleaning hinges on material compatibility, sanitization levels, convenience, cost, and environmental priorities. Material Type & Labels:

  • Follow manufacturer guidelines, if a surface is labeled “steam-safe” or “machine washable,” steam cleaning is an ideal option. Items marked “dry clean only” (silk, wool, leather) require solvent-based Cleaning to avoid fiber damage or shrinkage.
  • Sanitization Needs:
  • Steam Cleaning: Eliminates up to 99.9% of bacteria, viruses, and dust mites, critical for households with children, pets, or immunocompromised residents.
  • Dry Cleaning: Provides moderate stain removal and microbial control but is not a substitute for high-level sanitization.
  • Turnaround & Convenience:
  • Steam Cleaning: DIY approach, no scheduling needed, but carpets and upholstery may take 6–12 hours to dry.
  • Dry Cleaning: Professional services offer same-day or next-day pickup, while in-home kits refresh garments quickly but do not provide deep Cleaning.
  • Budget Considerations:
  • Steam Cleaning: Up-front cost ( $100–$300) yields years of chemical-free Cleaning, making long-term expenses lower.
  • Dry Cleaning: Professional services incur recurring fees ($3–$20 per garment), which may exceed the amortization of a steam cleaner over time.
  • Environmental & Health Goals:
  • Steam Cleaning: Eliminates chemical exposure, reduces plastic and solvent waste, and capitalizes on renewable electricity sources.
  • Dry Cleaning: “Green” solvents (liquid CO₂, silicone) minimize toxicity but still involve specialized disposal and energy-intensive production.
  • Ultimately, evaluate specific surfaces and personal priorities: if high-level sanitization and eco-friendliness rank highest, steam cleaning typically prevails; for delicate fabrics requiring minimal moisture, dry Cleaning is indispensable.

Step-by-Step Guide: Implementing Steam Cleaning Safely

Inspect & Prepare

Consult the manufacturer’s instructions to verify that the surfaces are “steam-safe” (e.g., sealed hardwood, tiles). Sweep or vacuum loose debris from floors, carpets, and upholstery. Test a discreet patch for colorfastness on fabrics.

Fill & Heat Unit

Use distilled water in hard-water regions to prevent mineral buildup. Fill the reservoir, then allow 2–4 minutes to heat, wait for the indicator light signaling readiness.

Select Attachment:

  • Bristle Brush: Ideal for grout lines and stubborn grime.
  • Microfiber Pad: Gentle on sealed floors and upholstery; traps loosened dirt.
  • Detail Nozzle: Focused steam jets for crevices, vents, and corners.

Technique & Motion

Hold nozzle ~1 inch above the surface, avoid lingering to prevent over-saturation or scorch marks. Move the wand in a slow, overlapping sweeping motion (2–3 inch overlap) to ensure even coverage. For carpets, pre-treat stains with an enzyme spray, then briefly steam and immediately vacuum the damp residue.

Post-Cleaning & Drying

Wipe surfaces with a clean, dry microfiber cloth to remove moisture and loosened soil. Open windows or run fans in enclosed areas (bathroom, kitchen) to accelerate evaporation. Allow carpets, rugs, and upholstery to air-dry for 6–12 hours before heavy use; prop cushions upright to improve airflow and prevent mildew.

Step-by-Step Guide: Implementing Dry Cleaning Safely

Professional Dry Cleaning:

  • Pre-Inspection: Flag stubborn stains (ink, wine, grease) to the cleaner for targeted pre-treatment.
  • Packaging & Drop-Off: Transport garments in eco-friendly cloth or reusable bags to minimize the use of single-use plastic.
  • Pickup & Post-Inspection: Upon retrieval, inspect items for missed spots or lingering odors and ensure that no solvent residue remains before storing.

In-Home Dry Cleaning Kits:

  • Sorting: Separate “dry clean only” items (silk, wool, leather) from machine-washables.
  • Pre-Treat Stains: Use the included stain-removal pen on light spots (such as lipstick or food); blot gently without rubbing.
  • Bag & Tumble: Place garments and the kit’s solvent-impregnated cloth in the provided bag. Tumble in dryer on low heat for 15–20 minutes.
  • Remove & Hang: Extract garments immediately and hang them in a well-ventilated area to eliminate any remaining odor. Lightly brush upholstery or textured fabrics with a soft cloth to restore nap.

Spot-Treating Large Upholstery:

  • Solvent-Based Spray: For minor upholstery stains (makeup, oil), lightly mist with a fabric-safe solvent.
  • Blotting Technique: Use white, lint-free cloths to blot the area until the stain transfers gently; repeat this process until no residue

remains.

  • Dry and Ventilate: Allow treated areas to air out thoroughly. Use fans to speed up solvent evaporation and prevent lingering odors.

Frequently Asked Questions

Is steam cleaning safe for all hardwood floors?

Not necessarily. Sealed hardwood can generally tolerate low-moisture steam, but unsealed or wax-finished floors risk warping. Always check the manufacturer’s guidelines, test a small, inconspicuous spot, and wipe away any moisture immediately.

Does steam cleaning permanently remove pet urine odors?

Steam, combined with enzyme pre-treatments, can effectively neutralize urine bacteria and odors on carpet surfaces. However, if urine has seeped into subfloor padding, odors may persist unless the affected padding is replaced.

Are there eco-friendly dry-cleaning alternatives?

Yes. Liquid CO₂ and silicone-based solvents (e.g., GreenEarth) produce fewer VOCs and reduce environmental impact compared to perchloroethylene (perc). Look for green-certified cleaners using such “wet” or CO₂ methods.

How frequently should high-traffic carpets be steam cleaned?

Quarterly deep steam extraction is ideal for busy households with pets or children, as it effectively removes dirt and allergens. In less frequently used areas, biannual or annual steam cleaning usually suffices.

Which method is better for allergy sufferers?

Steam cleaning outperforms dry Cleaning in removing dust mites, mold spores, and bacteria due to its high heat and water extraction, making it the preferred choice for allergy relief.

Can dry Cleaning remove mold from fabrics?

Solvent-based dry Cleaning may kill some mold spores but often fails to eradicate mold roots that are deeply embedded in fibers. For washable fabrics, a combination of steam and thorough drying is more effective for mold remediation.

Real-World Scenarios

Scenario A: Busy Family with Children & Pets

Frequent spills, muddy footprints, and pet hair demand a reliable cleaning routine. Monthly steam cleaning on floors and grout eliminates bacteria and allergens; quarterly carpet steam extraction removes pet dander. Upholstery steam freshens sofas with spot treatments for accidents. Dry Cleaning is reserved for occasional “dry clean only” garments.

Scenario B: Home Office with Light Use

Light dust accumulation and occasional coffee spills call for bimonthly steam cleaning on hardwood or laminate floors. Annual steam extraction for low-traffic carpets; upholstery spot-steaming as needed. Drapes and delicate fabrics benefit from yearly professional dry Cleaning to maintain sheen and prevent shrinkage.

Scenario C: Historic Home with Delicate Surfaces

Original hardwood, marble countertops, and vintage rugs require extra caution. Avoid steam on unsealed or antique wood; instead, use dry microfiber mopping. Annual professional dry Cleaning preserves oriental rugs and fragile draperies. Steam can sanitize sealed grout lines, but surfaces must be wiped dry immediately to prevent moisture damage. The combination of careful dry Cleaning for antiques and judicious steam use on modern sealed areas balances protection and cleanliness.

Conclusion

Choosing between steam cleaning and dry cleaning boils down to material compatibility, sanitization needs, budget, and environmental impact. Steam cleaning stands out for its chemical-free, high-heat sanitization, which is ideal for floors, carpets, upholstery, and kitchen surfaces in homes with children, pets, or allergy concerns. A one-time investment in a steam cleaner offers long-term cost savings and a reduced ecological footprint, especially when powered by renewable electricity.

Meanwhile, dry Cleaning remains indispensable for delicate fabrics, such as silk, wool, and leather, and vintage textiles that cannot tolerate moisture or heat. Professional dry Cleaning or in-home kits effectively address oil-based stains and provide rapid turnaround. For many homeowners, a hybrid approach, using steam for general home maintenance and resorting to dry Cleaning for specialized garments and fragile furnishings, yields optimal results. By understanding the strengths and limitations of each method, you can tailor your cleaning routine to ensure a healthier, longer-lasting home environment.

Ultimately, informed choices about steam vs dry methods translate into cleaner surfaces, preserved materials, and greater peace of mind.

Comparing Self-Cleaning and Manual Oven Cleaning: Time, Cost, and Efficiency Guide

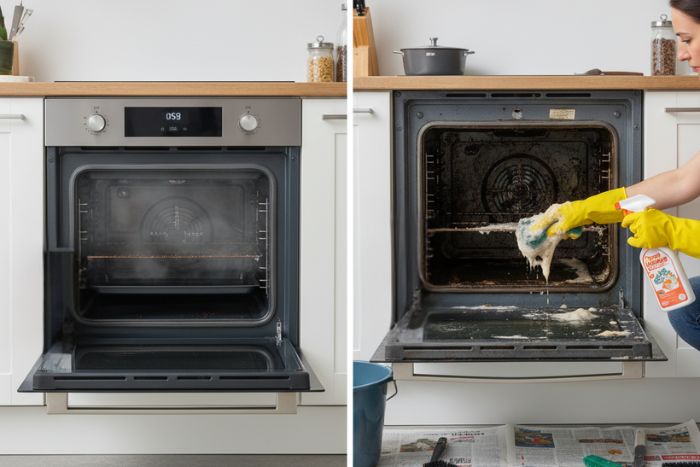
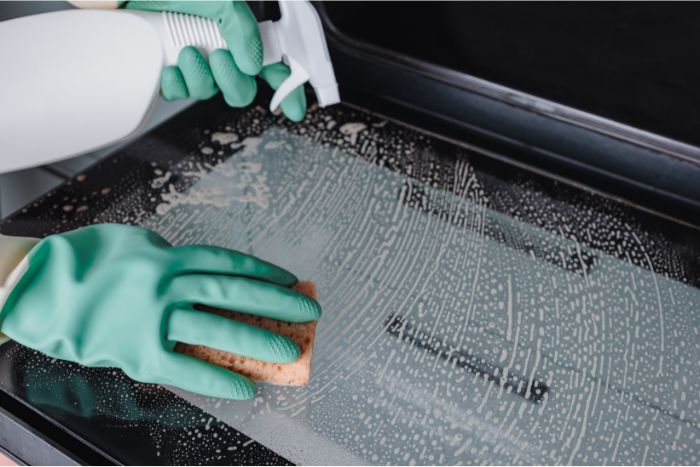
From beginning to end, keeping an oven clean can seem like a battle. Do you surrender to the convenience of a self-cleaning model, or do you cling to trusty elbow grease and familiar scrubbing? Self-Cleaning Ovens vs. Manual Cleaning: A Comparison of Time and Efficiency delves into this dilemma. On one hand, self-cleaning ovens promise a hands-off approach by incinerating debris with extreme heat. On the other hand, manual cleaning relies on sprays, scrubs, and a great deal of patience.

Each method has its time requirements, costs, and hidden drawbacks. Here, we’ll distill the essential differences, how long each takes, what expenses you’ll incur, and which approach delivers the cleanest interior. Whether you bake lasagna weekly or roast chicken monthly, understanding the trade-offs can help you make informed decisions. Read on to discover which route aligns with your budget, schedule, and cleaning preferences.

Understanding Self-Cleaning Ovens

Self-cleaning ovens simplify grime removal by heating the interior to extraordinarily high temperatures, often between 800°F and 900°F (426°C–482°C). In pyrolytic models, food residue incinerates to ash during a dedicated cycle lasting two to four hours. Once the oven cools, you wipe away the ash. A door-locking mechanism ensures safety by preventing premature opening.

Catalytic ovens, by contrast, feature special liners coated with oxidation catalysts; grease breaks down gradually at normal cooking temperatures (around 500°F/260°C), requiring only occasional gentle wiping.

Less common steam-cleaning ovens operate at much lower temperatures (210°F–250°F/99°C–121°C), using saturated steam to soften residue in about 30–60 minutes. While each process varies, pyrolytic cycles require lengthy, energy-intensive “set-and-forget” sessions, and catalytic liners work behind the scenes. The shared goal of self-cleaning technology is to minimize manual scrubbing.

Benefits of Self-Cleaning Ovens

Self-cleaning ovens offer convenience. A pyrolytic cycle eliminates the need for scrubbing, letting you set the oven and walk away. By transforming baked-on debris into fine ash, it spares hands and backs from vigorous cleaning sessions, making it ideal for those with mobility challenges or anyone who dreads manual labor. Because no harsh chemical cleaners are required, families concerned about toxic fumes can breathe easier. Cleaning results are remarkably consistent; high heat reaches every corner, reducing the risk of stray grease or stubborn spots. Over time, avoiding abrasive scrubbing also preserves the smooth enamel interior, maintaining the oven’s pristine finish. Lastly, scheduling cycles during off-peak hours or when you’re out of the house makes the long clean-up period virtually invisible, as it involves just minutes of preparation for hours of unattended cleaning. In sum, self-cleaning ovens marry safety, efficiency, and minimal effort.

Drawbacks of Self-Cleaning Ovens

Despite their allure, self-cleaning ovens carry hidden costs. Pyrolytic cycles require significant energy, approximately 3–5 kWh per run, which drives up electricity bills, especially in regions with high electricity rates. The blistering temperatures can cause heat to radiate into your kitchen, making summer months feel like an oven within an oven. Burning off food residue also emits smoke and odors; without proper ventilation, these fumes can irritate the eyes or trigger coughing. Cycle times stretch from two to four hours, plus cooling time, rendering the oven unusable for extended periods, which can be an inconvenience if you frequently cook and clean. Catalytic ovens avoid extreme heat but require periodic liner replacement (often $50–$100 per panel) when saturation renders them ineffective.

Finally, repair costs for sensors or locking mechanisms in pyrolytic models can range from hundreds to thousands of dollars. Thus, convenience often arrives at the price of higher energy use, more extended downtime, and occasional maintenance surprises.

Understanding Manual Cleaning

Manual oven cleaning is the traditional method: apply a cleaning agent, let it work, and scrub stubborn residue by hand. Common approaches include a baking soda and vinegar paste, which sits for 8–12 hours before foaming away grime under a vinegar spray, and commercial oven cleaners containing caustic agents like sodium hydroxide, which can strip off tough grease in 20–60 minutes.

The ammonia method, placing a bowl of ammonia in a cold oven overnight, loosens caked-on debris, minimizing the need for elbow grease the next day. Some households scrape with a plastic or metal tool, tackling carbonized spots without chemicals but risking enamel scratches. Manual cleaning’s allure lies in its affordability, control, and minimal energy use; you choose where to focus, bypassing a full-cycle commitment. Yet, this hands-on approach demands physical effort, exposes you to potent chemicals, and can be inconsistent if you run out of steam mid-scrub.

Benefits of Manual Cleaning

Manual cleaning treasures control and flexibility. If you spill something minor, say, a small amount of lasagna, you can quickly spot-clean in under 30 minutes without sacrificing hours to a self-cleaning cycle. Initial costs remain low: basic ovens often cost 20–30% less than their self-cleaning counterparts, and homemade baking soda solutions cost mere cents. Since no high-heat cycles are involved, your kitchen remains cooler, a boon during hot summer days or in spaces with poor ventilation.

Manual methods also sidestep the risk of costly repairs tied to self-cleaning components. Finally, manual cleaning generates minimal waste, especially when using reusable cloths and DIY cleaners, which reduces plastic packaging and chemical runoff. When done diligently, you can achieve results that rival automatic methods, feeling a small but satisfying sense of accomplishment with every scrub.

Drawbacks of Manual Cleaning

However, manual cleaning takes a toll on time and effort. Scrubbing requires patience and physical stamina; kneeling, leaning, and applying force can strain the knees, back, and wrists, especially during 1–to 2-hour steam cleanings. Commercial oven sprays release potent fumes; without proper ventilation and protective gear, these chemicals can irritate the lungs, eyes, and skin. A half-hearted scrubbing session often leaves behind grease patches in corners, leading to quicker re-soiling and more frequent cleaning sessions. Sticky, caked-on layers built up over weeks can take multiple sittings to remove, making the process feel never-ending.

Moreover, excessive scrubbing can scratch enamel surfaces, creating micro-abrasions that trap grime and accelerate future buildup. In sum, manual cleaning trades off immediate costs for potential physical strain, inconsistent results, and long-term wear on your oven’s interior.

Time Comparison: Self-Cleaning vs Manual Cleaning

Cleaning Method

Total Time per Session

Notes

Pyrolytic Self-Cleaning

3–6 hours

2–4 hour cleaning cycle + 1–2 hour cool-down; additional 5–15 minutes to wipe ash; oven unusable during cycle and cool-down.

Catalytic Self-Cleaning

30–60 minutes (every 4–6 weeks)

There is no dedicated cycle; grease breaks down during everyday cooking. Periodic wipe-downs, 30–60 minutes, are available at all times. The oven remains available at all times.

Steam Self-Cleaning

40–80 minutes

30–60 min steam cycle + 5–10 min wipe; oven unavailable for the duration of the steam cycle.

Manual Cleaning (Light Soil)

20–30 minutes

Quick spray-and-wipe; oven immediately available afterward.

Manual Cleaning (Heavy Soil)

1–2 hours active scrubbing + 1–12 hours (DIY) or 20–60 min (commercial) soak

Deep scrubbing after soak; oven available during soak. Actual “hands-on” time is 1–2 hr; soak time overlaps with everyday routines.


When evaluating time efficiency, context matters. A pyrolytic self-cleaning cycle typically runs for two to four hours, followed by one to two hours of cooling down, and then the oven is sidelined for 3–6 hours. Add ten minutes for ash removal, set it up, and walk away.

Catalytic ovens, by contrast, clean gradually during everyday cooking; wiping liners every 4–6 weeks requires 30–60 minutes. Steam cleaning takes 40–80 minutes total (including wipe–down).

Manual cleaning is highly variable: a light clean might take 20–30 minutes, while a heavy-duty scrub, complete with a 1–2 hour chemical soak, demands 1–2 hours of active scrubbing. Over the course of a year, a moderate user running pyrolytic cycles quarterly invests roughly 17 hours of oven downtime; catalytic maintenance requires about 6 hours; steam cleaning, 7 hours; and manual deep cleans (every six weeks), about 12 hours (soaking overlaps with ordinary life). Contextualizing these numbers, in terms of physical effort versus unavailable oven time, clarifies the temporal footprint of each method.

Efficiency Comparison: Thoroughness and Cost

Thoroughness varies by method. Pyrolytic ovens incinerate virtually all organic residues, delivering a nearly pristine interior, although racks and glass windows often require separate cleaning. Catalytic liners excel at breaking down average splatters but can struggle against heavy carbonized spills, sometimes demanding supplementary scrubbing.

Steam cleaning softens light soils, making it ideal for removing spilled sauces, but it often falters on hardened grease, necessitating a manual follow-up. The effectiveness of manual cleaning hinges entirely on effort; with enough elbow grease and the right chemicals, you can match or exceed the results of automatic methods, but fatigue and oversight frequently lead to missed spots.

Cost-wise, pyrolytic ovens cost 20–30% more upfront and burn 3–5 kWh per cycle (about $0.36–$0.60), while catalytic ovens cost $100–$200 more than manual models, with occasional liner replacements ($50–$100). Steam cleaning consumes 1–2 kWh ($0.12–$0.24 per use). The incremental costs of manual cleaning are negligible beyond the cost of cleaning supplies; DIY mixes cost a few cents; commercial sprays range from $5 to $15 per bottle.

Factoring in repair and maintenance, catalytic ovens avoid high energy bills but require periodic part replacements, while manual ovens dodge specialized repairs but demand more frequent labor.

Maintenance and Longevity

Maintaining an oven’s interior extends its lifespan. Pyrolytic self-cleaning ovens preserve enamel surfaces by eliminating the need for abrasive scrubbing, although repeated high-heat cycles can stress heating elements and sensors, potentially shortening their service life. Catalytic ovens’ panels gradually saturate; manufacturers typically recommend replacing liners every 3–5 years to maintain performance (costing $50–$100 per panel).

Steam cleaning imposes minimal thermal stress but cannot tackle deep carbonization alone, often requiring manual touch-ups. Manual cleaning, particularly with abrasive pads or harsh chemicals, can wear away enamel over time, creating micro-scratches that trap grime and compel more frequent cleans. Frequency guidelines help: run pyrolytic cycles every 3–6 months, wipe catalytic liners every 4–6 weeks, steam clean monthly (or bi-weekly for heavy cooks), and manually clean visible spots monthly. Best practices, such as wiping spills immediately, using non-abrasive scrubbers, and avoiding liner coverage, minimize wear. In essence, each method’s maintenance routine influences how long your oven retains its new-like performance.

Which Option Is Right for You?

Choosing between self-cleaning and manual cleaning hinges on lifestyle, budget, and priorities. If you bake daily or frequently roast, a pyrolytic oven’s “set-and-forget” convenience may outweigh higher energy costs and extended downtime, especially if you can run cycles during off-peak hours or when away.

Catalytic ovens appeal to moderate cooks who prefer lower energy use and minimal effort; liners maintain cleanliness quietly but require eventual replacement.

Steam cleaning suits those who handle spills promptly and don’t face heavy carbonized messes; at 40–80 minutes per session, it balances time and energy fairly well.

For budget-conscious households or those who enjoy hands-on cleaning, manual methods offer immediate availability and negligible energy impact, though at the cost of physical effort and potential inconsistency. Consider your kitchen’s ventilation, sensitivity to chemicals, and willingness to scrub. Together, these factors reveal the proper time, cost, and comfort trade-offs, guiding you to the best fit for your cooking habits and cleaning tolerance.

Conclusion

Ultimately, Self-Cleaning Ovens vs Manual Cleaning: Time and Efficiency Compared is not a one-size-fits-all showdown. Pyrolytic ovens deliver unmatched cleanliness with minimal labor, but they demand hours of downtime, higher energy bills, and possible repair costs. Catalytic models offer a quiet, energy-efficient middle ground, with gradual grease breakdown paired with occasional 30–60 minute wipe-downs and liner replacements every few years. Steam cleaning balances short cycles with limited effectiveness, often requiring manual follow-up for stubborn spots.

Manual cleaning reigns supreme in terms of upfront affordability and flexibility, but it demands consistent effort and can be physically taxing. Reflect on your cooking frequency, budget constraints, tolerance for heat and fumes, and physical stamina. By weighing these dimensions, time blocked versus time scrubbed, dollar outlay versus effort invested, you’ll select the approach that keeps your oven gleaming and suits your lifestyle.

FAQs

How often should I run a pyrolytic cycle?

Every 3–6 months for moderate use; heavy bakers may need to run it every 2 months. Always remove large spills first to minimize smoke and odors.

Can I keep oven racks inside during the self-cleaning cycle?

No. Extreme heat can warp racks. Remove them and clean them separately, either by hand or in the dishwasher if they’re dishwasher-safe. a

Are odors from self-cleaning harmful?

Generally, they’re not toxic, but the burned residue can irritate the eyes and lungs. Ensure strong ventilation by opening windows or running a powerful exhaust fan.

Do catalytic liners work forever?

No. They lose efficiency after 3–5 years. When panels appear darkened or greasy, replace them according to the manufacturer’s guidelines.

Is manual cleaning effective for heavy grease?

Yes, given enough time, effort, and proper cleaners. Expect 1–2 hours of scrubbing after a 20–60 minute chemical soak for severe buildup.

Seasonal Cleaning Tasks You Can’t Skip: Your Year-Round Home Maintenance Guide

Seasonal cleaning isn’t just about satisfying a checklist; it’s a proactive strategy that preserves home comfort, health, and value. By tackling “Seasonal Cleaning Tasks You Shouldn’t Skip,” you’re investing in efficiency and peace of mind. Imagine sunlight filtering through spotless windows or knowing your HVAC system won’t fail during a heat wave. That’s the payoff. Each season brings unique challenges: spring’s allergens, summer’s humidity, fall’s falling leaves, and winter’s moisture. Neglecting even one task can lead to higher energy bills, unhealthy air, or expensive repairs. In this guide, every section breaks down critical chores into concise overviews, so you can quickly identify what to prioritize and why it matters. Embrace these seasonal imperatives to stay ahead of problems, extend the lifespan of your appliances, and maintain a safe, inviting living space all year long.

Why Seasonal Cleaning Matters

Homes are dynamic; weather changes leave their mark. Seasonal cleaning wards off dust, mold, pests, and system breakdowns before they escalate. When you skip tasks, minor issues compound, clogged gutters become ice dams, dirty filters strain HVAC units, and damp basements foster the growth of mold. These overlooked chores can drive up utility bills, trigger allergies, and reduce appliance lifespans.

On the other hand, a proactive strategy ensures adequate ventilation, prevents water damage, and promotes the health of the family. Following a quarterly or monthly schedule will help you identify little issues early on, such as a loose gutter bracket, a drafty window, or a missing shingle.

Furthermore, consistent cleaning improves appearance and fosters mental health because a stress-free atmosphere lowers tension. In essence, seasonal cleaning transforms reactive maintenance into preventive care. Rather than rushing through emergency repairs, you invest time upfront, yielding long-term savings and smoother operation. Prioritize these essential tasks to keep your home resilient, efficient, and comfortable.

Spring Cleaning Tasks You Shouldn’t Skip

Spring often symbolizes renewal, and a deep-dive cleaning regimen at this time sets the stage for smoother months ahead. While most of us think of dusting and vacuuming, certain chores require special attention:

Deep Clean Windows and Screens

Why it matters

After months of pollen, rain, and winter debris, windowpanes are often covered in grime. Dirty windows not only block sunlight, diminishing natural warmth and brightness, but also harbor allergens and mold spores that can aggravate respiratory issues.

How to do it:

  • Remove screens carefully, then lay them flat on a clean surface.
  • Spray with a gentle mixture of water and mild detergent, then scrub with a soft-bristled brush.
  • Rinse thoroughly and allow to air-dry before reinstalling.
  • For windows themselves, use a squeegee and a vinegar-based cleaner to minimize streaks. Pay special attention to window tracks; use a toothbrush or compressed air canister to flush out accumulated debris.

Declutter Closets and Donate

Why it matters

Winter wardrobes, heavy coats, bulky sweaters, insulated boots, often occupy prime real estate in closets, leaving little room for spring/summer attire. If you’re not careful, neglected storage can lead to musty odors, moth infestations, and wasted space.

How to do it:

  • Pull everything out and categorize it into “keep,” “donate,” and “discard.”
  • Clean the interior: vacuum floors, wipe down shelves, and inspect for signs of pests (like moth casings or rodent droppings).
  • Bag donated items immediately to avoid reintroducing clutter.
  • Store off-season clothing in breathable containers; vacuum-sealed bags can save space but risk crushing delicate fabrics.

Service Your HVAC System

Why it matters

With temperatures warming, your air conditioner (AC) is about to work overtime. Dust and debris accumulated in filters, coils, and ducts during winter can restrict air flow, reduce efficiency, and even cause system breakdowns during a heatwave.

How to do it:

  • Replace or clean filters; most systems require a new filter every 60–90 days, but you may need to replace it immediately after winter.
  • Inspect condenser coils: turn off the power, remove the exterior panel, and gently hose off the dirt. A pressure washer might damage sensitive fins, so avoid using it.
  • Clear vegetation around the outdoor unit, ensuring at least 2 feet of clearance on all sides.
  • Schedule a professional tune-up if your AC hasn’t been serviced in over a year. Technicians can check refrigerant levels, test for leaks, and lubricate moving parts.

Clean Gutters and Downspouts

Why it matters

Winter’s ice, snow, and debris often clog gutters. If left unchecked, this congestion can lead to water overflow near the roofline, damage to fascia boards, basement flooding, or the facilitation of mold growth on exterior walls.

How to do it:

  • Don heavy-duty gloves and use a small plastic scoop (or trowel) to remove leaves, twigs, and other buildup.
  • Flush the gutters with a hose to dislodge finer debris; ensure proper runoff is directed away from the foundation.
  • Inspect downspouts: run water through them and check that they exit at least 5 feet from the house. If there are water pools, consider extending the downspouts or installing splash blocks to prevent water from accumulating.

Inspect and Clean Patio/Deck

Why it matters

Winter’s freeze-thaw cycles can wreak havoc on wooden decks, pavers, and deck furniture. Failing to clean and inspect now means you might miss early signs of rot, mildew, or structural looseness, problems that become more dangerous when temperatures rise.

How to do it:

  • After sweeping away any loose debris, use a stiff brush and a cleaning solution made specifically for the type of deck you have (wood, composite, or stone).
  • Look for loose boards, protruding nails, or rusted screws. Tighten or replace as needed.
  • If you spot mildew or algae, mix one part bleach with four parts water, gently scrub the area, and then rinse it thoroughly.
  • Re-stain or seal wooden decks every 2–3 years; spring is the ideal window for proper adhesion.

Summer Cleaning Tasks You Shouldn’t Skip

Deep Clean Kitchen Appliances (Oven, Fridge, Dishwasher)

Why it matters

Summer often means more grilling and entertaining, or, if you’re out enjoying the sunshine, neglected appliances gathering spills and odors. A grimy oven can distribute smoke or uneven heat; a clogged fridge drain can lead to water pooling at the bottom, fostering mold.

How to do it:

  • Oven: Use a non-toxic baking soda and water paste. Spread it liberally on interior surfaces, let it sit for several hours (or overnight), then wipe away residue with a damp cloth. For tough spots, spray vinegar and scrub gently.
  • Refrigerator: Empty the shelves, discard expired items, and remove detachable parts (shelves, drawers). Wash them in warm, soapy water. Wipe interior walls with a solution of water and vinegar (in a 1:1 ratio) to neutralize odors. Finally, vacuum the condenser coils on the back to enhance cooling efficiency.
  • Dishwasher: To dissolve soap scum and mineral deposits, put a cup of white vinegar on the top rack and run a hot-water cycle. Scrub the door gasket with a toothbrush soaked in a bleach solution (1 part bleach to 10 parts water) if there is mildew present.

Wash Exterior Windows and Screens (Again)

Why it matters

Pollen counts are high in spring and early summer, leaving windows and screens coated with a fine yellow-green film that obstructs light and harbors allergens. If you skipped it during spring, don’t put it off; the summer sun magnifies streaks and spots.

How to do it:

  • As before, remove screens first; scrub and rinse.
  • To prevent streaks and speedy drying, clean windows on a cloudy day.
  • For second-floor or high windows, use an extension pole with a squeegee attachment. This prevents standing on unstable ladders in the heat.

Clean and Inspect the Outdoor Grill

Why it matters

Summer is grilling season. A greasy, clogged grill can produce flare-ups, impart off-flavors to food, and even pose a fire risk. Routine cleaning also helps extend the grill’s lifespan and maintains even heat distribution.

How to do it:

  • Heat the grill on high for 10–15 minutes to burn off residual grease.
  • Once it cools slightly, use a stiff wire brush to scrub the grates. For stubborn gunk, remove grates and soak them in hot, soapy water before washing.
  • Empty the grease trap or drip pan.
  • Inspect burners, checking for rust, blockages, or uneven flame patterns; replace parts as needed.

Shampoo Carpets or Rugs

Why it matters

High humidity and open windows invite dust, pollen, and outdoor contaminants inside. Carpets act like giant filters, trapping allergens and potentially developing mold if damp spots go unnoticed. A mid-year deep clean eradicates lingering debris and revitalizes fibers.

How to do it:

  • Rent or purchase a carpet cleaner that injects hot water and detergent and then extracts the moisture. Avoid machines that leave excessive water behind.
  • Vacuum thoroughly beforehand to lift dry debris.
  • Work in small sections, moving furniture when necessary. Allow the carpets to dry completely; use fans or open windows to speed up the process.

Check and Clean Ceiling Fans

Why it matters

With higher energy costs and frequent fan use, a dusty, unbalanced ceiling fan can circulate allergens, wobble, or even come loose from its mount, an accident waiting to happen.

How to do it:

  • Please turn off the fan and use a pillowcase: slide it over each blade, then pull back slowly, trapping dust inside.
  • Tighten screws on the mounting bracket and blade arms.
  • If wobbling persists, use a balancing kit (usually included with the fan) to add weight where necessary.

Fall Cleaning Tasks You Shouldn’t Skip

As leaves fall and temperatures drop, preparation prevents winter woes. First, clean gutters before they clog with early foliage, remove debris by hand, then flush with a hose to ensure proper drainage and prevent ice dams.

Next, organize your garage and storage spaces by clearing out summer items, sweeping the floors, inspecting for rodent entry points, and sealing any cracks. Proper storage prolongs equipment life and deters pests.

Third, seal drafts and clean windows: vacuum tracks, wipe panes, and caulk gaps to lock in heat. A draft-free home boosts efficiency.

Fourth, service the furnace: replace filters, test for carbon monoxide leaks, and schedule a professional inspection to ensure safe and reliable heating.

Fifth, clean the fireplace and chimney: remove ash, hire a sweep to eliminate creosote, and inspect the cap for damage or animal nests. Tackling these chores now ensures a cozy, trouble-free home when winter arrives.

Winter Cleaning Tasks You Shouldn’t Skip

Cold weather limits outdoor work, but indoor and accessible exterior tasks remain essential. First, deep clean entryways: install layered mats to trap snow and salt, sweep or vacuum daily, and mop tile or hardwood to prevent moisture damage. A tidy entry keeps the rest of the house cleaner.

Second, sanitize your home office or workspace: unplug electronics, dust keyboards, screens, and vents with compressed air, and wipe down surfaces with alcohol-based wipes to minimize the risk of winter colds.

Third, check and replace weatherstripping: inspect door bottoms and window frames for gaps, apply adhesive foam tape or V-strip to seal leaks, and test by feeling drafts.

Fourth, clean behind large appliances: pull out your refrigerator and washer to vacuum coils and vent openings; remove lint from the dryer vent to prevent fire hazards.

Finally, stock up on cleaning supplies: ensure you have ice melt, a sturdy shovel, floor cleaners, and dehumidifier filters. Being prepared reduces stress when storms make stores inaccessible.

General Tips for Effective Seasonal Cleaning

Executing “Seasonal Cleaning Tasks You Shouldn’t Skip” becomes easier with a strategy. First, create a master checklist by categorizing chores into quarterly and monthly items, labeling them as either “interior” or “exterior,” and scheduling calendar reminders. A visual plan prevents tasks from slipping through the cracks. Second, involve family members: assign age-appropriate duties, kids can dust baseboards while adults handle ladders or heavy lifting. A shared effort speeds completion and fosters responsibility. Third, use proper tools: invest in quality ladders, scrub brushes, gloves, and microfiber cloths. Rent specialized equipment, such as carpet cleaners or chimney brushes, when needed. Fourth, break tasks into manageable segments: tackle two or three chores per weekend, focusing on one area at a time to avoid burnout. Fifth, always prioritize safety: wear protective gear, maintain three points of contact on ladders, and read chemical labels; never mix incompatible cleaners. These overarching tips ensure efficiency, thoroughness, and peace of mind throughout the year.

Eco-Friendly Cleaning Practices

Pairing seasonal chores with sustainable approaches safeguards both your home and the planet. Conventional cleaners often contain harsh chemicals that degrade indoor air quality and harm waterways. Instead, harness pantry staples: vinegar neutralizes odors, baking soda scrubs away grime, and lemon’s acidity cuts through grease.

Mix equal parts of water and vinegar in a spray bottle. Spray the area, then wipe it clean for effective surface cleaning. This solution will dissolve mineral deposits and disinfect them without leaving any harmful effects. Sprinkle baking soda on stubborn stains, scrub gently, then rinse thoroughly. Replace disposable wipes with microfiber cloths that trap dirt more effectively, then launder and reuse them for a more eco-friendly approach. Opt for biodegradable, phosphate-free dish soap and floor cleaners to protect aquatic life.

When possible, opt for refillable containers or purchase concentrates in bulk to minimize plastic waste. By incorporating these green methods into your seasonal cleaning routines, you create a healthier indoor environment, reduce environmental impact, and reinforce sustainable habits that benefit both your household and the broader ecosystem.

Similar Topics

Topic

Brief Description

Spring Cleaning Checklist

Key tasks and tips to refresh your home as temperatures rise.

Summer Home Maintenance Tips

Essential chores to tackle during humid, high-activity months.

Fall Prep: Winterize Your Home

Steps to seal drafts, service heating systems, and protect against cold.

Eco-Friendly Home Cleaning Practices

Sustainable methods and ingredients for safe, planet-friendly cleaning.

Monthly Home Upkeep Calendar

A breakdown of recurring chores to spread maintenance evenly year-round.

Moving-In/Out Cleaning Guide

Critical tasks to prepare a property for new occupants or a final walkthrough.

Quick Declutter Strategies

Streamlined approaches to purge and organize spaces efficiently.

Appliance Care 101

How to clean and maintain major appliances to extend their lifespan.

Allergy-Proofing Your Living Space

Seasonal tactics to reduce indoor allergens and improve air quality.

DIY Minor Repair Guide

Simple fixes, like patching drywall or tightening loose fixtures, can prevent larger issues later.

FAQs

How often should I replace HVAC filters?

Typically, every 60–90 days, but in high-pollen seasons or if you have pets, swap them monthly to maintain peak efficiency.

Can I use bleach on all outdoor surfaces?

No. While bleach kills mildew on particular stone or concrete patios, it can discolor wood and harm surrounding plants; always spot-test and rinse thoroughly.

What’s the easiest way to prevent gutter clogs?

Install mesh guards to block leaves, then flush gutters biannually; this two-step approach minimizes debris without constant ladder use.

Should I schedule a professional chimney cleaning every year?

Yes. An annual sweep removes creosote buildup, reducing fire risk and ensuring proper ventilation, especially crucial if you frequently use your fireplace.

How can I reduce indoor allergens during spring?

Eliminate dust mites and pollen by swapping or thoroughly cleaning your air filters every month, vacuuming with a HEPA-capable machine, and laundering your sheets and pillowcases in hot water at least once a week.

Is it safe to leave cleaning products in an unheated garage over winter?

Not always, extreme cold can thicken or freeze liquids, rendering them ineffective; store chemicals indoors at moderate temperatures.

What’s the quickest way to identify drafts around windows?

On a windy day, run your hand slowly along frames; if you feel a chill, apply caulk or weatherstripping immediately to seal leaks.

Conclusion

Understanding “Seasonal Cleaning Tasks You Shouldn’t Skip” transforms chores into proactive home stewardship. By adopting a structured design for each section, you achieve clarity on why every task is important, from spring’s pollen-covered windows to winter’s drafty doorways. Regular maintenance preserves system efficiency, lowers energy bills, and safeguards health against allergens, mold, and pests. With proper planning, a family-wide effort, and the right tools, you can conquer seasonal imperatives without overwhelm.

Remember: small, consistent efforts prevent big, costly repairs. Mark your calendar, enlist help, and allocate bite-sized time slots to each chore. When the seasons shift next, you’ll be well prepared, your home will be resilient, efficient, and welcoming, no matter the weather. Prioritize these succinct, actionable tasks to enjoy a smoother, safer, and more comfortable living environment throughout the year.

Safe Cleaning Products for Homes with Pets

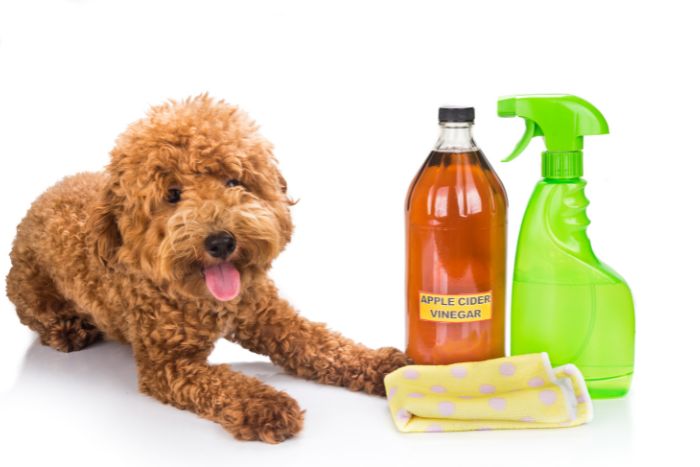
When sharing your home with furry, feathered, or scaly companions, selecting cleaning products becomes more than a matter of convenience; it becomes a vital component of maintaining both a spotless living environment and a safe sanctuary for your beloved animals. In many households, pets roam freely from room to room, sniffing, licking, and sometimes even sneezing upon surfaces that have recently been treated with conventional cleaners laden with harsh chemicals. The question, “Are these cleaning solutions truly pet-friendly?” often lingers in the minds of conscientious animal lovers. To address that concern head-on, this comprehensive guide will delve into the art and science of choosing, and even formulating, safe cleaning products for homes with pets.

From the subtle differences between various plant-based ingredients and essential oils to understanding misleading labels on store shelves, this article explores practical tips, proven recipes, and expert recommendations. Read on to learn how to transform your home into a haven that is simultaneously clean, fresh, and minimally toxic for every creature that calls it home.

Why Pet-Safe Cleaning Matters

When it comes to sharing your home with curious cats, playful pups, or chirping birds, conventional cleaning products can pose hidden dangers. Many mainstream cleaners rely on phenols, ammonia, or quaternary ammonium compounds, substances that can irritate respiratory tracts, harm skin, and cause gastrointestinal distress if ingested. Imagine a dog licking freshly mopped floors or a cat grooming its paws right after you spray bleach; the risk of poisoning is real. Beyond acute toxicity, harsh chemicals also degrade indoor air quality, aggravating asthma or allergies in both animals and humans. Birds, with their delicate respiratory systems, are especially vulnerable to even trace amounts of volatile organic compounds (VOCs).

By choosing pet-safe alternatives, you safeguard against accidental ingestion and inhalation, promote a healthier living environment, and ensure that cleaning routines nurture rather than threaten every member of your household.

Common Harmful Ingredients to Avoid

Not all cleaning agents are created equal; some are downright toxic to animals. First, phenols (e.g., o-phenylphenol) lurk in hospital-grade disinfectants; they can injure a cat’s liver or cause neurological distress.

Bleach (sodium hypochlorite), though a powerful germ-killer, emits fumes that irritate eyes and lungs; direct ingestion leads to mouth burns and organ damage. Ammonia, common in glass cleaners, produces harsh vapors and, if mixed with bleach, creates lethal chloramine gas. Quaternary ammonium compounds (quats), ubiquitous in sanitizing wipes, irritate the skin, trigger respiratory issues, and can harm the kidneys if ingested. Synthetic fragrances and phthalates are often hidden under the vague label “fragrance,” masking dozens of undisclosed chemicals that act as endocrine disruptors and allergy triggers.

Finally, high-concentration isopropyl alcohol or ethanol, found in quick-dry cleaners, can lead to vomiting and liver damage, especially in cats. Steering clear of these ingredients is essential to maintaining a pet-friendly home.

How to Read Product Labels Like a Pro

Labels often lure with buzzwords like “green” or “natural,” but proper safety requires deeper scrutiny. First, flip the bottle and examine the ingredient list in fine print; if you spot unfamiliar chemical names, research them or opt for alternatives. Beware of generic “fragrance” or “parfum” entries; they can conceal dozens of potentially harmful chemicals, including phthalates. Seek out recognized certifications such as EPA’s Safer Choice or Ecologo, but remember these primarily gauge environmental impact and human safety, not specifically pet safety. Distinguish between “biodegradable” (eco-friendly breakdown) and “non-toxic”, the former doesn’t guarantee harmlessness to animals. Check pH values when available; products with extreme acidity or alkalinity can irritate sensitive pet skin.

Finally, heed dilution instructions: concentrated “eco” solutions can become toxic if overused. By adopting this investigative approach, parallel to reading pet food labels, you ensure every cleaner you choose aligns with your animals’ health needs.

DIY Pet-Safe Cleaners: Recipes and Formulas

Crafting your cleaning solutions empowers you to know exactly what’s in each bottle. Most effective DIY formulas harness vinegar, baking soda, and castile soap: familiar, inexpensive, and generally safe for pets when used correctly. For an all-purpose spray, combine one cup of distilled vinegar, one cup of water, a tablespoon of unscented castile soap, and, if desired, 10–15 drops of a pet-safe essential oil such as lavender (avoid tea tree, citrus, or peppermint around cats). Shake gently, then spray on countertops or sealed floors. Wipe dry. Combine half a cup of vinegar, a gallon of warm water, and a small amount of castile soap to clean floors, whether they are laminate, tile, or hardwood. Mop lightly, then rinse with clean water. For carpets, sprinkle plain baking soda (or with 5–10 lavender drops) to neutralize odors, let sit for 30 minutes, then vacuum.

Spot cleaning requires a mixture of 1/4 cup castile soap, 1/4 cup vinegar, and 2 cups of warm water: spray, blot, rinse, and air-dry. With these simple, pet-friendly concoctions, you’ll keep your home fresh without worrying about hidden toxins.

Top Store-Bought Pet-Safe Brands

While DIY solutions can be cost-effective and empowering, sometimes convenience and specialized formulations are preferable. Over the past few years, a wave of eco-friendly, pet-conscious cleaning brands has emerged, offering products marketed explicitly as puppy- or kitty-friendly. When selecting a store-bought option, you’ll want to verify ingredient transparency and, ideally, look for third-party testing or certifications. Below are some reputable brands (available nationwide or online as of 2025) that fit the bill:

Earth Rated™ Pet Wipes and Surface Cleaner

  • Key features: Plant-derived surfactants, no alcohol, dye-free, hypoallergenic.
  • Pet-friendly claim: Specifically formulated for cleaning pet messes, paws, and minor spot cleanups. It uses a mild, coconut-derived surfactant.

Better Life™ Natural All-Purpose Cleaner

  • Key features: Free of dyes, synthetic fragrances, phthalates, parabens, and sulfates. Plant-based, biodegradable formula.
  • Pet-friendly claim: Non-toxic and safe around dogs and cats; EPA Safer Choice Partner.

Rocco & Roxie Professional Strength Stain & Odor Eliminator

  • Key features: The enzymatic formula breaks down organic stains without relying on harsh chemicals or perfumes.
  • Pet-friendly claim: Recommended by a veterinarian and trainer; safe for use on carpets and upholstery where pets frequently visit.

TruEarth™ Eco-Strips (Pet-Safe Laundry Detergent Strips)

  • Key features: Ultra-concentrated laundry strips, free of dyes, parabens, phosphates, and optical brighteners.
  • Pet-friendly claim: Hypoallergenic; gentle on fabrics and pet bedding. It leaves no residue that pets might ingest through grooming their fur.

Method™ Antibac Pet Hard Floor Cleaner

  • Key features: Plant-based cleaning agents, no bleach, no ammonia, no triclosan. Mild essential oil scent (lemongrass or lime).
  • Pet-friendly claim: PH-balanced, non-toxic; safe for dogs, cats, and small animals once floors are dry.

Puracy™ Natural Multisurface Cleaner

  • Key features: Non-toxic, vegan, cruelty-free, biodegradable ingredients. Free of sulfates, triclosan, ammonia, and harsh solvents.
  • Pet-friendly claim: Safe for all surfaces, including those that pets lick or sleep on; recommended by vets.

ECOS® Pet & Family All-Purpose Spray

  • Key features: Plant-powered formula, no dyes, no phthalates, no ammonia. Naturally derived citrus and botanical extracts.
  • Pet-friendly claim: pH-balanced and non-toxic; suitable for cleaning areas where pets roam and play.

Seventh Generation® Free & Clear Disinfecting Multisurface Cleaner

  • Key features: It contains thymol (a derivative of thyme oil) as an active disinfectant rather than bleach or ammonia.
  • Pet-friendly claim: EPA-designated as safer for use around pets once surfaces are dry; fragrance-free version available.

When selecting a product, always read the manufacturer’s label for usage instructions, drying time recommendations, and any warnings. Even “pet-safe” products can cause issues if used excessively or if pets are allowed on freshly cleaned surfaces before they fully dry.

Room-by-Room Pet-Friendly Cleaning Tips

Kitchen

  • Countertops and Cutting Boards: Opt for a 50% water, 50% distilled vinegar solution, plus a few drops of unscented castile soap. Immediately rinse or wipe down with a damp microfiber cloth after cleaning to eliminate lingering vinegar odors that may attract a curious dog or cat.
  • Floors: Use a pH-neutral floor cleaner certified as pet-friendly; avoid ammonia-based degreasers. Sweep up crumbs quickly to prevent pets from gulping down stray bits of human food.
  • Pet Bowls and Feeding Stations: Avoid using dishwasher detergent with strong fragrances. Instead, wash bowls daily with a gentle, fragrance-free dish soap, thoroughly rinsing afterward. Disinfect with a diluted mixture of 1 tablespoon bleach per gallon of water, then rinse well and let air dry (bleach is acceptable here as long as it’s thoroughly rinsed).

Bathroom

  • Toilet Bowls: Use a bleach-free toilet cleaner, or consider a gel with a thymol-based disinfectant (derived from thyme oil). During cleaning, keep pets out of the room to prevent splashes and protect them from potential hazards. After scrubbing, flush immediately and allow good ventilation until odors dissipate.
  • Showers and Tubs: Avoid abrasive cleansers containing harsh acids. Instead, use a baking soda paste for gentle scrubbing. For disinfecting, use a spray-on hydrogen peroxide solution (3%),it breaks down into water and oxygen, leaving no harmful residues. Let it sit for a few minutes, then rinse thoroughly.
  • Floors and Grout: To effectively remove soap scum and mildew, create a paste using baking soda and water. Then, gently scrub the grout lines with an old toothbrush. Rinse well. For a finishing disinfectant, mist with 3% hydrogen peroxide and allow to air dry before letting pets back in.

Living Room and Common Areas

  • Carpets and Rugs: Regularly vacuum with a HEPA filter vacuum to remove dander, hair, and dust. For odor control, liberally sprinkle baking soda and let it rest for at least 30 minutes (preferably an hour). Then, vacuum again. For deeper cleaning, use an enzymatic cleaner designed for pet stains; these break down organic matter without leaving harsh chemical residues.
  • Upholstery and Fabric Furniture: Many pet-safe fabric cleaners are available that utilize gentle surfactants and enzymes. Test a small area first. Alternatively, steam clean with plain hot water; steam kills many surface-bound bacteria and dust mites without the use of chemicals. Ensure the fabric dries thoroughly to inhibit mold growth.
  • Hardwood Floors: Use a microfiber dust mop daily to catch hair. When deeper cleaning is needed, dilute a few drops of unscented castile soap into warm water and use a damp mop, avoiding soaking the wood. Immediately follow with a dry microfiber pad.

Bedroom

  • Bedding and Linens: Launder pet beds, blankets, and your sheets at least weekly. Use a pet-friendly laundry detergent (e.g., TruEarth Eco-Strips). Include a vinegar rinse cycle (using ½ cup of white vinegar) to neutralize odors and residues.
  • Mattresses: Vacuum mattresses equipped with a vacuum and an upholstery attachment. Scatter baking soda on the surface, wait for an hour, and then vacuum again. This helps neutralize odors while ensuring that no chemical traces remain for a pet to inhale.
  • Curtains and Draperies: These can harbor dander. Either launder according to the care instructions or use a gentle steam cleaner to kill allergens and refresh the fabric without chemicals.

Special Considerations for Cats, Dogs, Birds, and Small Animals

Different species metabolize chemicals in unique ways, necessitating tailored precautions.

Cats lack vital liver enzymes that break down many essential oil compounds; avoid tea tree, citrus, pine, peppermint, and eucalyptus oils around felines. Phenolic disinfectants, common in heavy-duty cleaners, can induce neurologic issues. Ensure any vinegar or alcohol odors fully dissipate before letting cats return to a room.

Dogs, prone to paw-licking, require thoroughly dried floors and use enzymatic cleaners for accidents, allowing proper dwell times to break down urine and feces proteins without harsh residues. Textiles treated with cleaning agents should remain inaccessible until completely dry to prevent ingestion of fibers.

Birds possess highly sensitive respiratory systems; avoid aerosols, bleach, and VOC-laden products. Opt for diluted hydrogen peroxide (3%) when sanitizing cages. Rinse thoroughly, and keep birds in a separate, well-ventilated area until the odors have vanished.

Small mammals, such as rabbits or guinea pigs, cannot tolerate ammonia buildup. Clean cages frequently with mild soap and water, reserving a diluted 10:1 water-to-bleach solution only for hard plastic or metal surfaces. Rinse thoroughly before rehousing. Additionally, avoid using cedar or pine shavings as bedding; instead, opt for aspen or paper-based substrates to prevent respiratory distress. By respecting these species-specific sensitivities, you create a safer and more comfortable environment for each beloved companion.

Maintaining a Safe Environment: Beyond Products

Choosing the right cleaners is vital, but other habits also significantly enhance safety. Implementing a routine cleaning schedule, including daily vacuuming and prompt spill cleanup, reduces reliance on harsh chemicals. Establish no-clean zones in areas where pets lounge, their beds, and favorite carpets, using plain water or steam cleaning to freshen these sanctuaries. Store all cleaning supplies, even seemingly innocuous DIY ingredients, behind locked cabinets; pets might nibble on vinegar or essential oils, causing gastrointestinal upset.

Invest in a HEPA air purifier to trap dander, dust, and airborne irritants, lessening the need for chemical air fresheners. Train pets to wait outside during deep cleaning tasks. Use gates or closed doors to prevent them from inadvertently coming into contact with wet surfaces. After introducing any new cleaner, store-bought or homemade, monitor your pets for sneezing, itching, drooling, or lethargy; discontinue use and ventilate immediately if symptoms arise. Keep litter boxes and cages pristine: scoop daily, replace bedding weekly, and use unscented, dust-free litter to prevent respiratory irritation. When dusting, opt for a damp microfiber cloth instead of feather dusters to capture particles without dispersing them into the air.

These practices, combined with conscientious product choices, create a comprehensive safety net, ensuring that every corner of your home remains both clean and gentle for all inhabitants.

Frequently Asked Questions

What makes a cleaning product “pet-safe”?

A pet-safe cleaner avoids harsh chemicals, like phenols, bleach, ammonia, and quats, that can irritate or poison animals. Instead, it relies on mild, naturally derived ingredients (such as vinegar, baking soda, and plant-based surfactants) and clear, transparent labeling without undisclosed “fragrances.”

Can I use vinegar and baking soda around my pets?

Yes. Distilled white vinegar and baking soda are generally non-toxic to cats, dogs, and small animals when used correctly. To prevent pets from licking or inhaling residual acids or residues, always dilute the vinegar with water, thoroughly rinse the surfaces, and allow them to dry completely.

Are essential oils safe for homemade cleaners?

Most essential oils, especially tea tree, citrus, pine, eucalyptus, and peppermint, are unsafe for cats (and often dogs) because they lack liver enzymes to process certain phenolic compounds. If using oils, choose pet-friendly options (such as lavender and chamomile) sparingly and ensure the spaces are well-ventilated and fully dry before reintroducing animals.

How do I remove stubborn pet stains without chemicals?

Sprinkle plain baking soda or a baking soda–cornstarch mix over the stain, let it sit for 30 minutes to absorb odors, then vacuum. For spot treatment, gently spray a blend of ¼ cup vinegar, ¼ cup castile soap, and 2 cups of water. Blot, rinse with a damp cloth, and air dry.

Which store-bought brands are reliably pet-friendly?

Look for products from Earth Rated™, Better Life™, Puracy™, ECOS®, and Method™ (pet lines). These brands utilize plant-based, non-toxic ingredients, avoid synthetic fragrances, and often hold certifications (EPA Safer Choice, vegan, and cruelty-free). Always verify ingredient lists and allow surfaces to dry before pets return.

How can I ensure cleaning fumes don’t harm my animals?

Ventilate rooms by opening windows or running exhaust fans when cleaning to improve air quality. Use only low-VOC, fragrance-free formulas. Keep pets out of areas until surfaces are dehydrated,this minimizes inhalation risk and prevents accidental ingestion of residues.

Is bleach ever safe to use if I have pets?

Bleach can be disinfected effectively, but it poses significant risks if ingested or inhaled. If necessary (e.g., sanitizing pet bowls), dilute the solution heavily (1 tablespoon per gallon of water). Rinse surfaces thoroughly and allow them to air-dry completely in a well-ventilated area before allowing pets access.

How often should I clean to minimize the use of harsh chemicals?

Establish a routine: sweep or vacuum daily to remove fur and dander, spot-clean spills immediately, and perform deeper cleaning weekly with mild or DIY solutions. Regular upkeep reduces the need for strong, potentially harmful products.

Conclusion

Crafting a home that gleams without jeopardizing pet health demands intentionality and care. By steering clear of phenols, bleach, ammonia, quats, and undisclosed “fragrances,” you drastically cut the chance of accidental poisoning. Mastering label-reading, distinguishing “biodegradable” from truly non-toxic, is as crucial as consulting recognized pet-safe certifications. Embracing DIY recipes built on vinegar, baking soda, and castile soap gives you control, while trusted brands like Earth Rated, Better Life, and Puracy offer convenient, vet-recommended alternatives. Tailoring cleaning strategies to each room, ensuring surfaces are fully dry before letting curious noses wander, alongside species-specific precautions (such as avoiding tea tree oil around cats and aerosols near birds), further reduces the risk.

Finally, integrating holistic habits, such as daily maintenance, secure storage, air purification, and mindful monitoring, elevates your cleaning routine from merely functional to deeply protective. When you blend these elements, complex in consideration but straightforward in practice, you cultivate a living space that sparkles and sustains the well-being of every whisker, paw, and feather in your care.

Robot Vacuum vs Traditional Vacuum: A Concise Guide to Choosing the Right Cleaner

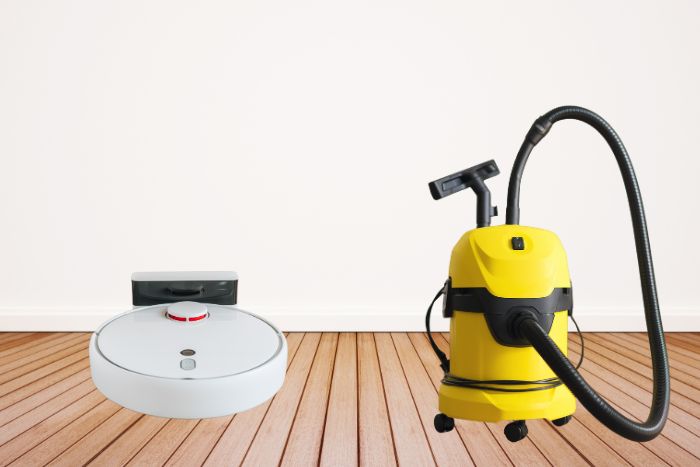
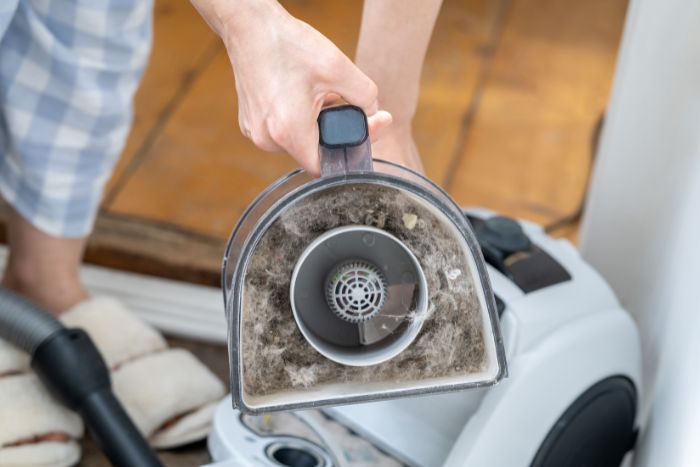
Selecting between a robot vacuum and a traditional vacuum isn’t purely academic; it shapes daily routines, indoor air quality, and overall home hygiene. A conventional vacuum offers direct control, raw suction, and the satisfaction of meticulous cleaning. Yet, it demands time, physical effort, and periodic maintenance.

In contrast, a robot vacuum navigates autonomously, sweeping floors while you focus on work, errands, or relaxation. Its convenience comes with trade-offs: modest suction, potential navigation hiccups, and reliance on consistent power and mapping accuracy. The decision you make resonates beyond mere equipment; it influences allergen reduction, pet hair management, noise tolerance, and long-term cost.

By weighing each type’s strengths, limitations, and how they align with your living space and lifestyle, you can select a solution that strikes a balance between efficiency and efficacy. This concise guide distills core considerations, features, costs, and convenience to help you decide which vacuum style best meets your unique cleaning demands.

Understanding Traditional Vacuums

Traditional vacuums encompass a range of designs, including upright, canister, stick, and handheld models, each tailored for distinct tasks. Uprights deliver formidable suction, making short work of carpets and rugs, but often weigh more and can be unwieldy on stairs. Canister models boast flexible hoses, better maneuverability under furniture, and generally quieter operation; however, their bulkier bodies demand more storage space.

Stick vacuums excel in lightweight, cordless convenience, making them ideal for quick cleanups on hard floors; however, their smaller motors and dustbins limit capacity and deep-cleaning power. Handheld units excel at spot-cleaning upholstery, cars, and tight nooks but lack the breadth for full-home cleanups. Key metrics include suction strength (in air watts), filtration type (standard versus HEPA), and bagged versus bagless designs, each influencing maintenance frequency and the efficacy of cleanliness.

Attachments, such as crevice tools, motorized brush rolls, and upholstery nozzles, extend versatility across various surfaces. Appreciating these variables clarifies why traditional vacuums remain a stalwart choice for thorough, hands-on cleaning.

Understanding Robot Vacuums

Robot vacuums represent a technological leap, compact, autonomous devices equipped with sensors, brushes, and onboard intelligence. Early models employed random bump-and-go patterns, often missing corners or under-furniture zones. Modern iterations harness LiDAR, cameras, or advanced infrared sensors to map rooms, navigate obstacles, and optimize cleaning paths. Their cleaning arsenal typically includes side brushes that sweep debris along walls and a central roller, either rubber or bristle, to agitate dirt. Dustbins are modest, ranging from 0.5 to 0.7 liters, and require frequent emptying. Filtration options range from basic foam to true HEPA on premium units. Powered by lithium-ion batteries, most robots deliver 60–120 minutes of cleaning per charge, then dock automatically to recharge and, in some cases, resume unfinished tasks.

Smartphone integration, voice-assistant compatibility, and virtual boundary features offer fine-grained control. Higher-end versions even feature auto-empty stations, multi-floor mapping, and mopping attachments. Understanding a robot vacuum’s navigation, suction metrics, and innovative capabilities sets realistic expectations for its performance compared to traditional vacuums.

Performance Comparison

Aspect

Traditional Vacuum

Robot Vacuum

Cleaning Power

High suction (100–300 AW) for deep extraction on carpets/rugs

Moderate suction (600–3,000 Pa), excels on hard floors

Coverage & Navigation

Manual control, reach under furniture and corners with attachments

Autonomous mapping with LiDAR/camera may miss tight corners

Adaptability

Adjustable brush-roll heights; multi-surface attachments

Best on low-pile carpets and hard floors; struggles on thick rugs

Maintenance Frequency

Filter clean monthly; belt/brush-roll check weekly

Empty small bin every 1–3 runs; untangle brushes weekly

Noise Level

70–80 dB (loud, like city traffic)

55–65 dB (quieter, like a dishwasher)

Dustbin/Bag Capacity

Large bag/bin (2–5 L); less frequent emptying

A small bin (0.3–0.7 L) requires more frequent emptying

Allergen Control

HEPA options trap 99.97% of 0.3-micron particles

Some models offer HEPA; the seal is often less airtight

Cost (Upfront)

$50–$1,000+ depending on type and features

$150–$1,200+ based on navigation, suction, and extra features

Battery & Power

Corded or cordless (30–60 min runtime); consistent power until bag is full

60–120 min runtime; auto-docks to recharge, may resume cleaning

Ideal Use Case

Deep-clean enthusiasts, large homes, heavy-duty tasks

Busy households, small to medium homes, and daily surface maintenance

When comparing cleaning performance, traditional vacuums hold the advantage in raw suction and deep-cleaning prowess. Their motors generate high air watts, often exceeding 200 AW, ensuring embedded dirt and pet hair vanish from thick carpets and rugs.

Manual control lets you address stubborn corners, under furniture, and upholstery attachments on demand. By contrast, most robot vacuums advertise suction in pascals (600–3,000 Pa). Their moderate suction is sufficient for routine pickups on hardwood and low-pile carpets but struggles on high-pile rugs and deep-seated debris. Navigation technology enhances coverage: LiDAR-equipped robots deftly map rooms and avoid obstacles, yet they can still miss tight corners or become entangled in cords. Traditional models maintain constant suction until the bags fill, while robots’ small bins require regular emptying, sometimes mid-cycle, which reduces efficiency.

In homes that prioritize meticulous and powerful cleaning, especially those with intricate flooring, traditional vacuums reign supreme. For consistently light tasks, keeping surfaces free of daily dust and pet hair, robot vacuums deliver convenience at the expense of brute force.

Convenience and Ease of Use

Convenience diverges sharply between manual and automated operations. Traditional vacuums demand human intervention: you plug in (or ensure the battery is charged), then push and pull, exerting physical effort that can feel strenuous, especially in large or multi-story homes. Storage options vary: uprights stand tall, canisters slide under counters, and sticks are often wall-mounted. Expect noise levels of around 70–80 decibels, comparable to bustling city traffic, which requires noise tolerance.

Conversely, robot vacuums excel in hands-off convenience. After initial setup, place the dock in an open space, connect to Wi-Fi, and configure it via the app. Then, schedule or press “start.” The robot hums quietly at around 55–65 decibels, returning to its dock automatically when its battery level wanes. The effort is limited to clearing floor obstacles and emptying the bin every few cycles. Robots offer a convenient, hands-off option for individuals with busy schedules, noise sensitivity, or mobility issues. Traditional vacuums appeal when direct control, customizable attachments, and deep cleaning needs outweigh the need for manual labor.

Cleaning Power and Suction Metrics

Evaluating cleaning power demands attention to quantifiable metrics. Traditional vacuums measure suction primarily in air watts (AW), blending airflow (CFM), and water-lift pressure. Entry-level models start at around 100–140 AW; mid-tier vacuums range from 140 to 200 AW; and premium units exceed 200 AW, which is critical for rigorous carpet extraction. CFM measures the volume of air a vacuum moves, directly affecting its ability to pick up larger debris, such as cereal or pet kibble. HEPA-equipped traditional models trap 99.97% of particles measuring 0.3 microns, delivering superior allergen control. Robot vacuums, however, advertise suction in pascals (Pa). Basic models muster 600–1,200 Pa; mid-range units achieve 1,200–2,200 Pa; top-tier robots breach 2,200+ Pa.

Although a 2,700 Pa robot might rival a low-end stick vacuum on hardwood, it remains outmatched on thick rugs. Battery runtime (60–120 minutes) and compact dustbin capacities (0.3–0.7 liters) limit coverage, requiring frequent emptying. By comparing AW versus Pa, alongside filtration and bin size, you can determine whether a vacuum meets your real-world cleaning needs.

Versatility: Surfaces and Obstacles

Versatility hinges on how well a vacuum adapts to diverse surfaces and navigates common household obstacles. Traditional vacuums excel on both carpets and hard floors when equipped with adjustable brush-roll heights. Their attachments, such as crevice tools, motorized pet brushes, and upholstery nozzles, expand functionality to cover stairs, sofas, and vents. Canister models’ flexible hoses can reach under low-clearance furniture, while handheld units are designed to tackle cars or countertops.

Conversely, robot vacuums shine on smooth floors and low-pile carpets; their side brushes sweep along baseboards, and automated mapping optimizes coverage. Yet, high-pile carpets (over 1 cm) often exceed the climbing thresholds of many robots, resulting in missed areas. Fringed rugs or cords can snag on side brushes, requiring human intervention. Cluttered rooms pose hazards: toys, cables, and pet bowls can trap or confuse robots.

Traditional vacuums, however, allow for manual navigation around obstacles. In homes with varied floor types and frequent obstacles, traditional vacuums offer consistent adaptability, while robots perform best in uncluttered, open-floor environments with minimal transitions.

Cost Considerations

Cost evaluation encompasses upfront investment and recurring expenses. Traditional vacuums range from $50 to $ 1,000: basic stick or upright models cost $50–$100, mid-range HEPA-equipped uprights and canisters are priced at $200–$400, and premium brands (such as Dyson and Miele) start at $500+.

Replacement parts, belts ($5–$20), filters ($10–$30), and dustbags ($10–$30), add maintenance costs, and cordless models incur $50–$100 battery replacements every 2–3 years. Electricity consumption ranges from 500 to 1,200 watts; with weekly vacuuming, annual energy costs hover between $10 and $20.

Robot vacuums range from $150 to $ 1,200: entry-level random-navigation units cost $150 to $250, mid-range mapping models cost $300 to $600, and high-end LiDAR-enabled robots with auto-empty bases cost $700 to $1,200.

Replacement parts, such as filters ($10–$20), side brushes ($8–$15), main brushes ($20–$40), and batteries ($80–$200), contribute to ongoing costs.

Robot energy draw is lower, at 30–60 watts during operation, costing $5–$10 annually. When assessing value, weigh a traditional vacuum’s superior suction against a robot’s automation and convenience, aligning expenses with cleaning priorities.

Maintenance and Lifespan

Maintenance protocols shape both performance and lifespan. Traditional vacuums require periodic filter cleaning, bagless models often need monthly rinsing of pre-motor filters, while HEPA filters need to be swapped every 6–12 months. Brush-roll checks and belt inspections help prevent wear and tear on the machine.

Remove hair weekly to avoid tangles; belts generally last a year, while brush rolls typically wear out over 1–2 years. Bagged models necessitate timely bag changes to preserve suction. With diligent care, uprights and canisters can endure 8–12 years; cordless sticks, limited by battery life, often last 3–5 years.

Robot vacuums require more frequent maintenance: emptying a small bin after every 1–3 runs, washing or replacing filters every 2–3 months, and untangling side and main brushes weekly, especially in homes with pets. Cleaning sensors and wheels every month ensures accurate navigation.

Robot batteries usually require replacement after 1–2 years; firmware updates and remapping may be needed after significant layout changes. Proper maintenance can extend the longevity of robot vacuums to 4–6 years or up to 8 years with timely battery swaps.

Additional Features: Beyond Basic Cleaning

Beyond suction and navigation, additional features differentiate vacuums. Traditional models seldom integrate with innovative ecosystems, although a minority of them track usage via “smart bags.” Their scheduling is manual: plugin, select attachments, and vacuum. Accessories, such as crevice tools for tight corners, upholstery brushes for drapes, and motorized pet attachments, enhance versatility across various surfaces. Noise levels remain elevated (70–80 dB), necessitating tolerance or the use of ear protection.

In contrast, robot vacuums thrive on connectivity. Voice control via Alexa or Google Assistant enables hands-free commands, while smartphone apps permit remote scheduling, monitoring, and the creation of virtual boundaries to block off no-go zones. IFTTT integration can trigger cleaning when you leave home. Premium units feature auto-empty stations that deposit debris into larger base bins, reducing the frequency of manual bin emptying. Hybrid mopping attachments enable post-vacuuming scrubs on hard floors. Filtration also varies: entry-level robots rely on basic foam filters, whereas high-end models feature sealed HEPA systems. These extras, automation, app-based zoning, mopping, and auto-emptying, elevate robot utility beyond mere vacuuming.

Pros and Cons Summary

Traditional Vacuum Pros

  • Robust suction (200–300+ AW) ensures deep cleaning of carpets and rugs.
  • Diverse attachments (crevice tools, motorized brushes) tackle upholstery, vents, and stairs with precision.
  • Sealed HEPA filtration prevents allergen recirculation, making it ideal for households with sensitive individuals.
  • Consistent performance until the bin or bag reaches capacity.

Traditional Vacuum Cons

  • Requires manual operation: pushing, pulling, and repositioning can feel laborious.
  • A bulkier storage footprint and louder noise (70–80 dB) can disrupt daily activities.
  • Ongoing costs for belts, filters, bags, and possible battery replacements elevate long-term expenses.

Robot Vacuum Pros

  • Hands-free, scheduled cleaning accommodates busy lifestyles; minimal intervention post-setup.
  • Quieter operation (55–65 dB) makes daytime or background cleaning more tolerable.
  • Advanced navigation (LiDAR or cameras), app control, and voice integration streamline usage.
  • Premium models feature auto-empty bases, multi-floor mapping, and mopping attachments for expanded capabilities.

Robot Vacuum Cons

  • Moderate suction (600–3,000 Pa) tends to underperform on high-pile carpets and thick rugs.
  • Frequent bin emptying and brush untangling, especially when dealing with pet hair, require diligent maintenance.
  • Limited reach: corners, very low-clearance furniture, and cluttered areas often remain uncleaned.
  • Higher upfront costs are associated with top-tier models; battery replacements are required every 1–2 years, adding recurring expenses.

By aligning each model’s advantages with drawbacks, you can pinpoint which vacuum type best meets your home’s layout, cleaning habits, and budgetary considerations.

Who Should Choose a Traditional Vacuum?

Traditional vacuums appeal to those prioritizing unparalleled suction and hands-on cleaning control. Households with thick, high-pile carpets or multiple area rugs need the deep-extraction power, often 200+ AW, only found in uprights or canisters. Allergy sufferers benefit from sealed HEPA filtration systems, which capture 99.97% of particles measuring 0.3 microns or smaller, thereby reducing the presence of airborne irritants.

Budget-conscious buyers willing to put in manual effort can opt for entry-level models under $100, recognizing that they typically deliver more powerful suction than basic robots. Detail-oriented users who enjoy tackling stairs, upholstery, vents, and tight corners with specialized attachments, such as crevice tools, motorized brush rolls, and dusting brushes, will relish the hands-on precision. Large homes with extensive square footage or heavy foot traffic demand consistent power; robot vacuums often require multiple cycles and still miss embedded dirt. Ultimately, if you seek deep-clean performance, direct control, and robust filtration, a traditional vacuum remains the optimal solution.

Who Should Choose a Robot Vacuum?

Robot vacuums excel for individuals who value time savings, convenience, and maintaining a consistently clean surface. Busy professionals, families with packed schedules, or those juggling remote work appreciate hands-free cleaning: schedule daily or multiple runs, and floors stay relatively free of dust, crumbs, and loose pet hair. Small homes or apartments with predominantly hard floors or low-pile carpets are well-suited for mid-range robots (≥1,500 Pa suction), often at a lower price point than many upright models.

Tech enthusiasts delight in advanced features, such as voice-command activation via Alexa or Google, virtual boundary creation, and IFTTT integrations that trigger cleaning when you leave home. Noise-sensitive environments, nurseries, home offices, or shared living spaces, benefit from quieter operation (55–65 dB). Elderly or mobility-challenged users find minimal physical exertion, just clearing floor obstacles and pressing “start” via app or remote, to be far preferable to pushing a heavy vacuum. While robots don’t replace deep clean sessions, they maintain a baseline level of cleanliness, making them ideal for convenience-focused households.

Hybrid Approach: Best of Both Worlds

A hybrid strategy unites robots and traditional vacuums for comprehensive cleanliness. Begin with daily or alternate-day robot vacuum runs, set for 30–45 minutes, to maintain surface dust, crumbs, and pet hair levels. The robot’s autonomous navigation and scheduled operation prevent the accumulation of loose debris, ensuring your floors look passable at all times. Then, once a week or biweekly, deploy a powerful traditional vacuum, such as an upright or canister model with 200+ AW suction, to perform a rigorous deep clean. This secondary session extracts embedded dirt from carpets, area rugs, and upholstery, areas where robots struggle. In multi-story homes, assign the robot to the main living area’s open spaces and use a lightweight, cordless stick for touch-ups on upper levels. This dual approach leverages automation for daily maintenance while preserving the brute-force cleaning capabilities of traditional vacuums. You get consistent floor freshness without sacrificing deep-clean quality, balancing convenience with performance.

FAQs

Can a robot vacuum fully replace a traditional vacuum?

No. Robots handle daily surface maintenance but lack the suction needed for deep-cleaning carpets and rugs.

How often should I run my robot vacuum?

For light debris, run 2–3 times per week. For pets or in areas with heavy traffic, daily 20– to 30-minute runs work best.

Are robot vacuums prone to getting stuck on cords and other objects, such as toys?

They have sensors, but can still tangle; clearing floors of small objects beforehand minimizes issues.

What is the typical battery life of a robot vacuum?

Most models clean for 60–120 minutes per charge; larger homes may require multiple cycles or utilize “resume after recharge” features.

Do traditional vacuums consume a lot of electricity?

Modern units draw 500–1,200 watts when running; at one hour per week, annual electricity costs are only around $10–$20.

Conclusion

Convenience, cleaning ability, and lifestyle requirements must all be considered when choosing between a robot vacuum and a conventional vacuum. Traditional vacuums deliver robust suction, ideal for deep cleaning high-pile carpets, removing embedded pet hair, and serving households prone to allergies. They require manual operation, produce higher noise levels (70–80 dB), and demand physical effort. In contrast, robot vacuums offer automated, scheduled cleaning, quieter operation (55–65 dB), and smartphone or voice control, making them perfect for busy professionals, small homes, or those who are averse to manual chores. Their moderate suction and smaller dustbins make them better suited for routine surface maintenance on hard floors and low-pile carpets. For many, a hybrid approach, robots for daily touch-ups and traditional vacuums for weekly deep cleans, provides the best of both worlds. By analyzing budget, home layout, pet and allergy considerations, and noise tolerance, you can select the ideal vacuum type that keeps your floors consistently clean while aligning with your daily routines and priorities.

Pet Hair Vacuum vs. Regular Vacuum: The Ultimate Showdown

Every pet owner knows the frustration of fur clinging to carpets, upholstery, and corners long after Fluffy has left the room. Pet hair isn’t just unsightly; it can entangle brush rolls, exacerbate allergies, and even harbor odors and pests. Enter the vacuum cleaner: your first line of defense. However, not all models are created equal. On one side, specialized pet hair vacuums boast tangle-resistant brush rolls, enhanced suction, and HEPA filtration; on the other, regular vacuums offer versatility for everyday spills and dust.

This guide pits them head-to-head. We’ll explore design differences, performance on various surfaces, ease of maintenance, and cost considerations. By the end, you’ll understand which vacuum aligns with your lifestyle and budget. Whether you live with a molting Maine Coon or a short-haired Chihuahua, this showdown will equip you to choose the machine that wins the war against pet hair, fast, effectively, and without constant brush-roll tangles.

Why Pet Hair Is a Unique Challenge

Pet hair presents a distinct cleaning dilemma: lightweight yet sticky, it binds clumps of dander and debris, weaving into carpet fibers. Unlike dust, fur’s structure, keratin strands coated in oils, forms matted tangles that standard vacuums often brush aside rather than lift. Electrostatic cling further exacerbates the problem: hair sticks to upholstery, baseboards, and even vacuum hoses, causing clogs. Unchecked, it aggravates allergies, triggers asthma attacks, and degrades indoor air quality.

Moreover, masses of hair can jam brush rolls, forcing repeated stops to manually cut and remove tangles, a nuisance that prolongs cleaning sessions. The specialized engineering inside pet hair vacuums, such as anti-wrap brush rolls, high airflow, and sealed HEPA filters, directly addresses these challenges. In contrast, regular vacuums, designed for general dust and debris, struggle to pick up persistent fur clusters, resulting in inefficient cleaning and frequent maintenance. For pet owners, understanding why fur fights back is the first step toward selecting the right cleaning tool.

Key Features of Pet Hair Vacuums

Pet hair vacuums incorporate design elements that tackle fur head-on. First, tangle-free brush rolls, often made of rubber blades or segmented bristles, resist hair wrap, reducing interruptions caused by manual detangling.

Next, specialized attachments like motorized pet tools, rubber pet nozzles, and crevice tools with fleece linings snatch embedded hair from upholstery, stairs, and tight corners.

Third, enhanced suction power (often 200–350 air watts) provides the force needed to lift deeply lodged fur without losing airflow.

Fourth, HEPA filtration systems trap 99.97% of particles down to 0.3 microns, critical for capturing dander and allergens before they recirculate.

Fifth, larger-capacity dust bins or bags (0.8–1.5 liters or 2–4 quarts) minimize the need for trips to the trash, while one-click emptying keeps hands clean.

Finally, these vacuums often feature reinforced materials, such as sturdy plastics, reinforced hoses, and durable wands, to withstand frequent heavy use and prevent wear from abrasive fur. Combined, these enhancements make pet hair vacuums a specialized tool for homes with fur-laden environments.

Core Attributes of Regular Vacuums

Regular vacuums excel at everyday cleaning, dust, crumbs, and loose debris, but falter against persistent pet hair. They typically employ standard brush rolls, which are either bristle-based or beater bars that excel at agitating carpet but easily wrap fur, requiring frequent stops to untangle. Their basic attachments, such as upholstery nozzles and crevice tools, aren’t optimized to extract hair; they’ll often plow it deeper or leave tufts behind. Suction power ranges widely: budget models may offer 40–80 air watts, mid-tier models 100–200 air watts, but anything under 150 air watts struggles to lift embedded fur. Filtration generally relies on foam or basic paper filters, adequate for dust but ineffective at trapping microscopic dander, allowing allergens to escape. Moreover, smaller dust cups (0.3–0.6 liters) fill quickly, interrupting cleaning sessions, and their lightweight build (8–12 lbs) often sacrifices durability when confronted with heavy fur loads. While budget-friendly ($50–$150), regular vacuums require more maintenance, such as brush-roll cleaning, filter replacements, and belt changes, when used in a pet-filled environment.

Comparison Criteria

To determine which vacuum reigns supreme, consider seven core criteria:

  • Suction Power & Airflow: Pet hair vacuums often boast suction power of 200–350 AW, ensuring deep extraction. Regular vacuums range from 40–200 AW; performance drops significantly when brush rolls tangle.
  • Brush Roll Design: Pet models feature anti-wrap rubber or segmented strips, whereas regular vacuums rely on bristles that are prone to hair accumulation.
  • Filtration & Allergen Control: HEPA-sealed systems in pet vacuums capture 99.97% of dander. Regular vacuums use foam or paper filters, allowing fine particles to recirculate.
  • Noise & Maneuverability: Pet vacuums are heavier (15–20 lbs) and slightly louder (60–70 dB), although some models utilize motor insulation. Regular vacuums weigh 8–12 lbs and operate at 50–65 dB.
  • Dust Bin Capacity & Maintenance: Pet models have 0.8–1.5 L bins or 2–4 qt bags, reducing the frequency of emptying. Regular vacuums often need bin swaps mid-clean (0.3–0.6 L).
  • Price and Value: Pet vacuums range in cost from $200 to $800, but they can reduce long-term maintenance and improve air quality. Regular vacuums start at $50–$150 but may require more frequent repairs and deliver inconsistent cleaning results.
  • Warranty & Longevity: Pet vacuum brands (Dyson Animal, Shark Pet) provide 3–5 year warranties; regular vacuums typically offer 1–2 years. Heavy-duty construction in pet models prolongs lifespan.

Evaluating these factors together ensures you choose a vacuum suited to your pet’s shedding habits and home environment.

Real-World Performance

  • Low-Pile Carpet

On short carpets, pet hair vacuums excel. High suction (often exceeding 200 AW) and anti-wrap brush rolls capture 90–95% of visible fur in a single pass. The tangle-resistant design prevents clogs, allowing continuous cleaning. In contrast, regular vacuums need multiple passes; bristle-based rolls often wrap hair, forcing frequent stops to cut tangled strands. The result: wasted time and uneven cleaning. If daily or weekly maintenance is critical, especially under heavy shedders, a pet-specific vacuum ensures carpets look nearly hair-free after every session.

  • High-Pile Carpet

Thick, plush carpets challenge vacuums. Pet hair models often include height-adjustment settings, allowing strong suction without snagging carpet loops. The powerful airflow lifts embedded hair that even a nimble regular vacuum struggles to reach. Standard vacuums tend to push hair toward the surface, leaving behind rooted tufts. Additionally, the weight of a pet vacuum helps the brush roll penetrate dense fibers, while a regular model may bounce atop the pile, failing to contact deep-set fur. For homes with shag or high-pile rugs and pets that shed heavily, a pet vacuum’s depth penetration delivers a cleaner finish.

  • Hardwood & Tile Floors

On hard floors, brush-roll downgrades can fling hair if not disabled. Pet vacuums often feature a dedicated bare-floor mode, allowing you to switch to a rubberized roller or suction-only tool that lifts hair without scattering it. The smooth edges and optimized suction pick up hair and dust simultaneously, leaving a polished finish. Regular vacuums sometimes lack a brush-roll shutoff, causing bristles to push hair across hardwood or tile. Sticky hair tufts may require repeated passes, and lackluster suction can leave residual debris. However, specific mid-range regular models that offer a “hard-floor” setting can work adequately, though they typically need more passes and occasional manual finishing with a broom or microfiber pad. For homes with hard surfaces, a pet vacuum’s dedicated floor tool ensures quick and effective pickups.

  • Upholstery & Stairs

Furniture and stair treads become magnets for fur. Pet hair vacuums bundle motorized pet tools, a mini powerhead with rotating bristles, and rubber nozzles that scrape hair from fabric weaves without tangling. On stairs, the compact head maneuvers into corners, capturing hair in crevices. The basic upholstery brushes of regular vacuums often lack the power or design to dislodge clinging fur, which can push hair deeper into the fabric or scatter tufts across cushions. Many owners resort to lint rollers or kitchen scissors to augment pickups. For households with cloth sofas, recliners, or carpeted stairs, pet vacuums dramatically reduce friction: hair lifts on the first pass, minimizing repeated work and ensuring a consistently clean finish without resorting to manual methods.

Cost-Benefit Analysis

When calculating the actual value, weigh both the upfront price and the long-term savings:

Factor

Pet Hair Vacuum

Regular Vacuum

Initial Price

$200–$800

$50–$300

Maintenance Frequency

Infrequent, anti-wrap

Frequent tangle cleanup

Attachment Versatility

Includes pet-specific tools

Basic tools only

Filtration

Sealed HEPA (0.3μm)

Foam or paper filters

Dust Bin Capacity

0.8–1.5 L / 2–4 qt

0.3–0.6 L

Warranty

3–5 years, robust build

1–2 years, lighter build

Replacement Costs

Low (durable parts)

Higher (hose/brush roll replacements)

Operational Noise

Moderate (60–70 dB)

Lower (50–65 dB)

Weight

Heavier (15–20 lbs)

Lighter (8–12 kg)

Hair Removal Efficiency

90–95% in one pass

30–50%, multiple passes

Long-Term Savings: A pet vacuum’s reduced downtime, fewer replacement parts, and improved air quality often offset its higher ticket price. The expedited cleaning process, which eliminates the need for detangling brush rolls, saves hours annually. For allergy sufferers, capturing dander with a sealed HEPA system can help reduce medical costs and absenteeism due to illness. Conversely, regular vacuums may seem budget-friendly initially, but they often require frequent filter and brush roll replacements when forced to tackle heavy pet hair.

Drawbacks of Pet Hair Vacuums

  • Higher Purchase Price
  • Specialized features and robust build push prices to $200–$800. For minimal shedding or tight budgets, this can feel excessive.
  • Bulk and Weight
  • Weighing 15–20 lbs, pet vacuums can be cumbersome when carried upstairs or between rooms.
  • Complex Maintenance
  • Though brush rolls resist tangles, HEPA filters require washing or replacement every 3–6 months. Failure to maintain them reduces performance.
  • Potential Overkill
  • Loath to expend extra features if you rarely battle fur, sometimes a solid regular vacuum suffices.

Drawbacks of Regular Vacuums

  • Frequent Clogs & Downtime

Bristle-based brush rolls easily wrap fur, dropping suction to near zero. You’ll spend more time manually cutting hair than actually vacuuming.

  • Ineffective Deep Cleaning

Embedded hair in carpet fibers often survives multiple passes, forcing repeated attempts and manual finishing.

  • Poor Allergen Control

Foam or paper filters fail to trap microscopic dander. Allergens recirculate, reducing indoor air quality and aggravating respiratory issues.

  • Small Dust Bins

A 0.3–0.6 L canister fills rapidly when collecting pet hair. Frequent emptying interrupts the cleaning flow.

Choosing Based on Specific Scenarios

Heavy-Shedding Multi-Pet Homes

Breeds like Huskies or Maine Coons demand robust suction and anti-wrap brush rolls. A pet hair vacuum with a motorized pet tool and sealed HEPA filtration is essential for effective pet hair removal.

Occasional Shed, Tight Budget

Short-haired breeds (Beagles, Boxers) shed moderately. A mid-range, regular vacuum ($100–$150) with decent suction and a basic HEPA filter, complemented by a lint roller, can suffice without breaking the bank.

Allergy or Asthma Concerns

Regardless of pet breed, airborne dander heightens triggers. A pet hair vacuum with a sealed, multi-stage HEPA system is crucial for trapping 99.97% of particles, preventing recirculation, and safeguarding respiratory health.

Large Home, Mixed Floors

Combine tools: use a pet hair vacuum upstairs for carpet and dander control, then switch to a lightweight stick or regular vacuum downstairs for quick hardwood touch-ups. This hybrid approach strikes a balance between power and agility.

Small Apartment, Minimal Storage

Look for compact pet hair sticks that fold away in a closet. They handle moderate shedding, deliver specialized accessories, and tuck into tight spaces. If your pet is short-haired and you have limited square footage, a multi-purpose regular stick vacuum might suffice, saving storage space.

Top Pet Vacuum Features to Prioritize

Brush-Roll Shutoff Switch

Enables seamless transitions from carpet to hard floors without scattering hair. Ensures you can turn off bristles and rely purely on suction.

Swappable Pet Tools

A motorized mini powerhead and a rubber floor nozzle maximize versatility, which is essential for upholstery, stairs, and hardwood floors.

Sealed HEPA Filtration

Confines 99.97% of 0.3-micron particles. Guarantees no leaks around filter housing, preventing allergen blowback.

Easy-Empty Dust Cup

One-click emptying prevents contact with sticky hair and dust. Larger capacities (0.8–1.5 L) reduce interruptions.

Adequate Reach or Runtime

For corded models, prioritize cords of 25–30 ft to avoid the need for plug swapping. For cordless devices, aim for at least 30 minutes of runtime at high power.

Maintenance Tips for Prolonged Performance

  • Weekly Brush-Roll Cleaning

Even “no-wrap” designs collect fine fibers. Detach and snip away any residual hair; rinse if permitted by the manufacturer.

  • Filter Washing & Replacement

Follow guidelines: Foam pre-filters are typically washable, while HEPA filters need to be replaced every 6–12 months. Dirty filters impair airflow.

  • Hose & Seal Inspections

Check hoses quarterly for cracks or gaps. Leaks reduce suction; seal or replace faulty components promptly.

  • Empty Before Full

Never wait until bins are brimming. Aim to keep the tank at half-full to maintain maximum airflow and prevent jams.

  • Proper Storage

Store vacuums upright in a superb, dry location. Excess humidity weakens plastic and promotes mold growth in filters, thereby reducing the vacuum’s lifespan.

User Reviews: Experiences from Pet Owners

I switched from my old upright to a pet canister, night and day difference. No more stopping to cut out hair; carpets look brand-new.”

, Samantha R., Labrador owner

My regular stick vacuum churned hair around my studio. The pet stick model filled halfway in five minutes, worth every penny.”

, Carlos M., Golden Retriever owner

I used to sneeze for an hour after vacuuming. The sealed HEPA system in my pet vacuum ended that. It’s heavier, but breathing easy is priceless.”

, Leah T., Cat owner

Adopted two long-haired kittens, my hybrid stick handled daily cleanup, but molting meant frequent bin swaps. Now I alternate with a pet canister for deep cleans.”

, Jamal F., Mixed-breed cat owner

Alternatives and Complementary Tools

  • Rubber Broom or Furminator
  • Use this pre-vacuum to loosen embedded hair on carpets or furniture; it dramatically reduces the workload for your vacuum.
  • Lint Rollers & Sticky Sheets
  • Ideal for clothing, curtains, and car interiors, this is a quick fix between vacuum sessions.
  • Air Purifiers with HEPA Filters
  • Captures airborne dander, reducing the settling of hair and allergens on surfaces, and complements vacuuming for healthier air.
  • Robotic Pet Vacuums
  • While they lack brute suction, they maintain a baseline level of cleanliness on a daily basis. Run them overnight to minimize fur buildup; follow up with a deep clean using a pet vacuum once a week.

FAQs

What makes a pet hair vacuum different from a regular vacuum?

Pet hair vacuums feature tangle-resistant brush rolls and more powerful suction to lift stubborn fur, whereas regular vacuums typically rely on standard bristle brushes that often entangle hair. Additionally, pet models normally include HEPA filters to trap dander and allergens.

Can a regular vacuum handle light pet hair?

Yes, if you have a short-haired, low-shedding pet, a mid-range regular vacuum with decent suction can pick up stray fur. Just expect more frequent brush-roll cleanings and supplemental tools (like lint rollers) for deep-clean tasks.

Is the extra cost of a pet hair vacuum worth it?

If you battle heavy shedding or suffer from allergies, the upfront investment of $200–$800 can save time and reduce maintenance hassles. For minimal shedding or tight budgets, a $100–$150 regular model may suffice.

How often should I clean the filters and brush rolls?

Empty the dustbin whenever it’s half-full to maintain optimal airflow. Wash or replace HEPA filters every 6–12 months, and clear any residual fibers from brush rolls weekly to prevent performance drops.

Are pet hair vacuums louder or harder to maneuver?

Pet hair vacuums tend to be heavier (15–20 lbs) and slightly louder (60–70 dB) than regular models, but often include noise-dampening features. Their bulk trades for power; expect a bit more muscle work when carrying stairs.

Can a single vacuum work for both carpets and hardwood floors?

Most pet hair vacuums offer a brush-roll shutoff or a rubberized bare-floor tool for use on hardwood floors. If yours does, you can switch modes quickly. Otherwise, pairing the pet model with a lightweight stick vacuum gives optimal results.

Do robotic pet vacuums replace the need for deep cleaning?

Robotic models can maintain a baseline by running daily and catching loose hair. However, they lack the suction to lift matted fur, so plan weekly or biweekly deep cleans with a dedicated pet hair vacuum for best results. Top of FormBottom of Form

Conclusion

For most pet owners, especially those facing heavy shedding or allergy concerns, a pet hair vacuum emerges as the clear winner. Its specialized anti-wrap brush rolls, high suction, and sealed HEPA filtration effectively tackle embedded fur and dander, minimizing brush-roll tangles, reducing allergens, and cutting cleaning time. The larger dust bins and robust warranties justify the higher price tag of $200–$800 by reducing long-term maintenance and replacement costs.

However, if your home sees only light shedding, or if you’re constrained by budget and space, a mid-range regular vacuum ($100–$150) with decent suction and a basic HEPA filter can serve adequately, supplemented by lint rollers or manual tools. In large homes with mixed flooring, pairing a pet vacuum for carpets with a lightweight regular or stick vacuum for hard floors may be ideal.

Ultimately, assess your pet’s shedding patterns, household allergies, flooring types, and storage needs. Select the machine, whether pet-specific or general-purpose, that suits your daily routine and keeps your home fur-free with minimal effort.

The Ultimate Guide to Pet Hair Removal for a Fur-Free Home

Living with pets brings immeasurable joy, warm snuggles, playful antics, and loyal companionship. Yet there’s an inescapable reality: pet hair proliferates, drifting onto furniture, infiltrating carpets, and clinging to clothing. A few stray hairs might seem harmless at first, but over time, they accumulate, potentially aggravating allergies and marring the appearance of your home. In this condensed guide, “Pet Hair Removal Tips for a Fur-Free Home,” you’ll discover targeted strategies to tackle fur at its source, prevent excessive shedding, and streamline cleaning routines.

From understanding why pet hair clings to surfaces to selecting the right tools, like HEPA-filter vacuums and microfiber cloths, you’ll gain actionable tips. Whether you live in a small apartment or a sprawling house, these succinct insights will help you minimize hair buildup, maintain indoor air quality, and reclaim spaces that once felt overtaken by fur.

Embrace these methods and transform hair removal from an overwhelming task into a manageable habit.

Understanding Pet Hair: Why It’s So Persistent

Pet hair stubbornly clings to nearly every surface, often due to a combination of shedding cycles, static electricity, and specific fabric properties. Seasonal shedding spikes, common among double-coated breeds like Huskies, release large volumes of loose fur, which then drifts through the air and settles on upholstery. Static cling exacerbates this issue, particularly on synthetic fabrics, causing hair to adhere stubbornly even after superficial cleaning.

Additionally, textured or loosely woven materials trap stray hairs deep within their fibers. Understanding these elements enables you to modify your strategy: instead of simply sweeping or dusting, you’ll understand the need for specialized tools and routines by grasping why pet fur lingers, whether due to your cat’s molting in spring or the electrostatic pull of your couch, you can mitigate accumulation more effectively.

This foundational insight paves the way for selecting the right products and habits, ensuring your efforts target the root causes of persistent pet hair.

Essential Tools and Products for Pet Hair Removal

Effective removal starts with investing in the right tools. A high-powered vacuum cleaner, ideally one boasting a true HEPA filter and motorized pet attachments, excels at capturing deeply embedded fur. Look for rubberized brushes or tangle-free roller heads; these reduce hair wrapping around the brush and increase suction efficiency. Lint rollers and sticky sheets offer quick and portable solutions for spot-cleaning clothes, lampshades, and upholstery.

For larger surfaces, a slightly damp microfiber cloth can be run over cushions or car seats, attracting hair via static charge reversal. Rubber gloves work wonders: slip them on, dampen lightly, and stroke your furniture; the friction causes fur to ball up for easy disposal. Electrostatic dusters or microfiber dusting cloths capture airborne dander and loose hair from shelves and baseboards, rather than merely pushing particles around.

Finally, grooming tools, such as slicker brushes, de-shedding combs, and grooming gloves, remove loose undercoats before they become household debris, drastically reducing the volume of stray hairs indoors.

Room-by-Room Strategies for a Fur-Free Home

A targeted, room-specific approach optimizes time and results.

In the living room, vacuum upholstery using pet-specific attachments, then remove cushions to reach hidden crevices. Removable slipcovers, especially those that are machine-washable, simplify maintenance. Spritz anti-static fabric spray to prevent future cling.

In bedrooms, keep pets off your bed by providing an elevated pet hammock or mat nearby; wash bedding weekly in hot water and use a lint roller before bedtime.

The kitchen and dining areas require daily sweeping or vacuuming to maintain cleanliness. Wipe countertops with a microfiber cloth to remove stray hairs, and cover chairs with washable protectors.

For bathrooms, use a drain hair catcher when bathing pets, and replace bath mats weekly.

In car interiors, lay a washable blanket or a specialized seat cover. Vacuum after each trip, and carry a mini lint roller for immediate touch-ups. By breaking down cleaning tasks by space, you’ll avoid overlooking hotspots where fur tends to accumulate, ensuring each area remains as fur-free as possible.

Preventive Measures to Minimize Pet Hair Accumulation

Prevention hinges on intercepting fur before it infiltrates your home. Regular grooming, daily brushing for long-haired pets, and bi-weekly sessions for short-haired breeds capture loose undercoat at its source. Invest in de-shedding tools, such as Furminators or slicker brushes, to significantly reduce seasonal shedding. A nutrient-rich diet rich in omega-3 and omega-6 fatty acids promotes healthy skin and fur, reducing excessive hair loss. Strategically place washable covers or pet blankets on favorite furniture spots; launder them weekly to trap hair before it spreads.

Air purifiers with genuine HEPA filters are invaluable, capturing airborne dander and fine fur particles before they settle. During peak shedding seasons, increase your pet’s grooming frequency and brush them outdoors to prevent a hair blitz inside. By focusing on these proactive steps, which include grooming, dietary considerations, and environmental controls, you can reduce the volume of loose hair entering your living spaces, making subsequent cleaning tasks faster and more effective.

Specialized Techniques and Natural Remedies

Sometimes, unconventional hacks offer surprisingly effective solutions. Fabric softener sheets, lightly rubbed over upholstery or clothing, harness anti-static properties to loosen fur clinging to fibers; hair then clusters into easily collectible clumps. On carpets, a simple rubber window squeegee, drawn at a shallow angle, detaches embedded hairs, forming rows that can be scooped up. Baking soda sprinkled on rugs before vacuuming neutralizes odors and loosens hair bonds; wait 15–20 minutes, then vacuum thoroughly. For drapes or curtains, gently tossing a rubber ball loosens the hair, allowing it to fall to the floor for easy removal. In the laundry, place a damp dryer sheet inside a small, breathable bag (such as old pantyhose) to trap pet hair during the wash cycle, preventing clogs in the machine filter. Each of these budget-friendly tricks leverages static charge reversal or friction to dislodge fur, making your standard cleaning tools even more powerful without adding significant cost or complexity.

Maintenance Routines: Creating a Consistent Cleaning Schedule

Consistency transforms overwhelming tasks into manageable routines. Below is a sample weekly rota (adjust as needed):

  • Monday: Vacuum living room carpets and furniture; brush pets before bedtime.
  • Tuesday: Wipe kitchen countertops with a microfiber cloth; sweep or vacuum the dining area floor.
  • Wednesday: Dust bedroom surfaces; change and launder bedding in hot water.
  • Thursday: Intensive grooming session, dashed long-haired pets; vacuum pet bedding.
  • Friday: Vacuum carpets and rugs throughout the home; use a squeegee on high-pile areas if needed.
  • Saturday: Wash removable slipcovers and pet blankets; mop hard floors.
  • Sunday: Deep-clean bathroom (wipe surfaces, wash mats); inspect and clean vacuum filters.

By dedicating 15–30 minutes per day to targeted tasks, you prevent hair from accumulating into unmanageable masses. This systematic approach ensures that every hotspot, high-traffic area, pet resting spot, and hidden crevice receives attention, ultimately reducing overall cleaning time and effort.

Addressing Allergies and Air Quality

Pet hair often carries dander, microscopic skin flakes that can trigger allergies and respiratory irritation. Combat this by choosing vacuums with genuine HEPA filters, trapping at least 99.97% of particles down to 0.3 microns. Similarly, deploy a HEPA-equipped air purifier in primary living spaces to intercept airborne allergens before they settle. To remove dander that becomes trapped in materials, wash bedding once a week in hot water (130°F/54°C). Consider using hypoallergenic mattresses and pillow protectors with tightly woven barriers to minimize exposure to allergens.

Establish pet-free zones, such as your bedroom, by using solid doors rather than relying solely on rules, creating dander-free refuges for sensitive occupants. Post-grooming, wipe pets with a damp cloth to remove loose fur and dander before they roam.

Finally, remember to wash your hands after petting to prevent transferring dander to your face and clothes. These combined measures will markedly improve indoor air quality and reduce allergy flare-ups, allowing everyone in your home to breathe more easily.

Tips for Multi-Pet Households

With multiple furry friends, managing fur can feel relentless. Stagger grooming sessions: dedicate specific days to brush each pet so hair removal is spread out, preventing simultaneous shedding surges. Keep lint rollers in every room, allowing for instant spot cleaning without needing to retrieve supplies. Provide each pet with its bed and blanket; launder these items weekly to avoid cross-contamination of hair. If the budget allows, store a handheld vacuum centrally (e.g., a hallway closet) and a full-size vacuum elsewhere (e.g., the garage), reducing friction when switching between rooms. Use baby gates or pet gates to zone pets into specific areas while you’re away, limiting fur dispersal throughout the entire house. Coordinate feeding and playtimes to minimize high-energy fur-shedding moments while cleaning windows.

By structuring tasks, leveraging multiple tools, and strategically designating zones, you’ll tame the combined shedding of all your companions and maintain a cleaner, more harmonious living environment.

Professional Cleaning and Deep Maintenance

Occasional professional interventions can reset your home’s cleanliness baseline. Schedule upholstery cleaning biannually: experts use high-powered steam extraction to remove deeply embedded hair, dander, and allergens, rejuvenating sofas and chairs. For carpets, arrange a shampoo-and-extraction service at least once a year to remove fur and grime that vacuums alone cannot effectively reach. If your HVAC system circulates pet hair through its ductwork, consider investing in professional duct cleaning every 12 to 24 months. This prevents hair accumulation, maintains airflow efficiency, and improves air quality. Drapes and curtains also require professional attention: hem-length fabric often harbors hair in folds, so annual curtain steaming or laundering helps renew their appearance. Finally, schedule periodic inspections of your vacuum filters and brushes; professional maintenance or replacement ensures peak performance. While DIY routines handle day-to-day needs, these deep-clean interventions restore fatigued fabrics and systems, giving you a cleaner slate to maintain your space.

Common Mistakes to Avoid

Even well-intentioned efforts can backfire if you fall into these traps. First, avoid using standard dust cloths on surfaces, these often push hair around instead of capturing it; instead, opt for microfiber or electrostatic dusters. Next, avoid letting cleaning intervals become too long; hair buildup between sessions can become matted, requiring considerably more effort to remove. Overlooking hidden zones, under beds, behind dressers, and inside closet corners, allows hair to accumulate out of sight, only to migrate later into living areas. A vacuum with clogged filters or a whole bag loses suction power, making it virtually ineffective; routinely clean or replace filters and bags.

Ultimately, relying solely on a single method, such as vacuuming alone, fails to address hair that adheres to smooth surfaces or upholstery. Instead, combine multiple techniques (like lint rollers, rubber gloves, and grooming) for comprehensive coverage. By avoiding these common pitfalls, you’ll ensure that your cleaning routines are both efficient and practical rather than being frustrated by avoidable setbacks.

Pet Hair Removal Tips

Tip Category

Tool/Method

Brief Description

Vacuuming

HEPA-filter vacuum w/ pet attachment

Use a high-powered vacuum with motorized brushes to lift embedded fur from carpets and upholstery.

Lint Removal

Lint roller or sticky sheet

Roll over clothing, furniture, and lampshades to quickly pick up stray hairs in seconds.

Grooming at Source

A slicker brush or de-shedding comb

Brush pets regularly, daily for long-haired, bi-weekly for short-haired, to remove loose undercoats.

Surface Wiping

Microfiber cloth or electrostatic duster

Lightly dampen a cloth or use electrostatic dusters to attract and trap hair from shelves and counters.

Static Reduction

Fabric softener sheet

Rub over upholstery or clothing; its anti-static properties loosen hair, allowing it to clump for easy removal.

Carpet Refresh

Rubber squeegee + baking soda

Sprinkle baking soda on the rugs, let it sit for 15–20 minutes, then use a squeegee to gather the hairs before vacuuming.

Rubber-Glove Method

Slightly damp rubber gloves

Rub a gloved hand over the furniture; the friction causes the hairball to rise, making it simple to pluck and discard.

Maintenance Scheduling

Weekly cleaning rota

Follow a consistent schedule (e.g., vacuum on Mondays, groom on Thursdays, wash bedding on Wednesdays) to prevent buildup.

FAQs

How often should I vacuum to control pet hair?

Aim for at least three times a week in high-traffic areas, more if you have heavy shedders. Frequent, short sessions help prevent fur buildup and reduce the effort required for deep cleans.

What’s the single best tool for removing hair from upholstery?

A motorized pet brush attachment on a HEPA filter vacuum does wonders. It loosens embedded fur and traps dander in one pass.

Can I wash bedding and covers to eliminate pet hair?

Absolutely, use hot water (130°F/54°C) and a dryer sheet in a mesh bag to trap loose hairs. Repeat weekly during shedding season.

Is there a way to reduce shedding at the source?

Regular grooming, performed daily for long-haired pets and bi-weekly for short-haired pets, removes loose undercoats before they reach your floors. A de-shedding tool, such as a Furminator, can help reduce shedding spikes.

Do natural remedies work for pet hair?

Yes, rub fabric softener sheets over fabrics to reverse static, or use a damp rubber glove to gather clumps. Baking soda on carpets before vacuuming also helps loosen fur.

How can I manage pet hair in a multi-pet household?

Stagger grooming days for each animal, keep lint rollers in every room, and assign dedicated bedding to each pet. This multi-tiered approach prevents simultaneous shedding surges.

What’s the quickest touch-up method for clothes?

A sticky lint roller or sticky sheet works best. A couple of swift rolls over your jacket or pants removes stray hairs in seconds. Top of FormBottom of Form

Conclusion

Maintaining a fur-free home while sharing life with pets demands diligence, the right tools, and strategic planning. By grasping why pet hair clings, whether through seasonal shedding or static cling, you set the stage for targeted action. Armed with HEPA-filter vacuums, lint rollers, and simple hacks like squeegee strokes on carpets, you can swiftly remove existing fur. Preventive measures, regular grooming, a balanced diet for your pet’s coat health, and the use of air purifiers can help minimize loose hair before it settles. A consistent weekly schedule, broken down room by room, ensures no corner is overlooked. For multi-pet households, staggered grooming and strategic zoning keep combined shedding manageable. Periodic professional cleaning resets your home’s cleanliness baseline, tackling deeply embedded hair and allergens. By sidestepping common mistakes, such as using improper dust cloths or neglecting filter maintenance, you can streamline your efforts. Follow these concise yet powerful tips from “Pet Hair Removal Tips for a Fur-Free Home,” and enjoy the best of pet companionship without sacrificing a clean, allergen-reduced living space. Top of Form

Removing Grease from Kitchen Surfaces Without Harsh Chemicals: Eco-Friendly Tips and Tricks

Removing grease from kitchen surfaces without harsh chemicals is both eco-friendly and a health-conscious approach. Grease accumulates from cooking oils, food splatters, and airborne particles, leading to unsightly stains and bacterial growth. Traditional cleaners often rely on ammonia, phosphates, or strong solvents, which can irritate skin, worsen indoor air quality, and pollute waterways when rinsed away.

Conversely, simple ingredients like white vinegar, baking soda, and castile soap can effectively dissolve or emulsify grease while minimizing environmental impact and health risks. By using natural degreasers, you preserve surfaces, save money, and maintain a healthier home. In this concise guide, you’ll discover why avoiding harsh chemicals matters, learn about nine key natural cleaning agents, and follow step-by-step methods for degreasing stovetops, countertops, cabinets, and more.

Each section in this guide provides a clear roadmap to restoring shine in your kitchen without relying on toxic products.

Why Avoid Harsh Chemicals?
Harsh chemical cleaners often contain volatile organic compounds (VOCs), ammonia, or chlorine, substances that can irritate eyes, skin, and respiratory systems. In a poorly ventilated kitchen, these fumes linger, posing risks to children, pets, and anyone with asthma or sensitivities. Environmentally, many of these ingredients disrupt aquatic ecosystems when they are washed into drains. Phosphates fuel algal blooms that deplete oxygen and harm
marine life.

Additionally, synthetic fragrances and dyes can persist in water treatment processes, contributing to pollution. From a cost perspective, store-bought degreasers often come in single-use plastic bottles and require frequent repurchases, whereas pantry staples like vinegar and baking soda last longer and are more cost-effective.

Finally, abrasive or highly alkaline cleaners may damage sealed stone or wood finishes over time, whereas natural formulas tend to be gentler, thereby extending the lifespans of countertops and cabinets. By switching to eco-friendly alternatives, you safeguard your family’s health, reduce your environmental footprint, and protect the longevity of kitchen surfaces.

Understanding Kitchen Grease: Composition and Challenges
Kitchen grease consists of lipids, fats, and oils from animal or vegetable sources that liquefy with heat and solidify upon cooling. Animal fats (lard, tallow) can become rancid and emit foul odors, while vegetable oils (olive, canola) may polymerize under high heat, forming sticky, resinous films. Unlike water-based spills, grease repels water and adheres resiliently to surfaces, creating a hydrophobic barrier that standard soap and water cannot penetrate. As grease cools, it traps dust and food particles, further engraining itself in porous grout lines, stove grates, and countertop seams. Over time, multiple layers can build up, making removal increasingly difficult.

Effective degreasing requires either an acidic agent (to dissolve mineral deposits and emulsify oils) or a surfactant (to break grease into tiny droplets). Understanding these properties helps you choose the right natural ingredients, such as vinegar to cut through oil, baking soda to provide gentle abrasion, or castile soap to emulsify, ensuring more efficient, chemical-free cleaning.

Key Natural Cleaning Agents

  • White Vinegar: A mild acid (5% acetic) dissolves grease and mineral deposits while disinfecting. Dilute 1:1 with water for general use. Spray, wait for five minutes, and wipe. Avoid prolonged use on natural stone (granite, marble) to prevent etching. For metal filters, soak undiluted for 15–20 minutes.
  • Baking Soda: A gentle alkaline abrasive that loosens grime without scratching most sealed surfaces. Mix three parts baking soda with one part water to form a paste. Apply it, wait for five minutes, and then scrub. Combined with vinegar, it fizzes to break down stubborn residues.
  • Castile Soap: Plant-based surfactant (olive or coconut oil) that emulsifies oils. Mix 1–2 tablespoons with one quart of warm water. For tough grease, add a teaspoon of baking soda. Safe on most surfaces, fragrance-free options minimize sensitivity.
  • Citrus (Lemon, Orange): Natural citric acid dissolves light grease; oils (limonene) act as solvents. Rub a cut lemon on greasy spots; let the juice sit for five minutes, then wipe it clean. Infuse vinegar with citrus peels for a homemade degreaser; steep for one to two weeks before use.
  • Cornstarch/Arrowroot: Absorbent powders that draw out fresh oil spills. Sprinkle over grease, let it sit for 10–15 minutes, wipe away the powder, then clean with a castile soap solution. These five staples are inexpensive, effective, and eco-friendly alternatives to toxic solvents.

Step-By-Step Guide to Removing Grease from Kitchen Surfaces

  • Preparation: Clear countertops and stovetops of items. Gather a spray bottle filled with a 50/50 mixture of white vinegar and water, baking soda, castile soap, microfiber cloths, a soft scrub brush, rubber gloves, and warm water. Ventilate the kitchen by opening windows or using the exhaust fan.
  • Stovetop Cleaning: Remove grates and knobs, then soak them in hot, soapy water (use Castile soap). Spray the stovetop with vinegar solution; let it sit for five minutes. Sprinkle baking soda on stubborn spots, then gently scrub with a non-abrasive sponge. Wipe with a damp microfiber cloth and rinse with plain water. Dry immediately.
  • Range Hood and Filters: For the exterior, spray a vinegar solution, wait three minutes, then wipe following the grain of the stainless steel or painted finish. Remove filters and soak in hot water with ½ cup castile soap and ¼ cup baking soda for 15–20 minutes. Scrub with a soft brush, rinse, and air-dry before reinstalling.
  • Countertops and Backsplashes: For sealed stone, use a mild Castile soap solution; avoid using vinegar if the stone is unsealed. Scrub with a microfiber cloth; rinse and buff dry. On laminate, spray a vinegar-water solution, wipe, and spot-treat baked-on grease with a baking soda paste. For backsplash tiles, mix ½ cup of vinegar and ¼ cup of baking soda; apply, let it fizz for 10 minutes, scrub the grout lines with a toothbrush, rinse, and dry.
  • Cabinets and Drawers: For painted or laminated cabinets, spray a mild castile soap solution, wipe with a soft cloth, then dry. For unsealed wood, absorb grease with cornstarch for 10–15 minutes, then wipe away. Next, use a lightly dampened cloth with diluted castile soap. Rinse with a clean, wet cloth and dry thoroughly. Optionally, recondition wood with food-grade mineral oil after cleaning. Following these steps, your kitchen surfaces will be grease-free without a drop of harsh chemicals.

Alternative Methods and Special Techniques

  • Steam Cleaning: Utilizes high-temperature steam (above 200°F) to soften and emulsify grease, eliminating the need for chemicals. Ideal for grout lines and sealed tile. Fill the steamer reservoir with distilled water, heat it fully, and hold the nozzle a few inches away, moving in sweeping motions. Immediately wipe the treated area with a microfiber cloth.
  • Enzymatic Cleaners: Contain proteases and lipases that digest grease molecules. Dilute the concentrate according to the instructions (usually 1:10). Apply to greasy spots, let sit for 10–15 minutes, scrub lightly, rinse, and dry. For homemade versions, ferment citrus peels with sugar and water in a sealed jar for two to three weeks, then strain and use as a natural enzymatic solution.
  • Oil-Based Degreasers: Counterintuitive yet practical, a mixture of food-grade coconut oil and baking soda can dissolve thick, polymerized grease. Blend ¼ cup solid coconut oil, ½ cup baking soda, and optional tea tree essential oil (10–15 drops) into a paste. Apply to caked‐on grease (e.g., oven walls, grill grates), wait 10–15 minutes, scrub gently, and wipe away residue. Rinse thoroughly to remove any oily film.
  • Microfiber “Magic” Towels: Ultra-fine synthetic fibers generate an electrostatic charge that traps grease and dust with water alone. Dampen a microfiber cloth slightly, then rub the surface in small circles. Next, switch to a dry microfiber cloth to buff and polish. No chemicals or residues remain, and the towels are machine washable (wash with mild detergent, without fabric softener). These alternative techniques expand your arsenal, from heat-based steam cleaning to enzyme digestion, oil emulsification, and electrostatic microfiber action —chemical-free options to tackle entrenched grease.

Preventive Measures: Minimize Future Grease Buildup

  • Immediate Wipe-Ups: After frying or sautéing, blot oil splatters with a paper towel or damp microfiber cloth before the grease cools and hardens. Prompt cleanup prevents deeper penetration into crevices and grout.
  • Use Splatter Guards and Lids: Place a mesh splatter screen over pans when cooking with oils. This simple barrier captures airborne grease droplets, reducing buildup on stovetops and surrounding surfaces.
  • Regular Filter Maintenance: Clean or replace range hood filters every four to six weeks (sooner for heavy fryers). Clogged filters weaken suction, allowing grease to recirculate onto cabinets, walls, and counters.
  • Strategic Backsplash Accessories: Install removable adhesive backsplash panels or magnetic splatter shields behind stoves. These can be peeled off and cleaned separately, protecting permanent surfaces from continuous oil exposure.
  • Low-Oil Cooking Techniques: Opt for steaming, poaching, or roasting on parchment paper instead of deep frying. Nonstick or ceramic-coated cookware further minimizes oil usage, reducing airborne grease.
  • Proper Ventilation: Run the exhaust fan during and after cooking, keep it on high for at least five to ten minutes post-cooking to expel lingering grease particles and odors.
  • Weekly Maintenance Habit: Dedicate five to ten minutes each week to a quick wipe-down of countertops with a castile soap solution, a vinegar buff on range hood exteriors, and a sweep of crumbs under appliances. Consistent, light cleaning prevents grease from layering into stubborn buildup, making long-term maintenance chemical-free and straightforward.

Frequently Asked Questions

Can I use undiluted vinegar on all kitchen surfaces?
No. Undiluted vinegar is acidic (5% acetic) and may etch or damage natural stone (granite, marble) and unsealed grout. Always dilute vinegar with at least 1 part water. For stone surfaces, opt for a mild castile soap solution or a gentle baking soda paste.

Does vinegar’s smell linger after cleaning?
The vinegar odor dissipates as it dries. To neutralize residual scent, add 5–10 drops of essential oil (such as lemon, lavender, or eucalyptus) to your vinegar-water solution. Alternatively, follow up with a quick spray of citrus-infused water before drying.

How often should I clean range hood filters?
For frequent cooks who fry regularly, clean filters every four to six weeks. If you cook with minimal oil or bake more often, every eight to twelve weeks may suffice. Regular filter maintenance ensures the hood captures grease effectively, preventing it from recirculating.

Are natural methods safe for commercial kitchen equipment?
Generally, yes, many professional kitchens prefer natural degreasers for routine cleaning. However, always consult manufacturer guidelines for warranty compliance. Test a small, hidden area first to ensure no discoloration or damage.

Will baking soda scratch hard surfaces?
Baking soda is mildly abrasive but safe for most sealed surfaces (ceramic, stainless steel, laminate). Avoid using it on unsealed wood, polished marble, or delicate acrylic, as the fine particles can cause micro-scratches. In those cases, use castile soap and a soft microfiber cloth instead.

What’s the best way to remove caked-on oven grease?
Remove oven racks first. Spread a baking soda-water paste (three parts baking soda to one part water) inside the oven, avoiding the heating elements. Let it sit overnight. The next day, spray vinegar over the paste; the fizz indicates it’s working. Gently scrub with a soft brush, wipe with damp cloths until all residue is gone. For extremely stubborn spots, apply a paste made from coconut oil and baking soda, wait 10 minutes, then scrub and rinse thoroughly.

Safety Tips and Considerations

  • Test in an Inconspicuous Area: Before applying any homemade solution (vinegar, baking soda, citrus), test a small, hidden patch, especially on sealed stone, painted cabinets, or laminate, to ensure there’s no discoloration or surface damage.
  • Avoid Incompatible Mixtures: Never mix bleach with vinegar or ammonia; dangerous chlorine gas can form. If using enzyme cleaners, rinse surfaces thoroughly before applying acidic solutions (e.g., vinegar) to prevent pH shocks that deactivate enzymes.
  • Use Gloves for Extended Cleaning: Although natural ingredients are generally gentle, prolonged exposure to baking soda or vinegar can cause dryness in sensitive skin. Lightweight rubber or nitrile gloves protect hands without sacrificing dexterity.

Proper Storage of Homemade Solutions:

  • Store vinegar solutions in dark glass bottles to preserve their acidity; avoid plastic containers that can absorb odors over time.
  • Prepare baking soda pastes fresh before each use; never store wet pastes, as they can harbor microbial growth.
  • Label each container clearly (e.g., “Kitchen Degreaser, Vinegar & Water”) to prevent accidental misuse.

Ventilation

Even with natural cleaners, adequate airflow helps disperse fumes; opening windows or running fans briefly can also be beneficial. Prolonged exposure to any cleaner, however mild, can still irritate individuals with sensitive skin.

Handle Citrus Infusions Safely

When steeping citrus peels in vinegar for two to three weeks, use a sealed jar stored in a cool, dark place away from direct sunlight—strain thoroughly before use to prevent the growth of mold or bacteria.

Similar Topics

Similar Topic

Brief Description

Eco-Friendly Kitchen Cleaners for Everyday Use

A roundup of non-toxic, plant-based cleaners, ranging from homemade citrus sprays to biodegradable store-bought options, designed for daily maintenance of countertops, sinks, and appliances without compromising indoor air quality.

Natural Methods to Sanitize Cutting Boards

Techniques for using salt, lemon, and vinegar to remove bacteria and odors from wooden and plastic cutting boards; discusses the science behind natural sanitizers and offers step-by-step instructions for safe food preparation.

DIY Vinegar-Based Degreasers for Home Appliances

Detailed recipes for creating robust vinegar-infused solutions (with optional essential-oil boosts) to tackle stove hoods, ovens, and microwaves; includes tips on infusion times, storage, and optimal application methods.

Chemical-Free Bathroom Surface Cleaning Tips

Strategies for removing soap scum, mildew, and hard-water stains in showers and sinks using baking soda, hydrogen peroxide mixtures, and steam, with an emphasis on maintaining grout and tile integrity without harsh acids or bleach.

Using Baking Soda for Carpet Stain Removal

A guide to formulating and applying baking soda-based pastes to lift grease, coffee, or pet stains from carpets and upholstery; covers blotting techniques, drying times, and when to combine with mild surfactants for stubborn spots.

Green Cleaning: Eliminating Hard Water Stains Naturally

Explores how citric acid (lemon juice) and white vinegar can dissolve mineral deposits on faucets, showerheads, and glass surfaces; explains the role of chelation and offers preventative measures to minimize future buildup.

Homemade Castile Soap Solutions for Heavy-Duty Degreasing

Instructions on mixing castile soap with baking soda, essential oils, or borax to create thick pastes for ovens, grill grates, and barbecue tools; focuses on balancing pH and achieving maximum emulsification without toxins.

Safe Disinfectants for Kitchen Sponges and Dishcloths

Discusses soaking techniques and periodic deep-cleaning routines, utilizing vinegar, hydrogen peroxide, or microwaving damp sponges to kill bacteria naturally; also offers rotation schedules and alternative materials to reduce microbial growth.

Non-Toxic Oven Cleaning: From Paste to Steam

A comparison of baking soda–based oven pastes versus steam-cleaning attachments, including safety considerations, expected timeframes, and surface compatibility, helps readers choose the method that best suits their schedule and budget.

Conclusion
Conquering kitchen grease without resorting to harsh chemicals is both practical and sustainable. By harnessing the cleaning power of white vinegar, baking soda, castile soap, citrus, and absorbent powders, you can tackle stubborn oil build-up on stovetops, range hoods, countertops, backsplashes, and cabinets while preserving indoor air quality and surface integrity. Incorporate preventive measures, such as wiping spills immediately, using splatter guards, maintaining filters, and adopting low-oil cooking techniques, to minimize future grease accumulation. For specialized needs, try steam cleaning, enzymatic solutions, oil-based degreasers, or microfiber towels to break down grease at the molecular level or trap it electrostatically. Prioritize safety by testing cleaners on hidden areas, avoiding incompatible mixtures, and using gloves when needed. With these concise, eco-friendly strategies, maintaining a gleaming, grease-free kitchen becomes straightforward, cost-effective, and health-promoting, no toxic solvents required.

Mastering Odor Control: Essential Tips Every Professional Cleaner Needs

Odor control isn’t merely spraying a fresh scent; it’s a science. Cleaners must contend with unseen, volatile organic compounds (VOCs) that can compromise cleanliness despite the presence of spotless surfaces. From the stubborn ammonia of pet urine to the musty mildew thriving in damp corners, odors arise from microbial metabolism, chemical reactions, and the decay of organic matter. Ignoring these causes only invites temporary masking; clients quickly detect artificial fragrances.

This guide, Odor Control Tips Every Cleaner Should Know, unpacks targeted techniques rather than generic fixes. You’ll learn how airflow management dilutes malodors, why layered cleaning, mechanical debris removal, followed by enzymatic or oxidizing treatments, neutralizes VOCs at their source, and how eco-friendly solutions like vinegar, baking soda, or activated charcoal can rival harsh chemicals.

By mastering surface-specific tactics (e.g., steam extraction for carpets versus sealants on porous drywall) and deploying specialized tools (hydroxyl generators, UV-C wands), cleaners can deliver genuinely fresh, healthy environments. Let’s dive in and equip you with actionable strategies to conquer any olfactory challenge.

Understanding Odor Sources

Odors originate from volatile organic compounds that excite our olfactory receptors, yet beneath that chem-speak lies a more straightforward truth: odors signal biological or chemical breakdown. Pet urine, for instance, contains urea that bacteria convert into ammonia, producing that sharp, noxious tingle in the nose. Mold and mildew thrive in areas where moisture lingers, such as beside leaky pipes or inside neglected grout, generating musty, earthy terpenes. Decaying food particles in trash cans or garbage disposals emit putrescine and cadaverine, creating profiles reminiscent of rotting flesh. Even cooking oils, when left to oxidize, yield aldehydes with sour, metallic notes.

Odors can develop and spread more quickly due to environmental variables that accelerate volatility and microbial growth, such as high humidity, warm temperatures, or stagnant air. Recognizing these sources is crucial: unless you address the microbial colonies feeding on organic residues or halt chemical reactions before they start, surface-level cleaning only masks symptoms. By pinpointing whether an odor stems from bacteria, mold, food decay, or chemical change, you can choose targeted treatments, enzymatic cleaners for protein-rich stains, oxidizers for stubborn grime, or dehumidifiers to inhibit mold, all of which neutralize malodors at their molecular root.

Odor Control Tips

Tip

Description

Ensure Proper Ventilation

Open windows, run exhaust fans or use portable air purifiers to dilute and disperse VOCs before cleaning.

Layered Cleaning Approach

Begin by removing physical debris, then apply enzymatic or oxidizing cleaners to neutralize odors at their molecular level.

Surface-Specific Treatments

Tailor methods, steam clean carpets, use pH-neutral solutions on hardwood, and consider sealants or replacements for porous drywall.

Use Enzymatic Cleaners

Deploy protease and lipase-based formulas to break down proteins and fats, converting malodors into harmless byproducts.

Deploy Eco-Friendly Solutions

Leverage vinegar, baking soda, and activated charcoal to adsorb or neutralize VOCs without adding synthetic fragrances.

Utilize Specialized Equipment

Employ hydroxyl generators in occupied spaces, ozone machines after hours, and UV-C wands for targeted microbial control.

Preventive Maintenance

Schedule regular HVAC filter replacements, quarterly steam extractions, and monthly drain enzyme treatments to stay ahead of odors.

Address Odor Hotspots

Focus on bathrooms, kitchens, pet areas, and trash receptacles, use targeted scrubbing, enzyme treatments, and timely trash removal.

Communicate Value to Clients

Share before-and-after photos, VOC sensor data, and transparent service scopes to build trust and demonstrate effectiveness.

Prioritize Proper Ventilation

Before introducing any cleaning agent, optimize airflow. Even the most potent deodorizer falters in stagnant pockets where VOCs accumulate. Start by maximizing natural ventilation: open windows or doors to encourage cross-ventilation, diluting concentrated odors. In enclosed or high-traffic areas, deploy mechanical systems, high-capacity exhaust fans in kitchens and bathrooms expel moisture-laden air that fosters microbial growth, while well-maintained HVAC filters (ideally MERV-11 or higher) trap fine particulates like mold spores and dander. Portable air purifiers with HEPA and activated carbon layers offer a twofold benefit: HEPA captures solid allergens, while activated carbon adsorbs VOCs rather than masking them. Mind airflow patterns, too, avoid blocking vents with furniture, and ensure return registers aren’t obstructed so air cycles effectively. By prioritizing ventilation, you not only dilute existing odors but create an inhospitable environment for odor-producing microbes. Adequate air exchange thus becomes your first line of defense, enhancing every subsequent cleaning intervention.

Adopt a Stratified Cleaning Approach

Effective odor control requires a methodical, layered approach, peeling back each problematic layer until the residues are eliminated. First, physical removal: vacuum carpets and upholstery with a high-powered unit and brush-roll attachments, extracting hair, dander, and dust that harbor microbes. On hard surfaces, use a bare-floor brush to dislodge fine particulates before applying liquids.

Next, deploy targeted cleaning agents: enzymatic cleaners containing proteases and lipases break down organic stains, critical for pet urine, blood, or food spills, converting malodors into odorless molecules. For surfaces like grout or tile, dilute hydrogen peroxide can oxidize organic residues; however, always spot-test to prevent discoloration. Where ammonia-based odors (e.g., urine) persist, neutralize alkalinity with an acidic solution such as diluted vinegar; conversely, for acidic food odors, an alkaline cleaner (baking soda solution) balances pH and diminishes sour notes.

Finally, repeat interventions as needed: allow surfaces to dry thoroughly (starving microbes of moisture) and reassess. If odors linger, reapply enzymatic treatments or escalate to more potent oxidizers.

By layering cleaning tactics, from mechanical debris removal to precise chemical neutralization, you eradicate odors at their molecular source rather than simply perfuming spaces.

Tailor Strategies to Specific Surfaces

Different materials trap and release odor-causing compounds in unique ways, demanding substrate-specific tactics. Hot water extraction (steam cleaning), which combines heat and pressure with the proper detergents to loosen deeply ingrained dirt, is still crucial for carpets and upholstery. Pre-treat surfaces by sprinkling baking soda for 30–60 minutes to adsorb VOCs, then vacuum thoroughly.

Enzymatic spot treatments work wonders on pet stains, but always blot (never rub) to avoid spreading residues. Hard floors (tile, hardwood, vinyl): pH-neutral cleaners are recommended for preserving hardwood finishes, whereas grout may require a more potent alkaline formula. Steam mopping sanitizes without harsh chemicals, ideal for kitchens or healthcare settings, while ensuring thorough drying to prevent moisture buildup.

Fabric curtains and drapes: follow the care labels. Machine-washable panels can be washed on a delicate cycle with vinegar to neutralize odors. For non-removable drapes, professional-grade steamers sanitize in place.

Porous surfaces (drywall, ceiling tiles): if mold infiltrates beneath the paint layer, cleaning alone may fail; encapsulants seal microbial colonies, preventing VOCs from escaping. Severely compromised materials might necessitate replacement.

HVAC ducts and vents: Professional duct cleaning clears dust, dander, and microbes. Installing a UV-C light near the coils inhibits future microbial growth. By aligning your odor-control tactics with the characteristics of each surface, you ensure that cleaning solutions penetrate, rather than sit on top of, problem areas.

Leverage Natural and Eco-Friendly Solutions

Eco-conscious clients increasingly seek green cleaning alternatives that neutralize odors without introducing additional VOCs or harsh chemicals.

White vinegar (acetic acid): Combine equal parts white vinegar and water in a spray bottle, then mist affected areas to neutralize alkaline odors, such as those from spilled food or pet accidents. For garbage disposals, combine ½ cup baking soda with 1 cup vinegar; let the foaming action lift organic residues, then flush with hot water.

Baking soda (sodium bicarbonate): Place an open box in the refrigerator to adsorb food smells, replacing it every month. For carpets, sprinkle liberally, wait 30–60 minutes, then vacuum, optionally spraying a light mist of water to activate adsorption.

Activated charcoal: its high porosity makes charcoal sachets ideal for closets, basements, or pet areas; recharge by exposing the bags to sunlight for several hours to release trapped molecules.

Citrus peels and essential oils: simmer orange or lemon peels in water to diffuse natural citrus oils, masking mild odors without synthetic fragrances. Avoid overconcentration to avoid residue. Blend a few drops of tea tree or lemon essential oil into vinegar not only amplifies its germ-fighting power but also leaves behind a fresh, pleasant aroma.

Plant-based enzymatic cleaners: biodegradable formulations break down proteins, fats, and starches, achieving efficacy while minimizing environmental impact. By incorporating these natural methods, you can meet client expectations for sustainable cleaning while delivering genuine odor elimination rather than superficial masking.

Implement Specialized Odor-Fighting Techniques

When conventional cleaning falls short, specialized equipment and chemical approaches can eradicate even the most intractable malodors.

Ozone treatment: ozone generators release O₃ molecules that oxidize VOCs and disrupt microbial cell walls. Use in unoccupied spaces only, seal off the area during treatment and ventilate thoroughly afterward to eliminate residual ozone.

Hydroxyl generators: produce hydroxyl radicals (·OH) that oxidize odor-causing molecules without the toxicity associated with ozone. Because appropriate hydroxyl levels are safe for humans and pets, these units are suitable for occupied spaces such as hotels or healthcare facilities.

Thermal fogging: vaporizes deodorizing solutions (often containing chlorine dioxide or quaternary ammonium compounds) into micro-droplets that penetrate porous materials. Effective in fire- or flood-restored properties where smoke or mold odors have deeply infiltrated surfaces.

UV-C irradiation: Handheld wands or installed units expose surfaces, such as refrigerator drip pans or shower grout, to ultraviolet-C light, killing mold spores and bacteria without introducing liquids.

Thermal dehumidification: maintaining relative humidity below 50% via thermal dehumidifiers prevents the regrowth of mold and mildew in basements or crawl spaces. Although these methods require specialized knowledge, they excel in scenarios where standard enzymatic or oxidizing cleaners cannot reach hidden or pervasive odor sources.

Focus on Preventive Maintenance

Preventing odors is far more cost-effective than battling them reactively. Develop a structured preventive plan to minimize the recurrence of malodor.

Routine inspections: conduct monthly checks of HVAC filters, ductwork, and condensation pans, remove dust and debris before mold and bacteria colonize. Investigate plumbing by pouring an enzyme-based cleaner or water down infrequently used drains to prevent “dry-trap” sewer odors.

Scheduled deep cleans: Carpet and upholstery in high-traffic areas should undergo hot-water extraction quarterly. Kitchens and appliances require biannual coil vacuuming and pantry odor checks.

Moisture control: Deploy dehumidifiers in basements, laundry rooms, or other damp areas to maintain relative humidity between 40–60%, thereby inhibiting the activation of mold spores. Invest in infrared thermography or moisture meters to detect hidden leaks in walls or ceilings before mold sets in.

Trash and waste management: empty bins daily (or more frequently if handling organic waste) and disinfect receptacles weekly to prevent biofilm buildup. Use antimicrobial-coated liners for dumpsters, and arrange biannual professional dumpster cleanings.

Pet protocols: recommend clients scoop litter boxes daily, use clumping litter with activated charcoal, and designate a specific area for pet care, ensuring swift drying of any spills. By embedding these preventive measures into regular routines, you drastically reduce odor incidents, optimize cleaning efficiency, and enhance client satisfaction.

Address Common Odor Hotspots

Certain zones inherently trap malodors, demanding heightened vigilance from every cleaner.

Bathrooms and restrooms: mold thrives in grout and caulk lines, scrub vigorously with a bleach-based or oxygenated cleaner, using a stiff brush to remove biofilm. After cleaning, let surfaces dry completely for 24 hours before applying mold-resistant caulk. Toilet bowls and tanks harbor hidden grime beneath rims and lids, lift and clean those areas, then use an effervescent cleaner under the rim. Monthly enzyme-based drain treatments break down hair and soap scum in shower drains; if water backs up, snaking is imperative to clear blockages that cause persistent odors.

Kitchens: garbage disposals benefit from grinding citrus peels with ice cubes, the acid and abrasion remove buildup, followed by a hot water flush. Refrigerator coils attract dust that can overheat motors and create caramelized odors; vacuum coils seasonally and sanitize drip pans with a water-vinegar solution. Microwave odor removal requires heating a lemon-water mixture for five minutes to steam-loosen food splatter.

Carpets and rugs: high-traffic mats at entryways reduce dirt ingress; schedule professional steam cleaning biannually for busy environments. Blot pet accidents immediately, apply an enzymatic cleaner, and weigh down with a cloth to maximize absorption.

Upholstery and mattresses: Vacuum surfaces monthly using crevice tools to remove skin flakes and dust mites. Rotate or flip mattresses quarterly to distribute wear evenly and prevent localized odor buildup.

Trash receptacles and dumpsters: small bins require daily rinsing and disinfecting; large commercial dumpsters need biannual professional washdowns and industrial-grade odor inhibitors at the base to neutralize drips. By concentrating on these notorious hotspots, cleaners can deploy surgical odor control where it matters most.

Incorporate Professional-Grade Products and Equipment

While household remedies have their merits, professional cleaners require high-performance tools and solutions for consistent results.

Enzymatic urine neutralizers: seek formulations with multiple enzyme strains,protease, amylase, lipase,

to break down proteins, fats, and carbohydrates comprehensively. Apply via pump sprayers for carpets or fabrics; use foggers for airborne dispersion in larger areas.

Industrial-grade deodorizers, such as hydroxyl generators from brands like Alpha-Ozone, safely oxidize VOCs in occupied spaces, providing continuous odor control without requiring human evacuation. Reserve ozone generators for after-hours treatments in unoccupied zones, always adhere to strict safety and ventilation protocols to eliminate residual O₃.

High-pressure steam cleaners: machines featuring adjustable steam (150 psi or more) sanitize without chemicals. Accessories, such as crevice tools, brush attachments, and microfiber pads, enable access to tight, odor-prone crevices (e.g., HVAC coils, grout lines, and upholstery folds).

Air quality monitors: portable VOC sensors deliver real-time data on indoor air quality, validating the effectiveness of interventions. Complement with humidity and temperature probes to maintain a 40–60% relative humidity range, which inhibits mold proliferation.

UV-C sanitizing wands: handheld devices pass over mold-prone areas, such as shower tracks, refrigerator interiors, and bathroom drains, to destroy microbes. Always use protective eyewear and limit exposure per manufacturer guidelines to avoid surface degradation. By investing in commercial-grade products, cleaners ensure rapid and repeatable odor elimination, thereby boosting client confidence in their professional prowess.

Leverage Data-Driven Insights and Training

Exceptional odor control stems not only from products but also from continuous learning, feedback loops, and data analysis.

Odor audit checklists: perform baseline assessments for new clients, document identified odor sources, severity (mild, moderate, severe), and frequency. Use digital logs (via cloud-based cleaning management platforms) to record interventions: what was applied, where, and the client’s subsequent feedback.

Client feedback mechanisms: Deploy brief surveys post-service, asking clients to rate odor reduction on a 1–5 scale. Analyze the results monthly to identify recurring problem areas. For extensive facilities like hotels, establish real-time reporting channels (such as a hotline or app) that enable staff to flag new malodors immediately, prompting a rapid response.

Ongoing training and certification: Sponsor staff enrollment in industry-recognized courses, such as the IICRC Odor Control certification or CRI Green Label for carpet cleaning, to ensure everyone stays current on best practices. Host quarterly in-house workshops to demonstrate emerging products, safe utilization of advanced equipment (e.g., ozone generators, UV-C wands), and relevant health regulations (OSHA chemical exposure guidelines).

Continuous improvement: regularly review cleaning logs to detect patterns, perhaps a particular restaurant’s kitchen demands monthly enzyme treatments, or basement mold recurs after winter. Collaborate with suppliers to pilot new formulations, collecting empirical data on efficacy, application time, and cost per square foot. By integrating data-driven decision-making and ongoing training into your operations, you enhance odor control outcomes, improve service consistency, and foster a culture of excellence.

Communicate Value and Build Trust

Odor control isn’t invisible; clients must perceive its worth. Even the most thorough cleaning regimen can feel underwhelming if they don’t understand the process.

Educate clients on odor complexity: explain how VOCs arise, why masking agents fail, and why enzyme or oxidizer treatments require dwell time to work at the molecular level. This transparency fosters realistic expectations.

Before-and-after documentation: photograph stained carpets, mold-ridden grout, or discolored HVAC coils before treatment. While you can’t photograph odors, showcasing residue removal builds confidence in your methods. Share air quality reports from VOC sensors: a drop from, say, 300 ppb to 50 ppb vividly illustrates improvement.

Service scope and pricing transparency: detail exactly which areas are included, HVAC duct cleaning, enzymatic shampooing, hydroxyl treatments, and outline additional fees for specialized equipment use. Clear, itemized proposals prevent confusion and reinforce credibility.

Maintenance plans: offer tiered contracts, monthly, quarterly, biannual, outlining specific tasks (drain enzyme treatments, steam extractions, filter replacements). Frame them as investments: “Quarterly enzyme treatments in high-traffic restrooms reduce deep-seated odors by 80%,” for instance. Finally,

Solicit testimonials: request brief written or video endorsements from satisfied clients who attest that your odor control work has transformed their spaces. These testimonials act as potent social proof, attracting new clients and reinforcing trust among existing ones.

FAQs

What’s the first step in tackling stubborn odors?

Ensure proper ventilation, open windows or run exhaust fans to dilute concentrated VOCs before starting any cleaning.

Are enzymatic cleaners essential?

Yes, enzymes break down organic stains (pet urine, food spills) at the molecular level, eliminating odors rather than merely masking them.

How often should I deep clean carpets for effective odor control?

Quarterly hot-water extraction in high-traffic areas generally prevents odor buildup; spot-treat as needed in between.

Can natural remedies truly rival commercial deodorizers?

Absolutely, vinegar, baking soda, and activated charcoal effectively adsorb or neutralize VOCs without introducing new chemicals.

When is ozone treatment appropriate?

Use ozone generators only in unoccupied spaces for severe, lingering odors,always seal and ventilate afterward to remove residual ozone.

How can I prevent mold-related mustiness in the long term?

Maintain indoor humidity below 50%. Inspect and clean HVAC filters monthly and address leaks promptly to prevent microbial growth.

What’s the simplest way to reassure clients I’ve eliminated odors?

Share before-and-after photos of stains or HVAC coils and, if available, air-quality readings showing VOC levels dropping post-treatment.

Conclusion

Odor control transcends superficial masking; it demands a systematic, science-based approach. From understanding VOCs and microbial contributors to layering mechanical, chemical, and specialized interventions, the strategies in Odor Control Tips Every Cleaner Should Know to empower you to neutralize malodors at their source.

Proper ventilation dilutes airborne compounds, while targeted enzymatic or oxidizing treatments dismantle organic residues. Adapting tactics to specific surfaces, such as carpets, hard floors, and porous drywall, is crucial, as is leveraging eco-friendly solutions like vinegar, baking soda, and activated charcoal for sustainable and effective results. When challenges exceed routine cleaning, specialized equipment, such as hydroxyl generators, ozone machines, and UV-C wands, delivers deep penetration, mitigating even the most entrenched odors. Preventive maintenance, powered by data-driven audits, client feedback, and ongoing training, keeps issues at bay and fine-tunes your services.

Finally, transparent communication, sharing evidence before and after, air-quality data, and transparent pricing, builds trust and highlights your professionalism. By embedding these principles into every job, you’ll ensure that every space you clean isn’t just visibly pristine, but refreshingly odor-free.

Natural vs. Store-Bought Cleaners: A Concise Comparative Guide

Choosing between natural cleaning products and store-bought alternatives often hinges on balancing health, cost, convenience, and environmental concerns. Natural cleaners, crafted from vinegar, baking soda, essential oils, and castile soap, promise minimal toxins and eco-friendliness yet may require more elbow grease to tackle stubborn grime. Store-bought formulas often utilize synthetic surfactants, solvents, and disinfectants to deliver swift and decisive results; however, they can emit volatile organic compounds (VOCs), leave residues, and contribute to plastic waste. In this concise guide, each section presents a focused overview, exploring ingredient profiles, performance comparisons, safety considerations, environmental impact, and practical advice so you can quickly determine which approach aligns with your household’s priorities and lifestyle.

Natural Cleaning Products

Natural cleaners rely on widely available household staples: distilled white vinegar’s acetic acid, which cuts through mineral deposits and deodorizes; baking soda’s mild abrasiveness scrubs away light stains; castile soap, derived from olive or coconut oil, forms suds for general cleaning; and essential oils (tea tree, lemon, lavender) provide antimicrobial properties and fragrance. These ingredients biodegrade rapidly, leaving behind water, carbon dioxide, or simple salts, minimizing environmental persistence. Typically sold in concentrated formats or blended into DIY recipes, natural cleaners avoid synthetic fragrances, dyes, and harsh preservatives that can aggravate allergies or pollute waterways. Yet, their efficacy diminishes against caked-on grease, deep grout stains, or industrial-level mildew; you may need longer dwell times, repeated applications, or scrubbing to achieve the desired results.

Additionally, acidic solutions like vinegar can damage acid-sensitive surfaces (marble, granite) if not properly diluted. Ultimately, natural cleaning products shine for routine maintenance, quick cleanups, and households prioritizing lower chemical exposure, provided users are willing to accept the trade-off of more manual effort for eco-friendly peace of mind.

Store-Bought Cleaning Products

Commercial cleaning products incorporate engineered formulations, synthetic surfactants to lower water’s surface tension, solvents (such as ethanol and glycol ethers) to dissolve oils, and disinfectants (including bleach and quaternary ammonium compounds) to kill germs quickly. Specialized enzyme blends and targeted pH levels enable powerful degreasing, mold remediation, and stain removal in seconds. Manufacturers rigorously test these products to ensure consistent, hospital-grade sanitation. Fragrances and dyes enhance user experience but can exacerbate asthma or skin sensitivities, while preservatives extend shelf life at the cost of introducing additional chemicals into wastewater streams. These products offer undeniable convenience: ready-to-use sprays, wipes, and concentrated powders require minimal preparation or stirring.

However, VOCs emitted during application can linger, contributing to indoor air pollution. Moreover, single-use plastic bottles and aerosol cans generate significant amounts of packaging waste. Although effective for heavy-duty tasks and time-pressed households, store-bought cleaners may carry hidden health risks and environmental burdens, unless you choose eco-certified options (EPA Safer Choice, Green Seal) and practice responsible ventilation and disposal.

Key Comparisons

Effectiveness: Natural cleaners excel at light-to-moderate tasks, such as wiping countertops, mopping floors, and removing fresh spills, capitalizing on vinegar’s acidity and baking soda’s abrasiveness. However, they underperform on baked-on grease, deep grout stains, or industrial grime compared to commercial formulas fortified with strong acids, solvents, or proprietary enzymes that deliver rapid results.

Health & Safety: Natural ingredients rarely trigger severe respiratory issues or chemical burns; most break down into harmless byproducts. In contrast, store-bought products can emit VOCs, irritate the skin or eyes, and pose hazards if mixed incorrectly (e.g., mixing bleach with ammonia).

Environmental Impact: Homemade solutions biodegrade quickly and often utilize reusable containers, thereby significantly reducing plastic waste. Conventional cleaners contribute to water pollution (through phosphates and microplastics) and carbon emissions from manufacturing. Eco-certified brands mitigate some damage but rarely match the zero-waste DIY approach.

Cost & Convenience: DIY ingredients cost pennies per batch but require time and manual effort for mixing; commercial options cost more per ounce but save labor and deliver consistent, fast-acting performance, especially vital for busy households.

Feature

Natural Cleaning Products

Store-Bought Cleaning Products

Primary Ingredients

Vinegar, baking soda, castile soap, essential oils

Synthetic surfactants, solvents (e.g., ethanol, glycol ethers), disinfectants (bleach, quats), fragrances, dyes

Effectiveness

Excellent for light to moderate cleaning (counters, glass, routine dust); requires more scrubbing or dwell time for heavy stains.

Powerful on baked-on grease, grout stains, mold, and industrial-strength grime; quick action with minimal manual effort

Health & Safety

Low toxicity; minimal VOCs; fewer allergens (though some essential oils can irritate sensitive individuals or pets)

Can emit VOCs; may irritate eyes, skin, or airways; mixing certain chemicals (e.g., bleach + ammonia) generates toxic gases

Environmental Impact

Biodegradable byproducts (water, CO₂, simple salts); often packaged in reusable bottles; low carbon footprint if sourced locally

Potential water pollution (phosphates, microplastics); single-use plastic waste; manufacturing and shipping generate higher carbon emissions

Cost

Low cost per batch (vinegar $2–$4/gal; baking soda $2/box); initial investment in reusable bottles; requires more time/effort

Moderate to high cost per bottle ($3–$12+, depending on brand and specialty); very convenient but higher per-use expense

Shelf Life

Approximately 1–2 weeks for DIY vinegar-based sprays; baking soda pastes are best used fresh; no synthetic preservatives

6–12 months unopened; 3–6 months after opening; formulated with preservatives to resist microbial growth

Surface Compatibility

Safe on most sealed surfaces, avoid using undiluted vinegar on stone (marble, granite) or waxed wood

Many products are pH-balanced or labeled “safe for stone/wood”; specialized formulas for delicate surfaces reduce risk.

Convenience

Requires mixing, labeling, and occasional recipe adjustments; stash essential ingredients for on-the-fly batches.

Ready-to-use formulations, wipes, and sprays; minimal prep and instant results; widely available at grocery and online retailers

Certification Options

Look for organic or small-batch artisan brands; fewer standardized certifications, rely on ingredient transparency.

EPA Safer Choice, Green Seal, and EcoLogo certifications are available; they require scrutiny to avoid greenwashing

Ideal Use Cases

Daily maintenance, quick cleanups, households with chemical sensitivities, and eco-conscious consumers

Deep cleans, heavy grease or mold remediation, time-pressed environments, commercial or medical settings requiring verified disinfectant efficacy


Cost Comparison

One of the most debated factors is which approach saves more money in the long run. The answer varies based on usage frequency, local pricing, and the scale of cleaning required.

Upfront and Long-Term Costs of Natural Cleaning

DIY Ingredients (Vinegar, Baking Soda, Castile Soap):

  • A gallon of white vinegar often runs between $2 and $4.
  • A large box of baking soda usually costs less than $2.
  • A bottle of castile soap can be pricier ($8–$15) but concentrates last for many refills.

Homemade all-purpose cleaner recipes might require:

  • 1 cup white vinegar ($0.50)
  • 1 cup water (negligible)
  • 1 tablespoon castile soap ($0.30)
  • 10 drops essential oil ($0.50)

Total cost per quart (32 oz): approximately $1.30–$1.50, compared to $3–$5 for an equivalent volume of premium natural cleaner. Bulk purchases and DIY refills can further reduce the cost per ounce.

  • Reusable Bottles: Although the initial investment in spray bottles ($3–$5 each) incurs an upfront expense, these bottles typically pay for themselves within a few months, especially when refilled from bulk ingredient supplies.

Costs of Store-Bought Cleaners

  • Mass-Market Brands: A 32-ounce bottle of a national brand all-purpose cleaner typically costs between $3 and $4.
  • Specialty or Eco-Friendly Brands: Premium “green” cleaners often cost $8–$12 for a 16–32 ounce bottle.
  • Specialized solutions, such as oven cleaners, carpet pretreaters, or mold and mildew sprays, can cost $5–$10 per bottle, often sold in smaller volumes.

Retail promotions, coupons, and bulk deals can narrow this gap, some supermarkets offer weekly discounts on cleaning aisles. Still, if your priority is penny-pinching, making DIY solutions tends to be significantly cheaper over time.

Factoring in Time and Labor

  • DIY Effort: Mixing, labeling, and storing homemade cleaners require time, often 5–10 minutes per batch. If you have five different homemade formulations (all-purpose, glass, floor, laundry, bathroom), these minutes add up.
  • Performance Trade-Off: If a homemade cleaner demands more scrubbing or repeated applications, that “saved” $3 might cost you an extra 10–15 minutes of labor, which has its own implicit cost.

For minimal fuss, some households adopt a hybrid approach: they rely on store-bought disinfectants for heavy-duty tasks while using natural solutions for daily quick cleans.

Convenience and Availability

In today’s fast-paced world, convenience often takes precedence over ideology. Store-bought cleaners win points for ready-to-use formulations, precise dosage instructions, and targeted solutions (e.g., toilet bowl tablets, grout pens, carpet foams). When you’re juggling work, family, and social life, popping a pre-made spray in your cart can feel liberating.

Conversely, homemade solutions can be made in large batches; however, they are limited by the availability of ingredients. Running out of castile soap or essential oil means you must either pause your cleaning routine or make a trip to the store. That said, many natural ingredients, such as vinegar and baking soda, are pantry staples, allowing you to whip up an all-purpose cleaner at a moment’s notice.

Shelf Life and Storage

  • Homemade: Typically stable for 1–2 weeks (depending on ingredients). You may notice separation or reduced potency over time, especially if using essential oils without emulsifiers. Frequent shaking is required.
  • Commercial: Formulated with preservatives to last 6–12 months unopened; shelf-stable for another 3–6 months after opening. Packaging often includes safety seals to guarantee freshness.

The most practical option is often to balance natural and store-bought products for families with limited inventory or those living in isolated locations with limited access to retailers.

Potential Drawbacks of Natural Cleaning Solutions

Despite the many advantages, natural cleaning products come with caveats:

  • Limited Sanitizing Power: Most natural DIY solutions do not meet the standards of hospital-grade disinfectants. While vinegar is antimicrobial, it doesn’t kill all pathogens, such as certain viruses or spore-forming bacteria (e.g., Clostridioides difficile).
  • Time-Intensive: As previously noted, stubborn stains and heavy grease require more elbow grease, scrubbing, longer soak times, and repeated applications.
  • Ingredient Variability: The potency of essential oils can vary significantly depending on the brand, harvest season, and extraction method. One batch of lemon oil may smell faint, while another may be overwhelming; this inconsistency affects cleaning efficacy.
  • Surface Compatibility: Acids, such as vinegar, can etch natural stone surfaces (like marble and granite), damage waxed wood, and degrade certain metals over time. Without guidance, users may inadvertently harm prized surfaces.
  • Short Shelf Life: Homemade cleaners lack preservatives; mold or bacterial growth can occur if water or essential oils become contaminated, especially when stored in warm, humid areas (e.g., under the sink).

For these reasons, dedicated “green” brands often include stabilizers, mild preservatives, or chelating agents to extend shelf life and ensure consistent performance. If you rely heavily on homemade solutions, store them in a cool, dark place and label them with the date of preparation.

Potential Drawbacks of Store-Bought Cleaning Solutions

Conversely, mass-market cleaners present their own set of challenges:

  • Chemical Residue and Indoor Air Quality: Harsh ingredients can leave trace chemicals on surfaces, continuing to off-gas after cleaning. Poorly ventilated bathrooms or kitchens amplify these effects.
  • Overkill for Everyday Messes: Using a potent mold remover on lightly soiled countertops can expose occupants to unnecessary chemicals. Opting for specialty cleaners for every task can strain household budgets.
  • Allergic Reactions: Fragrances, dyes, and preservatives in some commercial products can trigger allergic rhinitis, skin contact dermatitis, or exacerbations of atopic dermatitis.
  • Environmental Toll: The manufacturing, packaging, and shipping of these products generate significant carbon emissions. Even with eco-friendly labels, the supply chain, from raw material extraction to distribution, can still hurt ecosystems.
  • Packaging Waste: Single-use plastic bottles, aerosol cans, and cardboard boxes contribute to landfill accumulation unless they are diligently recycled, something not all consumers consistently do.

Furthermore, marketing jargon, such as “green,” “eco,” and “natural”, can be misleading. Some brands add a dash of plant-based surfactants but still rely heavily on synthetic solvents. Thorough scrutiny and verification of ingredients through third-party certifications are essential.

DIY Recipes & Practical Tips

To maximize efficacy while embracing natural cleaning, follow these simple 150-word recipes:

  • All-Purpose Citrus Vinegar: Steep orange zest (or lemon peels) in 1 cup white vinegar for 24 hours. Strain, then mix with 1 cup of water and 10 drops of lemon essential oil. Use on counters, appliances, and sealed floors. Shake before use.
  • Glass Cleaner: Combine ½ cup vinegar, ½ cup distilled water, and 10 drops of lavender oil. Spray on the glass and wipe with a lint-free cloth for a streak-free shine.
  • Grout & Tile Scrub: Mix a paste of ½ cup baking soda, three tablespoons of water, and five drops of tea tree oil. Apply, leave for 10 minutes, and then cleanse with a nylon brush. Rinse well.
  • Floor Cleaner: Add one tablespoon of castile soap to 1 gallon of warm water, along with 10 drops of eucalyptus oil. Mop and rinse mop frequently to avoid residue.
  • Laundry Booster: Mix ½ cup baking soda, ½ cup washing soda, and 10 drops lavender oil. Add to each load to neutralize odors and soften fabrics.
  • Tips: Label all solutions with their dilution ratios; test acids (such as vinegar) on hidden spots to protect delicate surfaces; store homemade cleaners in cool, dark areas, and use them within two weeks to maintain potency.

Step-by-Step Guide to Making the Switch

If you’re ready to shift from store-bought cleaners to more natural approaches, or at least blend the two, follow these steps:

Audit Your Current Cleaning Products

  • List all cleaning supplies: All-purpose, glass, bathroom, kitchen, floors, laundry, specialty.
  • Identify which contain harsh chemicals (bleach, ammonia, synthetic fragrance, quaternary ammonium compounds).

Research and Purchase Basic Ingredients

  • Stock up on pantry staples: white vinegar, baking soda, washing soda, castile soap, and hydrogen peroxide.
  • Acquire essential oils with known antimicrobial properties (lemon, tea tree, lavender).

Invest in Reusable, High-Quality Containers

  • Purchase durable glass or PET spray bottles, ideally with adjustable nozzles.
  • Label each bottle clearly with the corresponding product name, such as “Glass Cleaner,” “All-Purpose,” or “Floor Cleaner,” along with the dilution ratio.

Test on Small Areas

  • Before applying a DIY solution to an entire countertop or floor, test a discrete corner or hidden spot to check for surface compatibility.
  • Note any discoloration, etching, or dulling, particularly on natural stone or wood.

Develop a Rotating Cleaning Schedule

  • Maintain daily, weekly, and monthly cleaning tasks.
  • Use natural cleaners for daily wipes and quick cleanups; reserve store-bought or specialized natural enzymes for more challenging weekly tasks.

Learn Proper Application Techniques

  • For all-purpose sprays: apply, let sit for 1–2 minutes, then wipe with a microfiber cloth.
  • For baking soda-based scrubs, dampen the surface slightly, sprinkle baking soda, and scrub with a nylon brush.
  • For vinegar solutions, avoid direct use on acid-sensitive surfaces; opt for diluted versions and wipe quickly.

Monitor Performance and Adjust

  • Keep a small notebook or digital note: which DIY recipes work best, which store-bought brands deliver quick results, and where you encountered issues.
  • Fine-tune recipes, add essential oil for scent, adjust ratios to enhance degreasing power, or try alternative natural ingredients like citrus peels for added freshness.

Educate Household Members or Staff

  • Share instructions and safety protocols with family or cleaning staff.
  • Ensure that everyone is aware of which products to use for specific tasks and understands the labeling.

Recycle and Dispose Responsibly

  • When a spray bottle is no longer usable, rinse it thoroughly before recycling.
  • Dispose of any leftover harsh chemicals according to local hazardous waste guidelines.

Celebrate Milestones

  • Mark the first month without a chemical-based all-purpose cleaner.
  • Note improvements in indoor air quality, fewer headaches, pleasant natural scents, and clearer skin.

By approaching the transition systematically, you can minimize frustration, avoid wasted ingredients, and cultivate a healthier, more sustainable cleaning routine.

FAQs

Are natural cleaners as effective as store-bought ones for everyday messes?

Generally, yes, vinegar and baking soda handle routine spills, dust, and light grease admirably. For heavy-duty stains or built-up grime, you often need more scrubbing or repeated applications than with a commercial degreaser.

Do natural cleaning products kill germs as well as commercial disinfectants?

Vinegar and certain essential oils possess antimicrobial properties; however, they don’t meet EPA-registered disinfectant standards. If you need full germ-kill power, for flu season or an immunocompromised household, supplement natural solutions with an EPA-approved disinfectant.

Will DIY cleaners save me money?

Over time, absolutely. Pantry staples like vinegar ($2–$4 per gallon) and baking soda ($2 per box) yield dozens of cleaning batches, compared to $4–$8 for store-bought specialty sprays. Keep in mind: more elbow grease and mixing time factor into the “cost.”

Can essential oils in homemade cleaners harm pets?

Certain oils, especially those from tea tree and citrus varieties, can be toxic to cats and dogs if they inhale strong vapors or ingest them. Always air out surfaces until fully dry, use oils sparingly, and research each oil’s safety profile before adding it.

Is vinegar safe on all surfaces?

No. Vinegar’s acidity can etch natural stone (such as marble and granite), strip waxed wood finishes, and dull some metals over time. For acid-sensitive materials, opt for a dilute castile soap solution or a pH-neutral commercial cleaner labeled “safe for stone.”

How long do homemade cleaners last?

All-purpose vinegar sprays keep potency for about 1–2 weeks before the scent fades. Baking soda pastes are best made fresh. Store solutions in cool, dark places and use them within two weeks to prevent separation or mold growth.

What’s the most straightforward, natural, all-purpose recipe?

Measure out one cup of white vinegar and one cup of water, stir in a tablespoon of castile soap, then finish by adding ten drops of lavender or lemon essential oil. Shake gently, then spray the solution onto surfaces. Let it sit for 1–2 minutes, and wipe clean with a microfiber cloth. (Avoid on stone or wood without testing first.)Top of FormBottom of Form

Conclusion

Deciding between natural and store-bought cleaners ultimately hinges on your household’s priorities: health, environment, time, and budget. Natural solutions,such as vinegar, baking soda, and castile soap,offer low toxicity, biodegradable cleaning at a minimal cost, but they require more manual effort and struggle against entrenched grime. In contrast, commercial formulas with synthetic surfactants, solvents, and disinfectants tackle heavy-duty cleaning tasks swiftly, albeit at the expense of potential VOC exposure, chemical residues, and increased packaging waste. A hybrid strategy often delivers the best balance: use natural cleaners for daily maintenance and quick spills, reserving eco-certified or specialty store-bought products for periodic deep cleans that require potent sanitizing power. By understanding ingredient properties, evaluating health and environmental trade-offs, and experimenting with DIY recipes alongside carefully selected commercial options, you can create a personalized cleaning regimen that aligns with your values while keeping your home sparkling clean.

1 2 3 6